What if automating short run welding jobs didn’t mean losing time to changeovers? If every new part seems to bring another setup, it’s reasonable to ask whether a robot can keep pace with a varied production schedule.
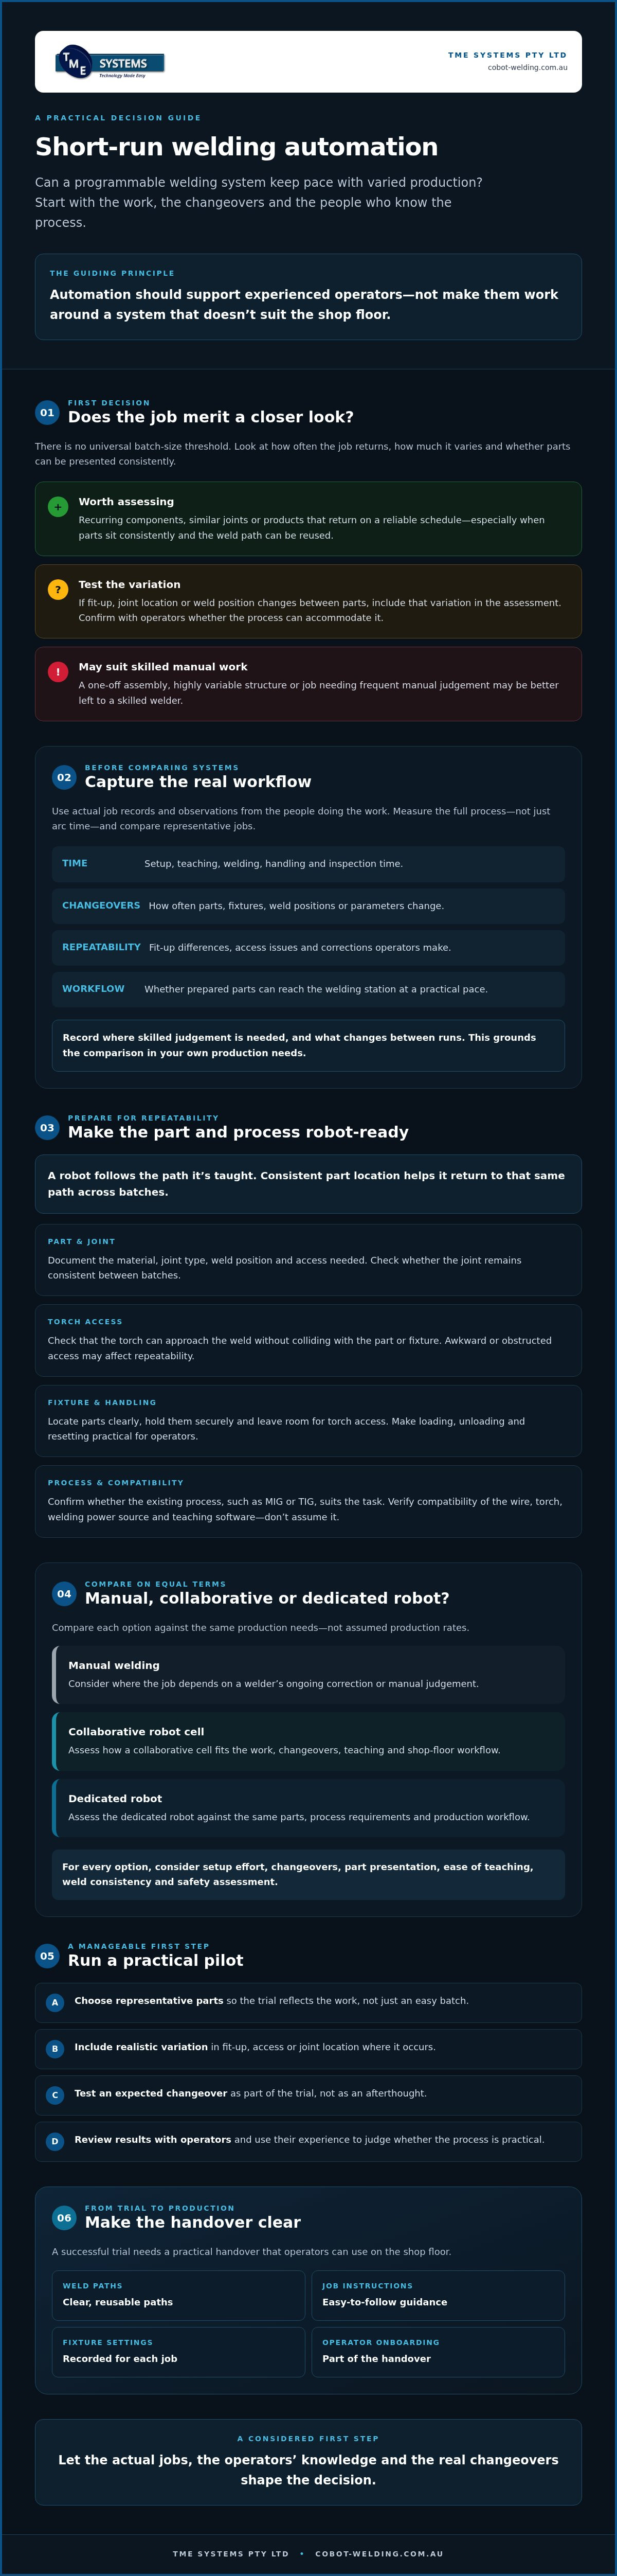
That concern is familiar to fabricators. Repeatable weld quality depends on more than the robot. Part fit-up, fixturing, ease of teaching and the flow of work through the cell all matter. Automation should support experienced operators, not force them to work around a system that doesn’t suit the shop floor.
This guide will help you identify recurring short-run jobs that may suit automation, then compare manual welding, dedicated robots and collaborative robot cells against your actual workflow. You’ll also learn how no-code teaching can help teams adjust weld paths, what to consider when connecting a cell with existing equipment, and how to plan a manageable trial with operator input.
We’ll cover changeovers, fixturing, weld consistency and safety assessment, so you can judge whether a proposed setup is practical before committing to production. The aim is a considered first step, with your welders’ knowledge central to the decision.
Key Takeaways
- Assess recurring jobs by batch size, frequency and variation to see whether repeatable work justifies setup and changeover effort.
- Check part presentation, joint access and torch approach before teaching robot paths, as these affect how consistently a job can be welded.
- When automating short run welding jobs, compare manual, collaborative and dedicated robot options against the same production needs.
- Build a practical pilot around representative parts, realistic variation and an expected changeover, then review the results with operators.
- Plan production handovers with clear weld paths, job instructions, fixture settings and operator onboarding.
Automating short run welding jobs: when does it make sense?
Short-run welding automation uses a programmable welding system for limited or frequently repeated batches, where consistent work may justify the effort of teaching, fixturing and changeovers. The right batch size depends on your shop. Consider how often a job returns, how much it varies between runs and whether parts can be presented consistently, rather than relying on a universal threshold.
The decision is a balance. A component that returns regularly with similar joints may justify the time spent setting up and refining its weld path. A one-off assembly, a highly variable structure or a job that needs frequent manual judgement may be better left to a skilled welder. Robot welding provides a useful overview of the technology and its components, but suitability still depends on the work in front of your team.
Which short-run welding jobs are worth assessing first?
Start with recurring components, similar joints or products that return on a reliable schedule. Check whether each part can sit in a consistent position and whether the torch can reach the weld without awkward movement or obstruction. These details help determine whether a taught path can be reused between batches.
Then separate repeatable welds from work that relies on a welder’s ongoing correction. If fit-up, joint location or weld position changes substantially from part to part, include that variation in your assessment. A job may still be worth testing, but don’t treat it as repeatable until operators confirm that the process can accommodate the differences.
What should you measure before comparing options?
Use actual job records and observations from the people doing the work. Capture the full process, not just arc time, and compare representative jobs so a single easy batch doesn’t skew the picture. Note what changes between runs and where skilled judgement is needed. This gives you a clearer basis for deciding whether automation can fit the workflow.
- Time: Record setup, teaching, welding, handling and inspection time.
- Changeovers: Track how often parts, fixtures, weld positions or parameters change.
- Repeatability: Note fit-up differences, access issues and corrections operators make.
- Workflow: Observe whether prepared parts can reach the welding station at a practical pace.
These measures show where setup effort is likely to sit and which tasks deserve a closer look. They also give your team a grounded basis for comparing manual work with automation, rather than relying on assumed production rates.
Prepare short-run jobs for repeatable robotic welding
Once a job looks suitable for automation, check whether the parts and process can support a reliable weld path. A robot follows the path it’s taught. It can’t automatically compensate for every change in fit-up, joint location or access. Consistent part location helps a robot return to the same taught weld path across batches.
Preparation is more than a programming task. For short runs, a fixture that locates parts consistently and allows practical loading can matter more than robot speed. A real-world example from The Fabricator explores how robotic welding can be economically viable for small batch sizes, but each shop still needs to assess its own parts, process and changeovers.
Check the part, joint and welding process
Choose representative jobs and document the material, joint type, weld position and access needed for each weld. Check whether the torch can approach the joint without colliding with the part or fixture, and whether the joint remains consistent between batches. A fillet weld on an accessible bracket may be straightforward to teach. A joint tucked behind an assembly may need a different orientation or prove difficult to reach repeatably.
Confirm that the existing process, such as MIG or TIG, suits the intended task. Then verify that the wire, torch, welding power source and teaching software are compatible with the proposed setup. Don’t assume compatibility. Confirm it for the specific equipment and welding process before planning a trial.
Design changeovers around operators and fixtures
A useful fixture locates the part clearly, holds it securely and leaves enough access for the torch. For varied batches, consider adaptable locating features or fixture arrangements that can be reset without turning each changeover into a fresh engineering exercise. Operators should be able to load and unload parts safely and recognise which setup belongs to each job.
Keep job identification, fixture settings and approved welding parameters clear at the cell. This gives operators a practical reference when returning to a job or switching between parts. No-code teaching software can help teams teach or adjust robot paths without traditional programming, subject to the capabilities and compatibility of the selected system. See this guide to no-code robot welding software for more on path teaching and adjustments.
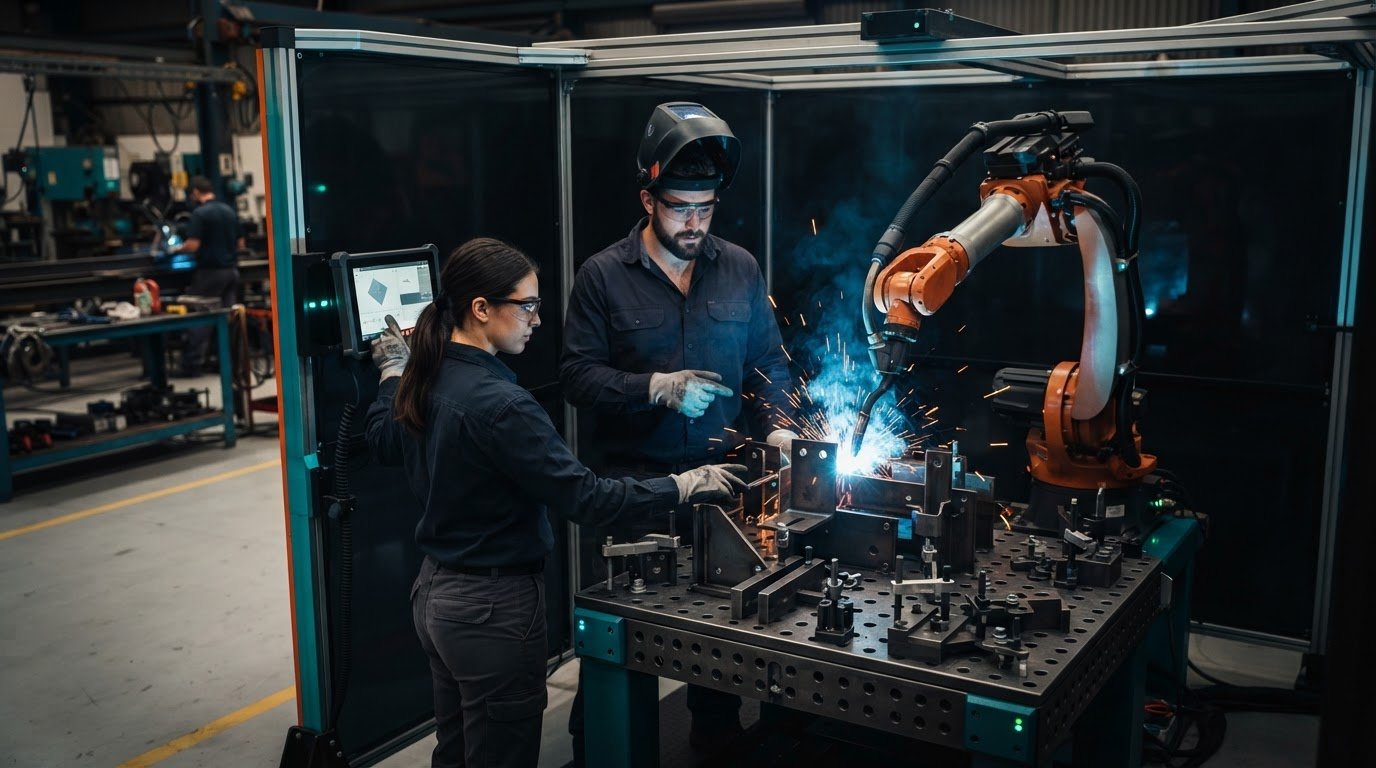
If your team wants to assess how a collaborative robot cell fits its parts and workflow, a collaborative welding demonstration can help make the discussion practical.
Cobot, dedicated robot or manual welding: compare the short-run trade-offs
Short runs don’t automatically rule out automation. The deciding factor is whether the time spent teaching, changing fixtures and setting up the next job makes sense for the work that follows. Compare each approach against the same jobs and measures, including changeover effort, variation, weld consistency, operator involvement and cell requirements.
| Approach | Changeover and teaching | Flexibility and operator role | Cell requirements and likely fit |
|---|---|---|---|
| Manual welding | No robot path to teach. Setup depends on the job and welder. | Welder applies judgement and adapts directly to variation. | May suit one-off work, unique assemblies or tasks needing frequent skilled correction. |
| Collaborative robot cell | Paths may need teaching or adjustment between jobs. Accessible teaching can support frequent changes. | Operator loads parts, teaches or selects paths, and monitors the work. | May suit recurring, varied jobs where the cell and workflow can be properly assessed. |
| Dedicated robotic cell | Often calls for planned tooling and setup around a narrower range of work. | Operators oversee the process and manage production, rather than manually welding every part. | May suit stable, repeated production that can support specialised tooling and a dedicated workflow. |
This is a guide, not a ranking. The American Welding Society’s discussion of cobots considers programming effort alongside efficiency in high-mix, low-volume work. Use that as context, then weigh your own job records and operator experience.
When is a collaborative robot a practical option?
A collaborative robot may be worth assessing when parts return regularly, but operators need to teach or adjust paths as jobs change. No-code teaching software may make those adjustments more accessible, subject to confirming its capabilities and compatibility with the specific welding process and equipment. Collaborative design alone doesn’t establish that a welding application is safe to run without safeguards. Assess the complete cell, task and work environment, including applicable Australian WHS requirements.
For cell-level considerations, see this collaborative robot welding cell guide.
When might manual or dedicated automation suit better?
Keep manual welding in the mix when each part is different or the weld depends on judgement that’s difficult to standardise. A dedicated cell may be a stronger fit when production is stable enough to make specialised tooling and a fixed process worthwhile. Neither option is best for every Australian workshop. Compare how each handles your actual changes, staffing and production flow.
If a collaborative cell is on your shortlist, a collaborative robot welding demonstration can help your team assess the approach against real work.
How to run a short-run welding automation pilot
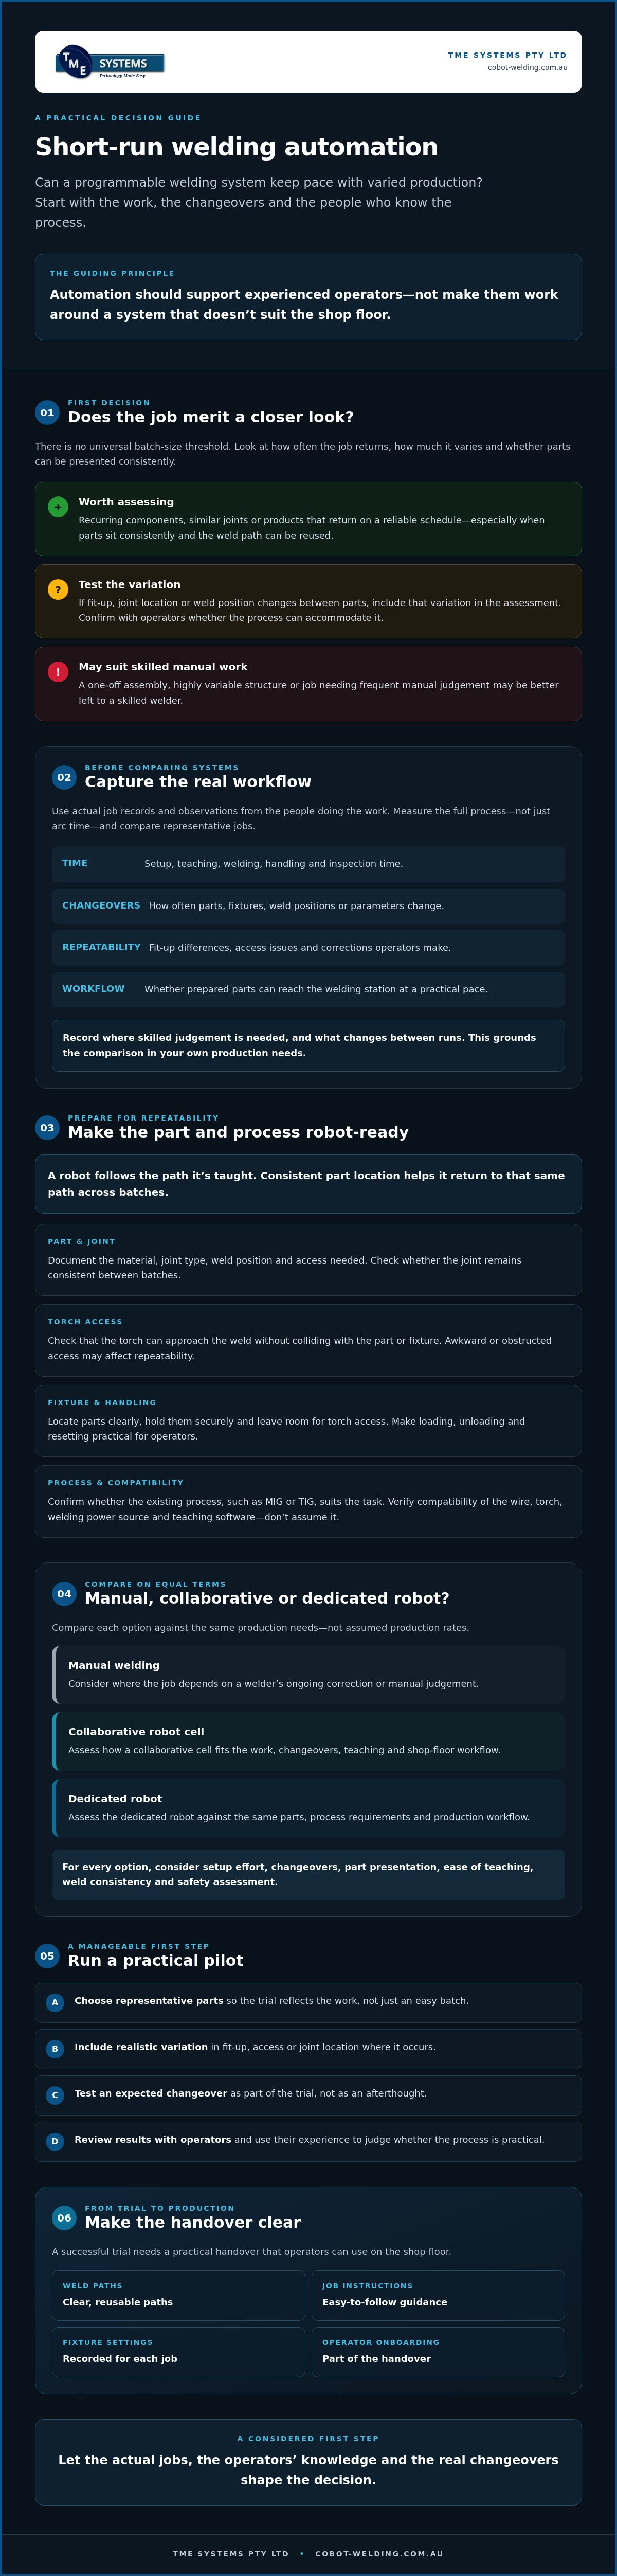
A pilot should test more than whether the robot can complete a weld. A useful short-run welding pilot tests both weld performance and the changeover workflow operators will use in production. Choose representative work, include realistic part variation and plan at least one expected changeover. Agree on what success means with welders and supervisors before the trial, using measures that reflect your actual job requirements rather than assumed savings or target percentages.
Work through the trial in a controlled sequence:
- 1. Select jobs: Choose recurring parts with a clear production need, plus a job that will test expected variation.
- 2. Document the current process: Record setup, welding, handling and inspection steps, along with quality requirements and operator observations.
- 3. Prepare parts: Confirm representative parts, fit-up, fixtures and access are ready. Include the variations operators regularly encounter.
- 4. Teach the paths: Develop the weld paths and record any adjustments needed. Confirm the teaching software and welding equipment suit the specific process.
- 5. Trial the work: Run the selected jobs, including a planned changeover, and note teaching, loading and adjustment effort.
- 6. Review together: Compare the results with the agreed measures and decide what needs refining before extending the trial.
Set up the trial with the people doing the work
Involve welders and supervisors in selecting jobs, reviewing fixtures and preparing safe operating procedures. Their practical knowledge can flag loading difficulties or workflow clashes before they delay the trial. Confirm the cell layout, equipment interfaces and risk controls with appropriate integration support, and check current Australian WHS requirements for the specific application. This welding system integration guide covers planning around equipment and workflow.
Review quality, changeovers and operator experience
Inspect trial welds against the agreed job requirements and compare the findings with the existing process. Record the effort involved in teaching, path adjustments, loading and each changeover. A satisfactory weld result matters, but so does whether the next job can be set up in a workable, repeatable way.
Ask operators what felt clear and what required workarounds. Log maintenance needs and any follow-up training before expanding the trial. If you’re planning a practical assessment, explore a collaborative robot welding demonstration to discuss the cell against your selected jobs.
Move from a successful trial to short-run welding production
A successful trial is a starting point, not a complete production plan. Before scaling up automating short run welding jobs, make sure the people, instructions and equipment are ready to repeat the process across shifts and future batches. Clear handovers help turn a taught weld path into a dependable part of the workshop workflow.
What should be ready before expanding beyond the pilot?
Document the approved weld paths, job setup, fixture settings, inspection requirements and safe operating procedures. Make sure operators can identify the correct setup for each part and know who is responsible for future path adjustments. If those details sit only with the person who ran the trial, a change of operator can make repeatability harder to maintain.
Plan operator onboarding alongside maintenance. Operators need to understand how to load the job, select or adjust the taught path within their role, and recognise when a fault or quality concern needs attention. Agree how routine maintenance will be handled and where staff can go for support. Reassess the setup if material, product design or production mix changes, as these can affect fit-up, access and weld requirements.
How can TME Systems help assess fit?
TME Systems supplies collaborative robot welding cells and no-code teaching software for robot paths and adjustments. Its welding system integration can help connect a cell with existing welding equipment and workshop workflows. Check software capabilities and compatibility for the specific welding process and equipment rather than assuming they will suit.
Operator onboarding can help staff become familiar with the setup and their role in using it. A mobile demonstration is another practical way to assess the approach against suitable jobs before deciding on next steps. These options support an informed evaluation, without replacing your own checks of weld quality, production needs and safety.
For Australian fabricators considering a move from pilot to production, discuss a short-run welding application with TME Systems to explore whether its collaborative cells, teaching software or integration support may fit your requirements.
Take a practical next step with welding automation
Automating short run welding jobs makes sense when repeatable work can justify the effort of teaching, fixturing and changeovers. Start with recurring parts that can be positioned consistently, then compare manual welding, a collaborative cell and dedicated automation against your actual workflow. A focused pilot, shaped with operator input, can show whether weld quality and changeovers are both workable.
Moving from trial to production also takes clear job instructions, approved paths and fixture settings, plus onboarding and a plan for future adjustments. TME Systems offers no-code robot path teaching and adjustment, collaborative welding cell integration and operator onboarding. Its mobile demonstration system can help your team assess application fit.
Bring a suitable recurring job and your operators’ questions to the next conversation. Discuss a short-run welding application with TME Systems and explore a sensible first step for your workshop. With a measured approach, automation can support your team’s skills and production needs.
Frequently Asked Questions
Can you automate short run welding jobs?
Yes, some short-run welding work can be automated when parts, joints or weld paths recur often enough to justify teaching and changeovers. There isn’t a universal batch-size threshold. Review how often jobs return, how much they vary, whether fixtures locate them consistently, and the setup effort between runs. A trial using representative work can show whether automation fits your workflow and quality requirements.
Is a cobot suitable for short-run welding?
A collaborative robot may suit jobs that need accessible path teaching and regular adjustments, but assess the complete welding application before selecting a cell. Consider the welding process, part presentation, equipment compatibility, cell layout and required risk controls. Collaborative design alone doesn’t establish that a welding task can operate safely without safeguarding. Check the application and workplace risks with qualified professionals before installation or operation.
How do you reduce changeover time when automating short-run welding jobs?
First, identify where changeover effort occurs, such as swapping fixtures, aligning parts, teaching paths, selecting parameters or completing inspections. Standardise repeatable steps and make job and fixture identification clear for operators. Then trial the process across representative parts, including a planned changeover. Record the time and adjustments involved. Results depend on the job and setup, so measure the actual changeover rather than assuming it will improve.
Do short-run welding jobs need a no-code robot?
No, a no-code robot isn’t necessary for every short-run job. No-code teaching software can make path teaching and adjustments more accessible to operators, which may help when jobs change regularly. Fit depends on the software’s capabilities and compatibility with the robot, welding equipment and process, as well as task complexity and staff training. Test the teaching workflow on representative work before deciding whether it suits your workshop.
What should you assess before automating a welding job?
Review the part, joint, material, welding process, torch access, fixture repeatability and how often the job returns. Check the welding power source, equipment interfaces, operator workflow and proposed cell layout. Consider applicable safety requirements for the specific task and workplace. Record current setup, welding and inspection effort too. That baseline helps your team compare automation with the existing method using practical job requirements, not assumed production rates.
Does a welding cobot remove the need for safety measures?
No, a collaborative robot doesn’t automatically make every welding application safe without safeguarding. The complete cell and task need a suitable risk assessment, including robot movement, hot work, fumes, arc exposure, tooling and operator access. The controls required depend on the specific application and work environment. Before installation or operation, confirm applicable Australian WHS duties and standards with qualified professionals who can assess the setup.
How can a fabricator test robotic welding before rollout?
Select representative jobs and agree on what the trial needs to assess, such as weld quality, teaching effort, changeovers and operator usability. Involve the people who will run the work, prepare realistic parts and fixtures, and record results against the current process. Include expected variation and a changeover so the trial reflects workshop conditions. TME Systems’ mobile demonstration system is available to help assess application fit before planning a wider rollout.