You don't need to spend years hunting for a "rare-as-hen's-teeth" specialist welder to get clean, structural aluminium seams every single time. Most workshop managers across Australia know the daily frustration of working with this temperamental metal. It dissipates heat at a rapid rate, and that soft wire has a nasty habit of bird-nesting in standard feeders just when you're hitting your stride. If you've felt that consistent, high-quality cobot welding for aluminium was out of reach for a smaller shop, it's time to look at how the technology has evolved to be more supportive of the operator.
We understand that the pressure to reduce scrap and hit production targets is constant, especially when the industry is facing a projected deficit of 70,000 welders by 2030. This article will show you how to overcome these technical hurdles by using accessible collaborative robots that your existing team can "teach" rather than program. We'll walk through the essential setup for aluminium fabrication, from no-code software to integrated feeding systems. You will learn how to empower your staff to produce professional results and maintain high arc-on time without the steep learning curve of traditional automation.
Key Takeaways
- Understand the physics of heat dissipation and how to achieve consistent structural seams using cobot welding for aluminium.
- Identify the right hardware setup, such as push-pull feeders, to eliminate frustrating wire-feeding issues like bird-nesting.
- Learn how no-code software empowers your existing team to "teach" the robot new tasks without needing complex programming knowledge.
- Discover the critical preparation steps, including oxide removal and precise fixturing, that lead to high-quality, repeatable results.
- Compare MIG and TIG automated processes to find the most efficient solution for your workshop's specific aluminium fabrication jobs.
The Challenge of Aluminium Fabrication in Australian Workshops
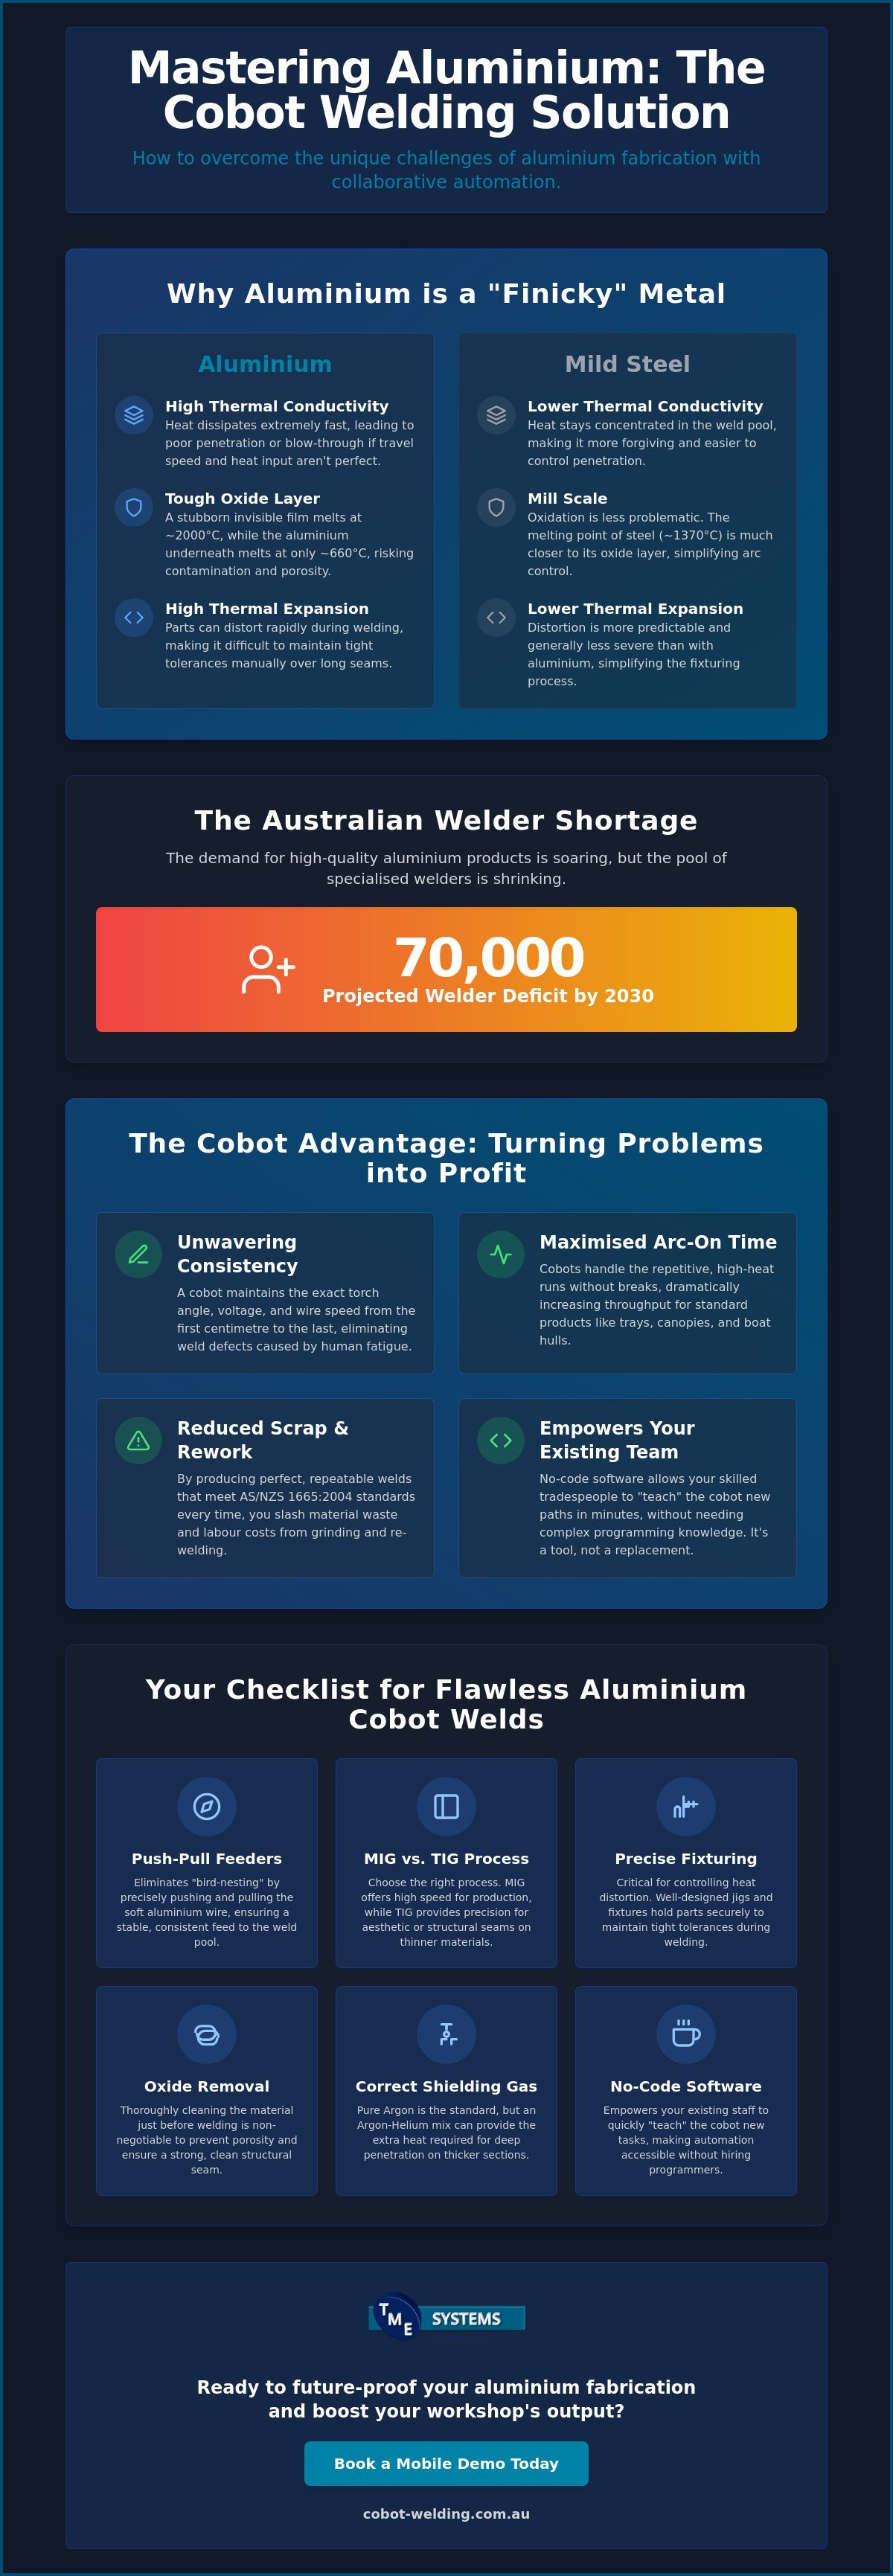
Aluminium is no longer just a specialty material for high-end marine builds. From the boat yards of Queensland, where Campbell Custom Fabrication sets a high standard for custom aluminium work, to the ute canopy manufacturers in suburban Melbourne, this lightweight, corrosion-resistant metal has become the backbone of modern Australian fabrication. It's the material of choice for transport and marine sectors because it slashes tare weight and improves fuel efficiency. However, while the demand for aluminium products is soaring, the number of tradespeople capable of welding it to a high standard is shrinking. Australia is currently facing a projected deficit of 70,000 welders by 2030, making it harder than ever to staff a manual production line.
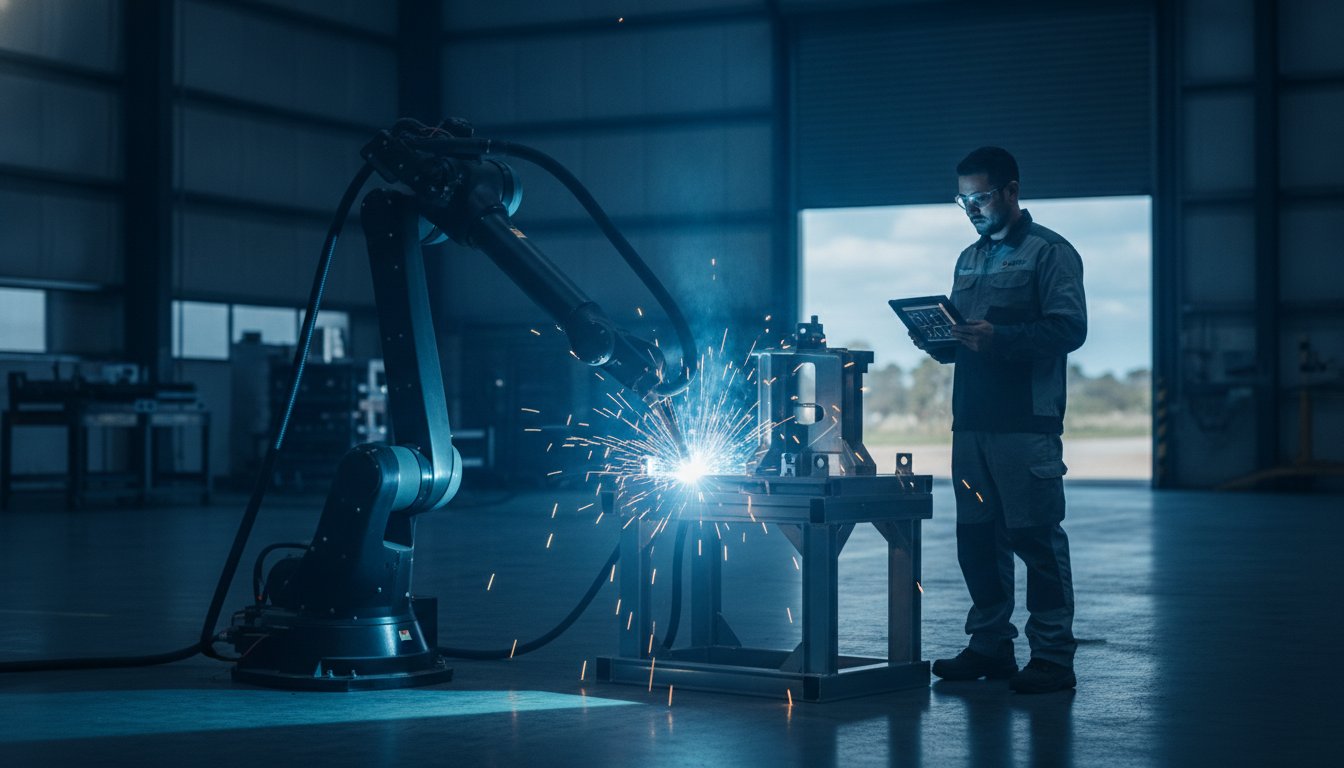
The reality is that manual aluminium welding is physically demanding and requires a level of finesse that takes years to master. Even your best welders can struggle with consistency during a long shift, leading to rework that eats into your margins. This is where robotic welding has shifted from being a luxury for car manufacturers to a practical tool for the local job shop. Implementing cobot welding for aluminium isn't about replacing your skilled tradespeople. It's about giving them a collaborative partner that handles the repetitive, high-heat runs, allowing your team to focus on complex fit-ups and custom work that requires a human eye.
While cobots handle the heavy lifting, supporting the long-term physical well-being of your staff is vital; for those interested in home-based solutions for physical independence, you can discover Care2MoveMobility.
Why Aluminium is "Finicky" Compared to Steel
If you've ever tried to weld aluminium like it's mild steel, you'll know why it's earned its "finicky" reputation. The thermal conductivity of aluminium is roughly four times higher than steel. Heat moves away from the weld pool almost as fast as you can apply it, which often leads to poor penetration or, conversely, total blow-through if the travel speed isn't perfect. Then there's the oxide layer. This invisible film melts at about 2,000°C, while the aluminium underneath melts at just 660°C. If your arc control isn't precise, you're fighting a losing battle against contamination and porosity. Finally, the high rate of thermal expansion means parts can distort rapidly during long runs, making tight tolerances a constant challenge for manual operators.
The Business Case for Automating Aluminium
Investing in cobot welding for aluminium directly addresses the "scrap bin" problem. Human fatigue is the primary cause of inconsistent beads, especially on complex paths or large canopies where the welder's position becomes awkward. A cobot doesn't get tired and doesn't lose focus. It maintains the exact same voltage and wire speed from the first centimetre to the last. For Australian shops producing standard items like toolboxes, trays, or boat hulls, this means a massive jump in throughput. By automating these common builds, you can ensure every unit meets the AS/NZS 1665:2004 standard without the need for constant grinding and re-welding. It turns a temperamental process into a repeatable, profitable system.
Understanding the Technical Hurdles of Automated Aluminium Welding
While cobot welding for aluminium simplifies the path to production, the physical properties of the metal remain unchanged. You can't simply apply a standard steel program and expect a clean finish. Aluminium demands a high degree of precision in voltage and wire speed to maintain a stable arc. Because the material is so conductive, even a slight variation in the distance between the contact tip and the work can cause the arc to wander or extinguish. This metal is unforgiving, but a well-integrated system handles these variables with far more discipline than a manual torch.
To penetrate that stubborn oxide layer, the cobot must maintain a consistent torch angle. Unlike a human welder who might subconsciously adjust for a shaky hand or a tired arm, the cobot delivers an unwavering angle that ensures the arc force is directed exactly where it's needed. This repeatability is one of the key factors for successful robotic aluminum welding, as it ensures the cleaning action of the arc happens uniformly across the entire seam. You will also need to consider your shielding gas; while pure argon is the standard, thicker sections often benefit from an argon-helium mix to provide the extra heat needed for deep penetration. If you're unsure which gas mix or power setting fits your specific parts, seeing a mobile demo system in action can help clarify the best configuration for your workshop floor.
Heat Management and Distortion Control
Managing heat is a delicate balancing act. We generally recommend using pulsed MIG programs for automated aluminium tasks. These programs cycle the current, allowing the weld pool to cool slightly between pulses. This prevents the "burn-through" that often ruins manual jobs, especially on thinner gauges like ute canopies or boat hulls. Robotic consistency also means you can plan your tacks and fixturing with confidence. Since the cobot hits the same spot every time, you can design fixtures that hold the part securely without obstructing the automated path, significantly reducing the risk of thermal distortion.
Wire Delivery and Feed Consistency
The biggest headache in aluminium automation is often the wire itself. Aluminium wire is incredibly soft. If you use standard V-groove rollers meant for steel, you'll crush the wire, leading to "bird-nesting" at the feeder and immediate downtime. You must use U-groove rollers and Teflon liners to ensure the wire slides smoothly without catching or deforming.
- U-groove rollers: These grip the wire without deforming it, ensuring a steady feed speed.
- Teflon liners: These reduce friction compared to steel liners, preventing the wire from bunching up.
- Tension settings: These must be set much lighter than steel to prevent the wire from stretching or shaving.
If the wire path isn't clean or the tension is too high, you risk introducing tiny metal shavings into the weld, which is a leading cause of porosity. Keeping the delivery path clear and using the right consumables is non-negotiable for achieving high-quality, structural results every time.
Selecting the Right Gear: MIG, TIG, and Push-Pull Feeders
Selecting the right equipment is where many workshop owners feel the most pressure. If you're building boat hulls or heavy-duty ute trays, MIG is usually the preferred option because of its high deposition rate and travel speed. For finer, aesthetic work where the weld needs to be near-perfect without grinding, TIG is the better choice. When you're setting up cobot welding for aluminium, the anatomy of your cell must be built specifically for the challenges of welding aluminum. A standard steel setup won't cut it; you need a system where the torch, feeder, and power source are in constant communication.
The "gold standard" for any automated aluminium setup is the push-pull torch. Because aluminium wire is so soft, pushing it through a three-metre lead from a standard feeder often results in the wire buckling. A push-pull system uses a secondary motor in the torch head itself to synchronise with the main feeder. This ensures the wire is under constant, gentle tension, preventing kinks and ensuring a steady arc. Integration is the final piece of the puzzle. Your collaborative robot needs to "speak" the same language as your welder, allowing the software to adjust parameters instantly if the arc conditions change mid-weld.
The Critical Role of Push-Pull Technology
Dual-motor systems are designed to keep that temperamental wire moving without a hitch. By having a motor at both ends of the lead, the system eliminates the friction issues that plague standard setups. To keep your system in top nick, you'll need to stay on top of regular maintenance. This includes changing your Teflon liners before they become clogged with aluminium dust and checking that your U-groove rollers haven't become worn. A well-maintained push-pull gun is the difference between a productive shift and a morning spent clearing bird-nests from the feeder.
Choosing a Power Source for Aluminium
Your power source needs to be more than just powerful; it needs to be smart. We recommend units with synergic programs, which are essentially pre-set "recipes" for different material thicknesses. As the cobot adjusts its travel speed, a synergic power source automatically tweaks the voltage and wire feed to keep the weld pool stable. For shops looking at automated TIG, high-frequency starts are essential to prevent tungsten contamination. You also need to ensure the unit has a high duty cycle. Robotic work is continuous, and you don't want your power source cutting out for a cooling break right in the middle of a critical structural seam.

Your Step-by-Step Guide to Setting Up an Aluminium Cobot Weld
Setting up your first job doesn't require a degree in robotics. It's a methodical process that relies on good workshop habits and a bit of common sense. Once you've got your gear sorted, the goal is to create a repeatable environment where the cobot can do its best work. Whether you're building a simple frame or a complex marine hull, following a structured workflow ensures you get the most out of cobot welding for aluminium without the usual headache of trial and error.
- Step 1: Preparing the material. Cleanliness is your best friend. Use a dedicated stainless steel wire brush to remove the oxide layer just before welding. Any oil, grease, or moisture left on the surface will turn into porosity the moment the arc hits.
- Step 2: Fixturing the part. The cobot is only as accurate as your setup. Use robust clamps and jigs to ensure every part sits in exactly the same position. If the joint moves by even a few millimetres, the bead won't land where it should.
- Step 3: Teaching the path. Use the intuitive interface to show the cobot where to go. This is where no-code robot welding software makes a massive difference, as it allows your welder to lead the arm by hand.
- Step 4: Setting the weld parameters. Dial in your amps, volts, and travel speed. If you're using a synergic power source as discussed earlier, many of these values will adjust automatically based on your material thickness.
- Step 5: Running a dry path. Before you strike an arc, run the program at a low speed. Watch for potential collisions with fixtures or any cable snags that might pull on the torch.
Teaching the Path Without Writing Code
The beauty of modern collaborative systems is "lead-through" programming. Instead of typing lines of code, your welder physically moves the cobot arm to the start and end points of the weld. You can set specific waypoints for complex curves or corners on aluminium frames with a simple button press on the teach pendant. This human-centric approach means the person who knows the craft is the one telling the robot how to weld. If you're ready to see how this works in your own workshop, you can book a mobile demo to get hands-on with the software.
Fine-Tuning for the Perfect Bead
Aluminium is prone to "crater cracks" at the end of a run. To prevent this, you'll need to adjust the crater fill settings in your program; this tells the cobot to linger for a fraction of a second and taper the current to fill the hole. Don't overlook your gas timers either. Setting a generous "pre-gas" flow clears the air before the arc starts, while "post-gas" protects the cooling weld from contamination. After your first live run, take a moment to analyse the bead. If it's too tall, you might need to increase your travel speed or slightly drop the wire feed to get that flat, professional finish.
Future-Proofing Your Fabrication with TME Systems
Adopting new technology shouldn't feel like a gamble. At TME Systems, our approach is built on the reality of the Australian workshop floor; we know that a tool is only as good as the person using it. We focus on making cobot welding for aluminium accessible to businesses that don't have a team of dedicated programmers on staff. By removing the complexity of traditional automation, we help you turn a temperamental material into a consistent source of profit. Our role is to act as your technical partner, ensuring the transition from manual to collaborative welding is seamless and grounded in practical results.
Our no-code teaching software is a genuine game-changer for shops dealing with short-run aluminium jobs. In the past, the time required to program a robot for a small batch of ute trays or toolboxes often outweighed the benefits. Now, your staff can "teach" the robot a new path in minutes. This flexibility allows you to maintain high throughput even when your product mix changes daily. TME Systems provides the entire ecosystem, from the collaborative robot welding cells to the specific operator training needed to get your team up to speed quickly.
A Partner in Your Automation Journey
We pride ourselves on providing local Australian support that doesn't disappear once the gear is installed. Technical expertise is only one part of the equation; the other is ensuring your staff feel confident and empowered by the new technology. We've seen that when welders realise the cobot is there to take the strain out of repetitive tasks, they embrace it as a valuable tool. Our onboarding process is designed to be supportive and thorough, offering ongoing training to keep your workshop at the cutting edge of fabrication standards.
Taking the Next Step
Evaluating your current workflow is the first step toward a more efficient floor. Many Australian fabrication shops report a full return on investment for a cobot welder within 12 to 18 months, according to industry data from TME Systems. This ROI comes from reduced scrap, lower rework costs, and the ability to maintain 85-95% arc-on time. If you're ready to see how cobot welding for aluminium can transform your production, we can bring the technology to you. Book a mobile welding robot demonstration to see it in action on your own parts and talk through the integration process with our local team.
Ready to Transform Your Workshop Floor?
Mastering the nuances of aluminium doesn't have to be a struggle that leads to a full scrap bin. By combining the right hardware, like push-pull feeders, with the repeatable precision of a collaborative arm, you can achieve structural seams that meet the highest standards every single time. It's about taking the technical hurdles we've discussed and turning them into a streamlined, reliable process that your team can manage with confidence.
Transitioning to cobot welding for aluminium is a practical way to future-proof your business against the growing welder shortage. With our specialised no-code teaching software and turnkey collaborative welding cells, your staff can transition from manual tasks to robot operators in a matter of days. TME Systems provides national integration and training support to ensure you're never left to figure it out on your own.
If you're ready to see these results for yourself, Book a Mobile Welding Robot Demonstration to see the system weld your own parts on your shop floor. We're here to help you build a more productive, resilient workshop. You've got the skills; we've got the tools to help you scale them.
Frequently Asked Questions
Is cobot welding actually suitable for thin aluminium sheets?
Yes, cobots are highly effective for thin aluminium sheets because they maintain a consistent travel speed and torch angle that is difficult to replicate manually. When combined with pulsed MIG programs, the system manages heat input precisely to prevent the burn-through often seen in manual fabrication. This makes it a reliable solution for lightweight components like ute canopies or marine fuel tanks where thin-gauge material is the standard.
Do I need a computer programmer to run a welding cobot?
You don't need a computer programmer or any coding experience to operate these systems. The "lead-through" method allows your best welders to physically move the cobot arm to set waypoints. By using no-code software, the operator simply follows a visual interface on a tablet. This puts the control back in the hands of the tradespeople who understand the craft rather than a software specialist.
What is the difference between a standard feeder and a push-pull feeder?
A standard feeder only pushes the wire from the power source, while a push-pull feeder uses a secondary motor in the torch to pull the wire through the lead. Because aluminium wire is so soft, pushing it through a long lead often causes it to buckle or "bird-nest." The push-pull system maintains constant tension, which is essential for stable cobot welding for aluminium over long production runs.
Can I use my existing MIG welder with a new cobot arm?
It is often possible to integrate your existing MIG welder, provided it has a digital interface that can communicate with the cobot controller. However, for the best results on aluminium, we recommend a power source with advanced pulse capabilities and a compatible push-pull torch. Our team can assess your current gear during a mobile demonstration to see if it's suitable for a high-quality cobot welding for aluminium upgrade.
How long does it take to train a welder to use a cobot?
Most experienced welders can learn the basics of path teaching and program adjustment in just a few hours. While full proficiency in complex multi-part setups might take a couple of days, the intuitive nature of the software ensures a shallow learning curve. We provide structured operator training and onboarding to ensure your team feels confident and productive from the first day of installation.
What safety standards apply to cobot welding in Australia?
In Australia, collaborative robot safety is governed by a framework of standards including ISO 10218-1 and the technical specification ISO/TS 15066. These are applied alongside the AS/NZS 4024 machinery safety series. These standards ensure that the robot's speed and force are limited to safe levels, allowing humans and machines to share a workspace without the need for traditional safety fencing in many workshop applications.
Does the cobot handle different aluminium grades like 5083 or 6061?
Yes, a cobot can handle common grades like 5083 and 6061 with ease. The key lies in selecting the correct filler wire and shielding gas for the specific alloy. Modern synergic power sources include pre-programmed "recipes" for these grades, allowing the cobot to automatically adjust its voltage and wire speed to suit the metallurgical properties of the material you are fabricating.
What happens if the cobot hits an obstacle or a person?
If a cobot encounters an unexpected obstacle or a person, its internal sensors trigger an immediate stop. This "power and force limiting" feature is what distinguishes collaborative robots from traditional industrial ones. The system is designed to detect even slight resistance, ensuring the arm halts before it can cause injury or damage your fixtures, providing peace of mind on a busy workshop floor.