What if the hardest part of adding a cobot isn’t teaching it to weld, but ensuring the welding equipment, robot and workshop workflow work together? That’s the practical question behind kemppi robotic welding integration. The right approach depends on the specific Kemppi equipment, the application and the interfaces connecting each part of the cell, so compatibility needs to be assessed rather than assumed.
If you’re weighing up automation, it’s reasonable to have questions. Will the controls communicate? Can established welding procedures be maintained? Is the job suitable for a collaborative robot? A useful assessment starts with your equipment details, weld requirements, parts, production workflow and workshop layout. It also considers how operators will work with the cell.
This guide explains the main integration components and dependencies, what information to gather before an assessment, and practical steps from planning through to operator onboarding. It also covers how TME Systems’ welding system integration and no-code teaching software can support operator-led path adjustments where the application suits. The aim is to help you plan a considered implementation while keeping the people and procedures that keep your workshop running in view.
Key Takeaways
- kemppi robotic welding integration involves more than connecting a welder to a robot: assess the tooling, interfaces and production workflow as one system.
- Record the Kemppi equipment details and welding-process requirements, then distinguish documented capabilities from interface questions that need model-specific assessment.
- Compare repeatability, changeovers, part variation and operator tasks to judge whether a collaborative robot suits the work.
- Prepare for an assessment with part drawings, sample parts, material and joint details, plus information about your current welding process.
- Understand how integration support, operator onboarding and no-code path teaching can help your team move from assessment towards implementation.
What Kemppi robotic welding integration involves in a fabrication workshop
Kemppi robotic welding integration connects a welding power source with a robot, tooling, cell controls and the production workflow so they can operate as a coordinated system. It involves more than placing a robot beside an existing welder. The equipment, torch position, workholding and job sequence all affect how the cell performs in your workshop.
“A welding machine supplies the welding process; a robotic welding cell brings together the equipment, robot, tooling, controls and workflow needed to carry out that process as an integrated operation.”
Having a Kemppi machine is a useful starting point, but it doesn’t establish that a particular model and configuration will connect with a robot cell. Control signals, communication methods, equipment settings and mechanical arrangements need to be assessed for the actual setup. Separate model-specific capabilities from assumptions before making integration decisions.
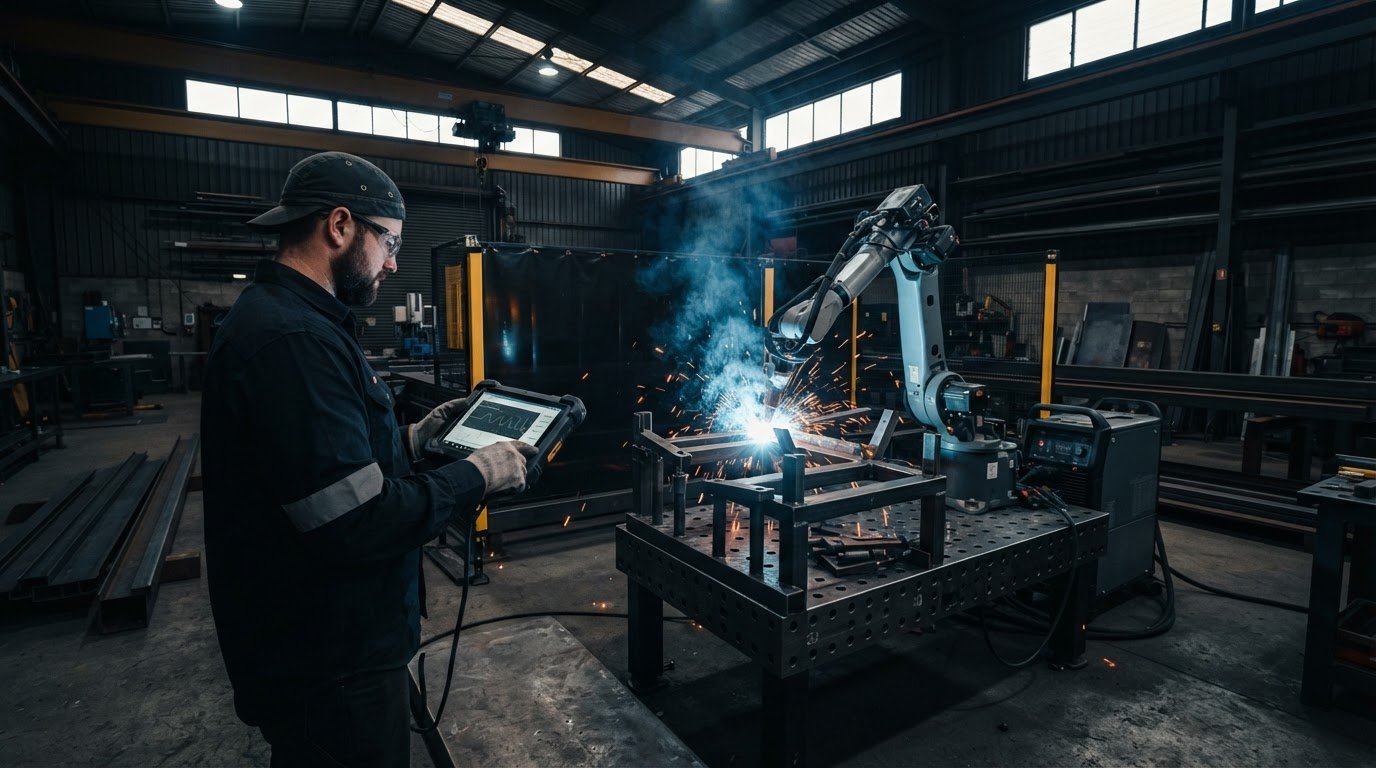
The aim is to make suitable work more repeatable, support a steadier production sequence and put operators’ skills to effective use. Operators remain central: their knowledge of fit-up, weld quality and job variation helps shape how the cell is set up and adjusted.
Which fabrication applications may suit robotic welding?
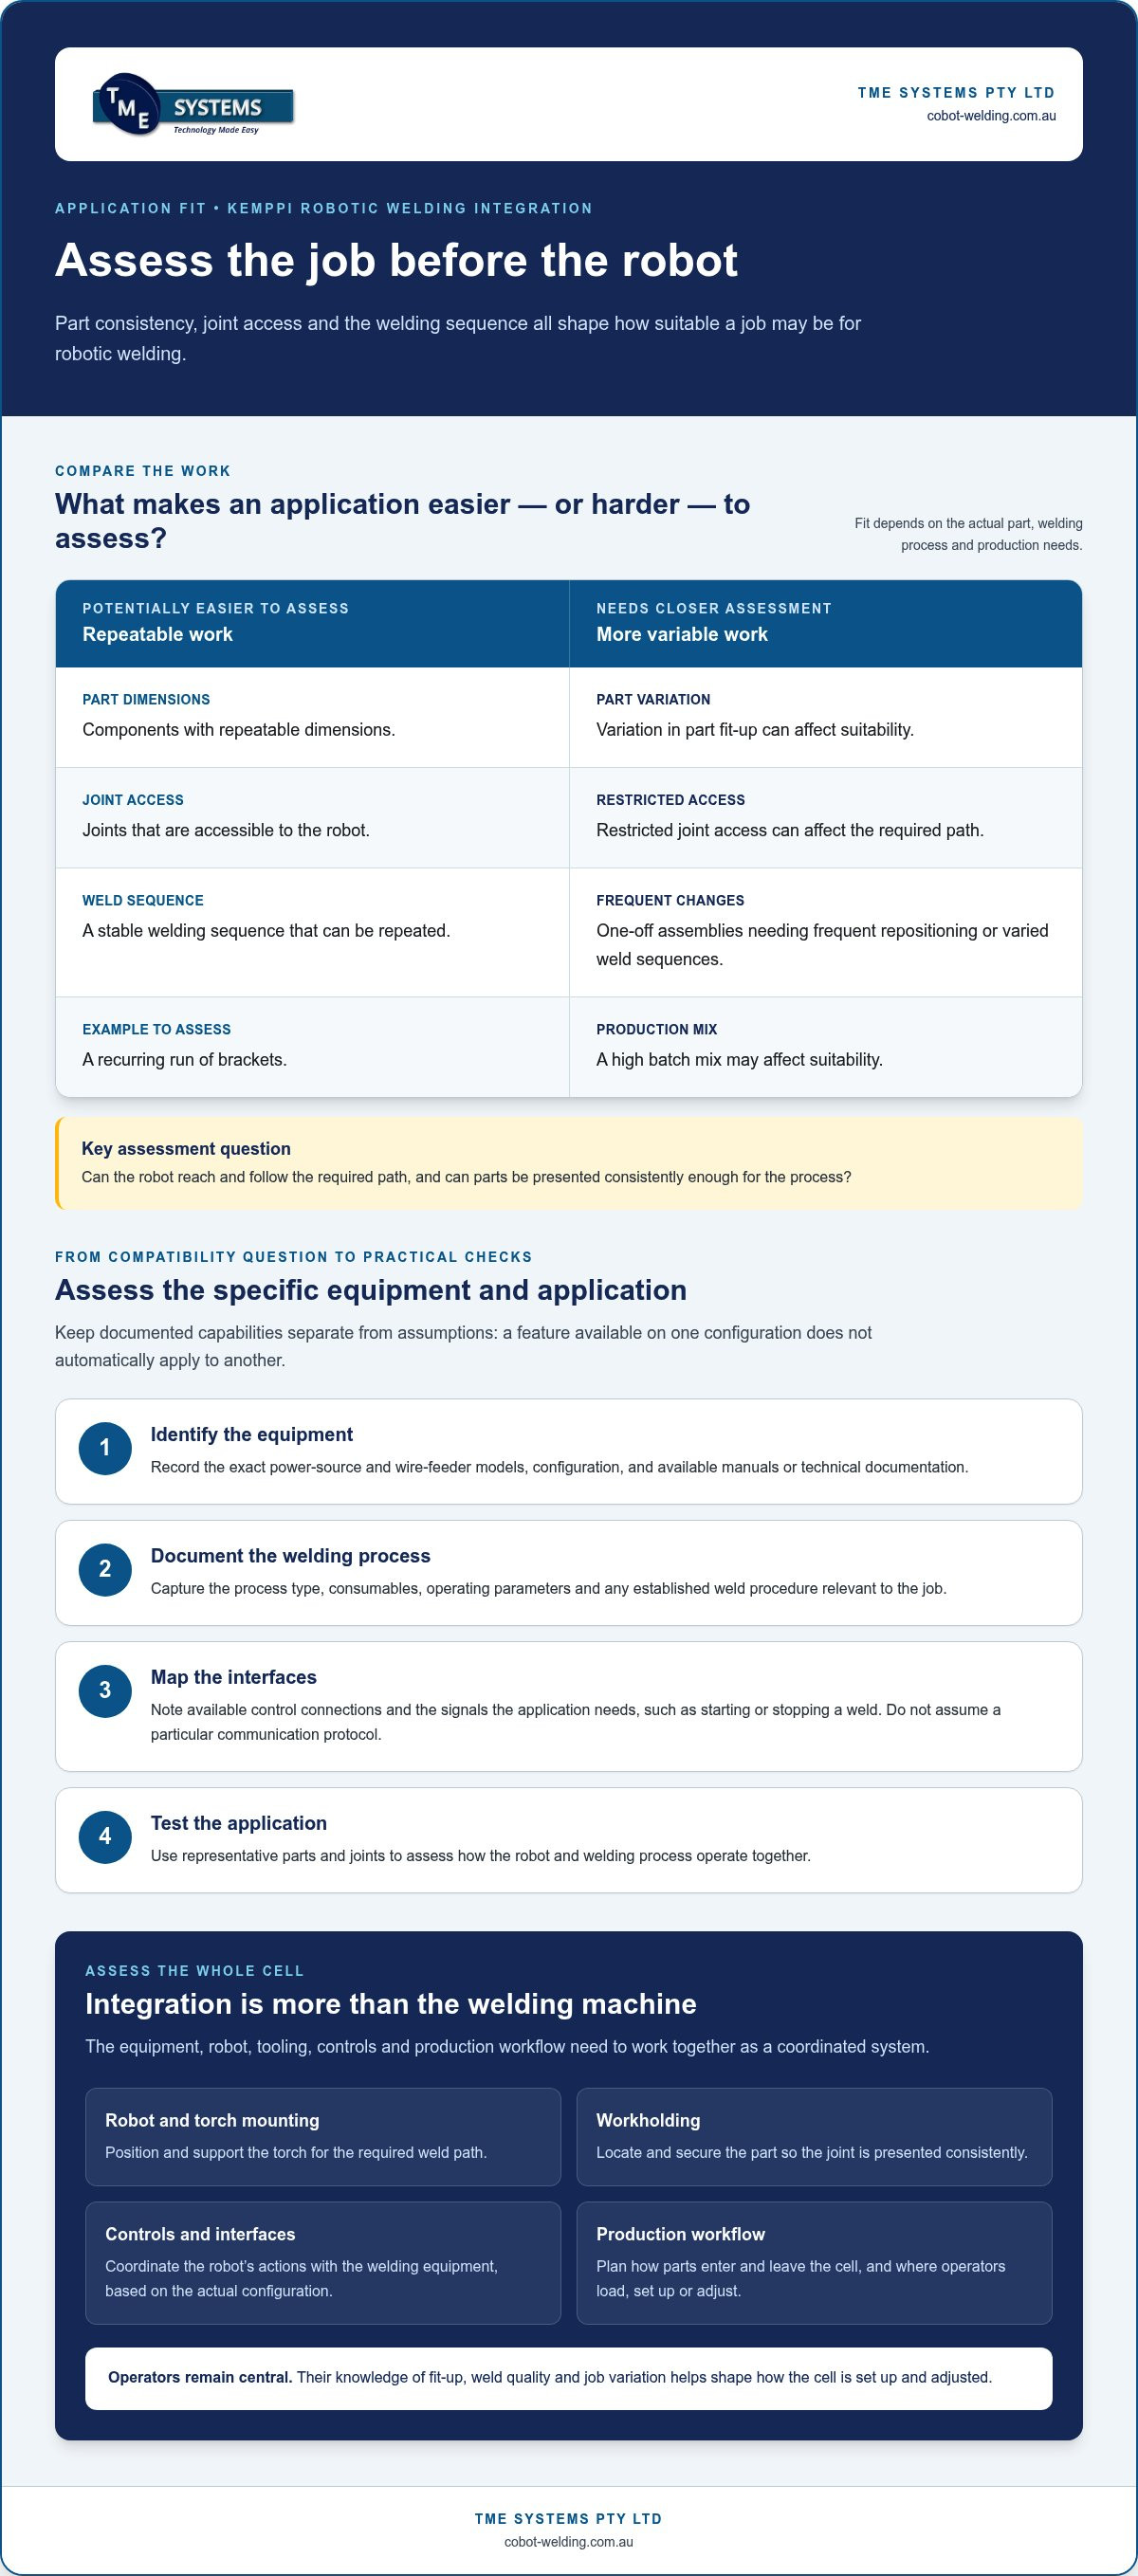
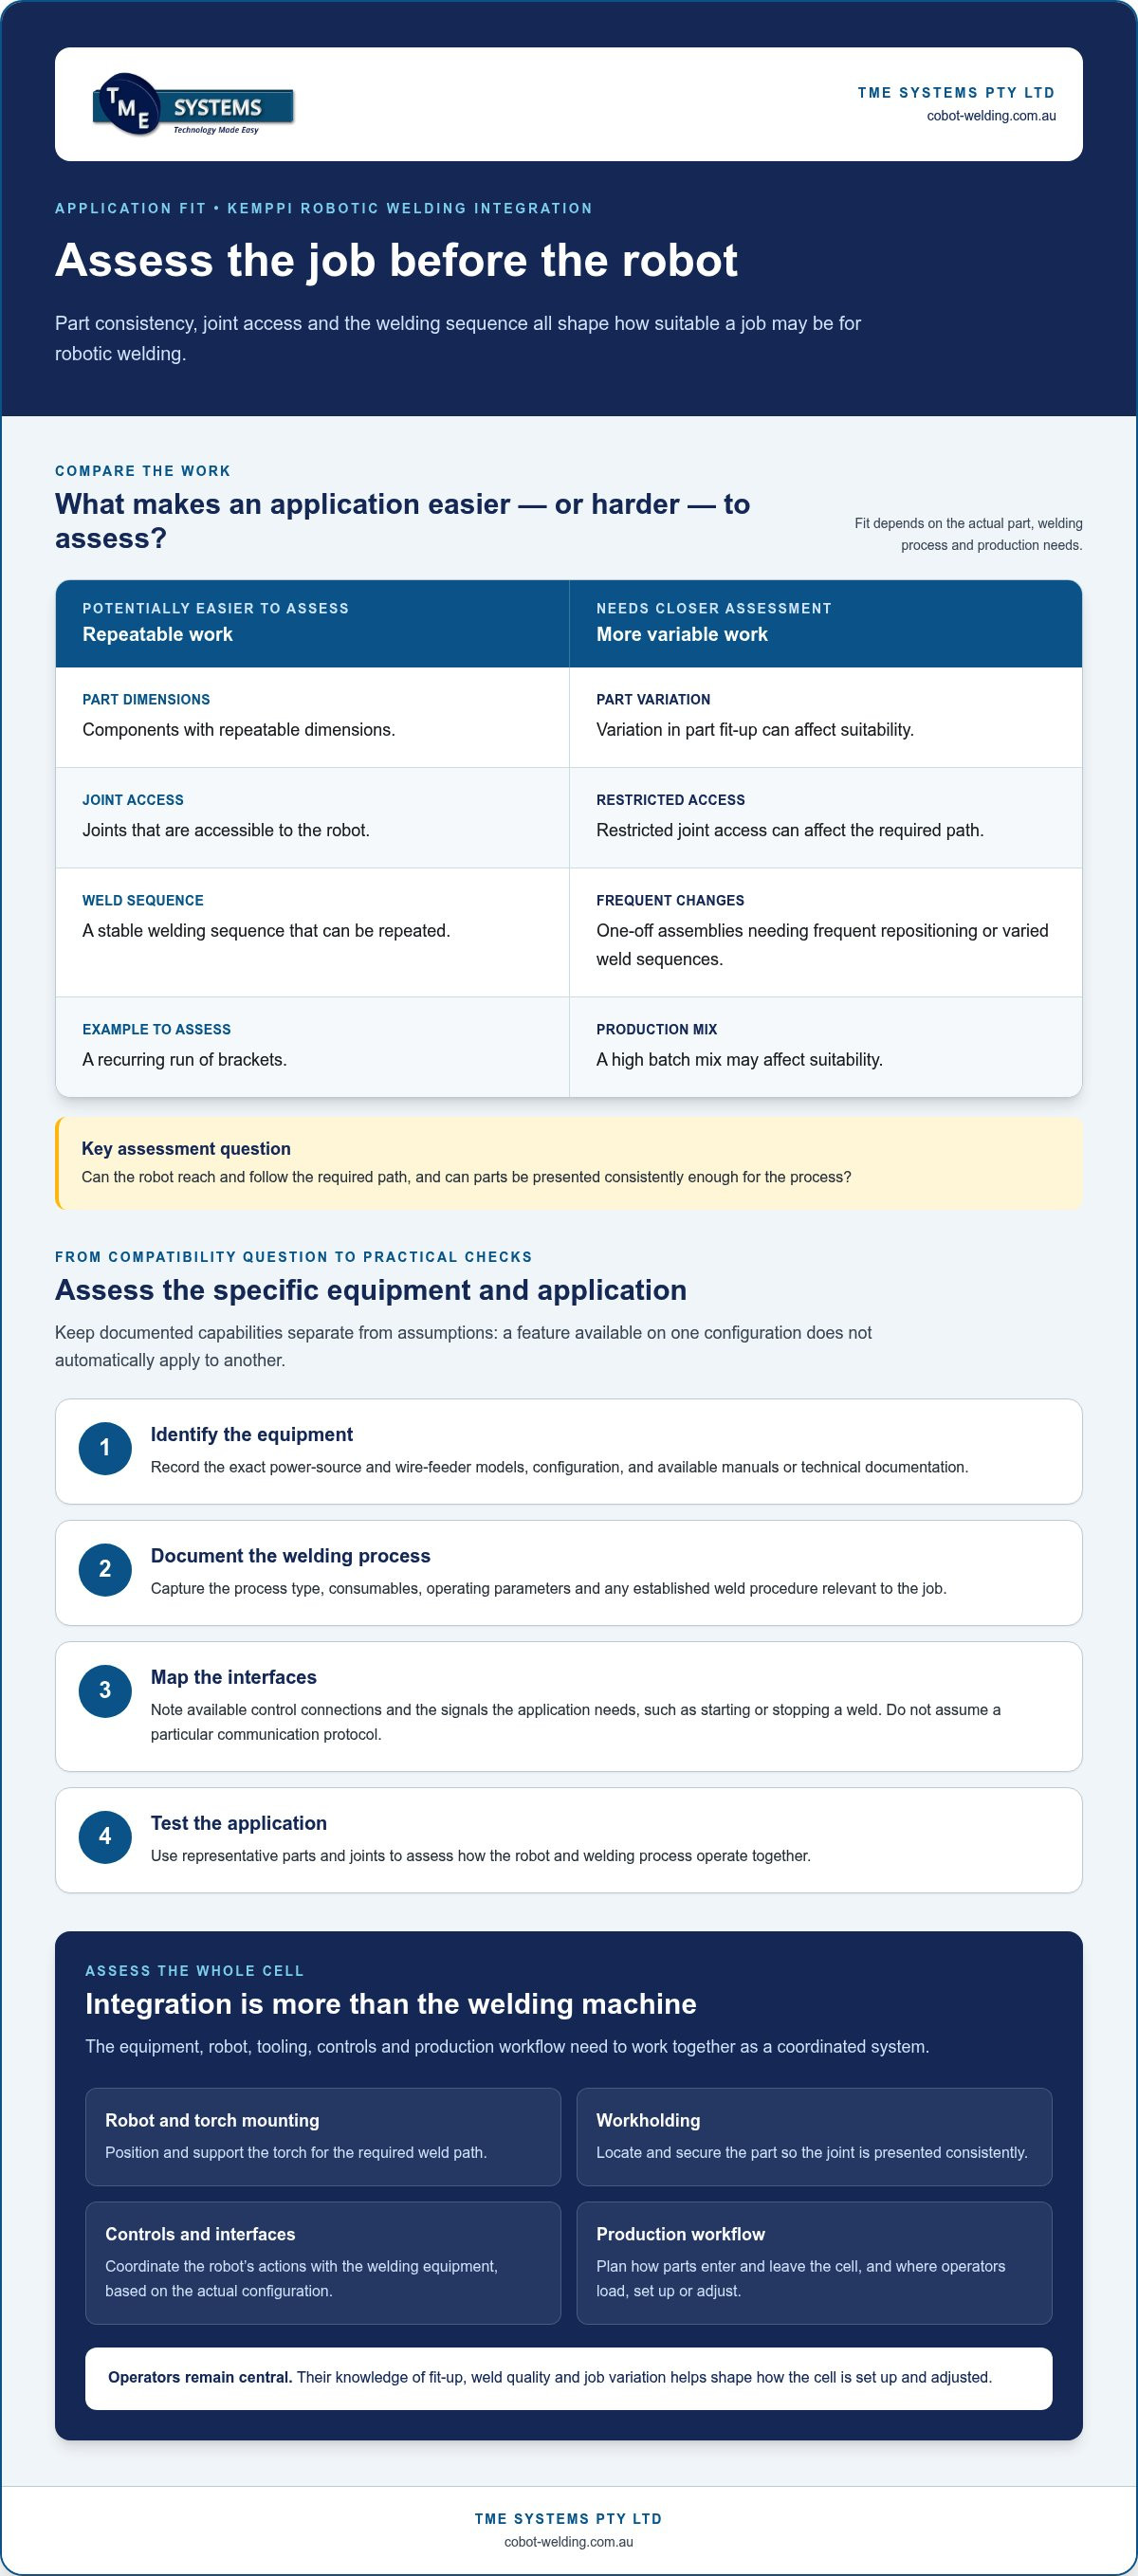
Start with the job, not the robot. Components with repeatable dimensions, accessible joints and a stable welding sequence may be easier to assess for robotic welding. A recurring run of brackets, for example, presents different requirements from one-off assemblies that need frequent repositioning or varied weld sequences.
Part fit-up variation, restricted joint access and a high batch mix can all affect suitability. Ask whether the robot can reach and follow the required path, and whether parts can be presented consistently enough for the process. Application fit depends on the actual part, welding process and production needs, not just the machine name or a broad description of the job.
What does integration add beyond the welding machine?
A cell brings together several elements that must work in coordination. These commonly include the robot, torch mounting, workholding, cell controls and welding equipment. The operator’s loading, setup and adjustment tasks are part of the workflow too. A foundational overview of robotic welding is available in this Introduction to Robotic Welding.
- Robot and torch mounting: Position and support the torch for the required weld path.
- Workholding: Locate and secure the part so the joint is presented consistently.
- Controls and interfaces: Coordinate the robot’s actions with the welding equipment, based on the actual equipment configuration.
- Production workflow: Plan how parts enter and leave the cell, and where operators intervene.
TME Systems supplies collaborative robot welding cells and provides welding system integration. A collaborative setup still needs to be assessed as a complete application, including how people, parts and equipment interact. Considering these elements together helps define what to test and how operator skills can be incorporated into the process.
How to assess Kemppi equipment, interfaces and welding-process requirements
A practical assessment turns a general compatibility question into a sequence of checks. For kemppi robotic welding integration, establish what the specific equipment can do, what the welding task requires and how the robot and welder will coordinate. Keep documented capabilities separate from assumptions: a feature available on one configuration doesn’t automatically apply to another.
- Identify the equipment. Record the exact power-source and wire-feeder models, configuration and available manuals or technical documentation.
- Document the process. Capture the process type, consumables, operating parameters and any established weld procedure relevant to the job.
- Map the interfaces. Note the available control connections and the signals the application needs, such as starting or stopping a weld. Don’t assume a particular communication protocol.
- Test the application. Use representative parts and joints to assess how the robot and welding process operate together.
“A welding interface can’t be judged in isolation: its suitability depends on the specific Kemppi model, configuration, robot and demands of the welding application.”
What Kemppi equipment information should be gathered?
Gather the nameplate details for the power source and wire feeder, along with configuration information and relevant documentation. Record the process type, wire and other consumables, current operating parameters, and the weld procedure or work instructions used for the job. This gives the assessment a clear reference for the existing process instead of relying on memory or a general product description.
For controls, document the connections and signal requirements shown in the equipment information. Establish which signals are needed to coordinate welding and robot movement, and whether the actual configuration provides a suitable way to handle them. Verify model-specific details before treating any connection or control capability as available.
How do welding parameters and robot paths work together?
A robot path needs to support the intended weld, not simply trace the joint. Travel speed, torch angle, work distance and joint position all relate to how the process is applied. If a path changes, the torch may approach a corner differently, travel at another speed or sit at a different distance from the work. That can affect process consistency, so use representative trials to assess changes before applying them to production.
No-code robot welding software can let operators teach paths without writing complex code, helping keep their process knowledge in the setup. The right workflow still depends on the application and established welding requirements. Involve operators in reviewing how path changes are made and assessed. When evaluating the teaching workflow, consider how a path is created, adjusted and checked against the requirements of the job.
Safety belongs in the assessment alongside equipment and process checks. OSHA’s Robotic Welding Safety Guidelines provide general information on robotics hazards; Australian workshop arrangements need to be considered in their own context. For a practical next step, explore collaborative welding cell options as part of assessing the application and workflow.
How to judge integration fit without assuming every Kemppi setup is compatible
A useful fit assessment compares the work as it’s done now with the tasks a robotic cell could take on. For kemppi robotic welding integration, look beyond the welding machine to the parts, production pattern, operator responsibilities and equipment interfaces. The assessment should identify opportunities, constraints and unanswered technical questions, not provide a blanket compatibility guarantee.
Start with the work mix. Note batch sizes, how often each job returns, how parts are presented and how much they vary between runs. Then consider whether fixtures locate parts consistently, whether joints are accessible and whether the torch has clearance along the required path. Frequent manual correction or repositioning can change the assessment substantially.
Which production factors influence system fit?
Stable, repeatable tasks are different from jobs that need regular hands-on adjustment. A component that returns often and follows a consistent sequence may be worth assessing for a cell. A varied assembly with changing joint access, fit-up or weld positions may need more operator input or a different approach. Changeovers matter too: consider how fixtures, programs and parts would be changed between jobs.
What should a comparison table make clear?
Compare specific tasks, not broad claims about manual or robotic welding. Record what the operator does today, what the proposed cell would handle and what still requires human judgement. Mark unknown equipment or interface details as items for technical assessment, rather than treating them as confirmed capabilities.
| Assessment area | Standalone welding setup | Proposed robotic cell | Fit question |
|---|---|---|---|
| Application fit | Operator positions the torch and adapts to the joint. | Robot follows a taught path around the presented part. | Are the joints accessible and the sequence repeatable? |
| Interface information | Welding equipment is operated in its current arrangement. | Robot and welding equipment need coordinated operation. | Which model-specific signals or connections need assessment? |
| Part variation | Operator may compensate for fit-up or position changes. | Variation may affect path and process consistency. | How consistently do parts locate in the fixture? |
| Operator involvement | Operator performs and monitors the weld. | Operator loads parts, oversees the process and may adjust taught paths. | Which tasks still rely on operator skill and oversight? |
The comparison should make trade-offs visible. For example, a cell may suit a recurring part, but frequent fixture changes could make the changeover process a key design consideration. The Kemppi equipment’s model and configuration also need technical assessment before interface suitability can be established. Don’t fill gaps with assumed compatibility, estimated savings or performance promises.
Operators remain central to the decision and eventual workflow. Their knowledge helps identify awkward fit-up, access issues and the adjustments that keep work moving. Involving them early grounds the assessment in workshop experience and clarifies where setup, oversight and job changes will sit in the proposed cell.
How to prepare a Kemppi robotic welding integration assessment
A well-prepared assessment starts with the work you want the cell to handle. For kemppi robotic welding integration, useful information extends beyond the welder and weld settings. Parts, fixtures, workshop layout and operator tasks all influence what can be assessed and which questions need resolving.
What to document before a demonstration or assessment
Choose a representative application, ideally one that reflects the parts and production conditions you want to understand. Gather the following information so the assessment can focus on real workshop requirements rather than assumptions:
- Parts and drawings: Bring sample components and drawings that show dimensions, weld locations and relevant access constraints.
- Material and joints: Note material details, joint types, weld requirements and any established procedures or work instructions.
- Current process: Describe the job sequence, batch variation, changeovers and recurring production constraints, including where operators make adjustments.
- Equipment records: Record the Kemppi power-source and wire-feeder identifiers, configuration and available technical documentation.
- Workshop context: Outline where a cell could sit, how parts are moved and presented, and what operators need to do before, during and after welding.
Include fixture details as well as the parts themselves. A drawing may show a joint clearly, but the physical fixture reveals whether the torch can reach it and whether the component can be located consistently. Note practical limits on floor space, material handling or access around the proposed work area.
How to plan a useful application trial
Agree on what the trial is meant to evaluate before it begins. That might include access to selected welds, how a part is held, whether a path can be taught and how robot movement coordinates with the welding process. A focused trial helps the team examine the application without treating one demonstration as proof of production performance.
Observe the work from the operator’s point of view, too. Who loads and positions the part? Which adjustments rely on experience? How would a job change be handled? These details help assess whether the proposed workflow fits the workshop and where operator instruction or onboarding will be important.
Keep a record of observations, decisions and open technical questions. Separate what the trial demonstrates from what still needs engineering assessment, including model-specific equipment or interface details. This gives your team a practical basis for planning next steps without promising a production result in advance.
With sample parts, process information and workflow requirements in hand, TME Systems can support the assessment through welding system integration and collaborative robot welding solutions. Explore TME Systems’ robotic welding integration approach to see how assessment can connect with implementation and operator onboarding.
How TME Systems supports Kemppi robotic welding integration next
Once an application has been assessed, the next step is to connect the welding process with a cell and the way work moves through your workshop. TME Systems supplies collaborative robot welding cells and provides welding system integration for Australian manufacturers. For a Kemppi-equipped application, the specific equipment and interfaces are part of the technical assessment, not an assumed fit.
Integration considers how the robot, welding equipment, workholding and operator workflow come together. The goal is a practical setup shaped around the application, with the people who run the process involved in decisions about setup, job changes and ongoing operation.
What integration and onboarding can cover
Welding system integration considers how robotic welding technology can connect with equipment and existing factory workflows. That includes the practical handover between loading parts, presenting joints, running the weld sequence and managing job changes. The right arrangement depends on the application and equipment configuration.
Operator onboarding helps your team prepare to use the cobot system and understand its operation and care responsibilities. TME Systems’ no-code teaching software lets operators teach robot paths without writing complex code. Where the application suits, this can support operator-led path adjustments while keeping their process knowledge in the workflow. Operator training and onboarding help staff build familiarity with the system as it moves towards implementation.
A mobile demonstration can also make the assessment more tangible. Seeing a collaborative welding setup in action gives operators and production staff a chance to consider how parts are presented, how a path is taught and where people interact with the cell. It’s a practical way to discuss the application, not a promise of a particular production outcome.
What to do next with your Kemppi application
To start a useful discussion, outline the Kemppi power-source and wire-feeder details, share a representative part or drawing, and describe the production challenge you want to address. Include the material, joint type, current process and any recurring issue that affects the job. These details help focus the discussion on your actual application and the questions that need technical assessment.
Bring operators into the discussion early. They can explain where parts vary, how changeovers work and which tasks depend on experience. Their input helps shape both the cell workflow and the onboarding required, so implementation is considered from the operator’s perspective as well as the equipment’s.
If a demonstration would help your team assess the application, TME Systems can bring a mobile demo system into the discussion. Outline your equipment, parts and production challenge, then discuss your robotic welding integration requirements and explore a practical next step with TME Systems.
Turn your priority welding job into a practical next step
A useful way to move forward is to choose one job that matters to production and involve the people closest to it. Ask operators what makes the task straightforward, where it needs careful judgement and what tends to change between runs. Their practical knowledge can help shape an automation plan around real workshop needs, not just an equipment list.
For kemppi robotic welding integration, define what you want to learn before committing to a cell design. Clarify the production challenge, the parts involved and the questions your team needs answered. From there, you can assess the application in a structured way, keeping technical requirements and operator readiness in view.
If you’re ready to explore the possibilities for your workshop, start planning your robotic welding application with TME Systems. A clear starting point makes the path ahead easier to assess, one practical step at a time.
Frequently Asked Questions
Can Kemppi welding equipment be integrated with a collaborative robot?
It may be possible, but compatibility depends on the exact equipment configuration and application. An assessment needs to consider how the welder and robot exchange the required control signals, how the torch is mounted and whether the welding process suits the proposed cell. For kemppi robotic welding integration, assess model-specific capabilities against the equipment documentation and intended setup rather than assuming compatibility from the brand alone.
What information is needed to assess Kemppi robotic welding integration?
Start with clear photos of equipment nameplates, power-source and wire-feeder details, and available manuals for the setup. Add a representative part or drawing, material and joint details, and a sample of the current weld procedure or work instructions. A short description of how jobs are scheduled and changed over can also show whether the application’s needs fit a robotic workflow.
Does integrating Kemppi equipment mean replacing the existing welding machine?
No, replacement isn’t automatic. The assessment considers whether the existing machine’s configuration and capabilities suit the intended cell, including the process requirements and control arrangements. If the equipment can be incorporated, it may form part of the proposed setup; if not, the assessment can identify the gap for planning. A decision should follow technical review of the actual equipment and application, not a general assumption.
Can a cobot weld small production batches using Kemppi equipment?
It can be worth assessing, particularly when a small batch returns regularly and parts can be presented consistently. The time and effort involved in changing fixtures, setting up a new job and teaching or adjusting a path matter as much as batch size. For occasional one-off parts with substantial variation, manual welding may remain more practical. Trial representative jobs to understand the actual changeover and operator workload.
What should a robotic welding integration trial test?
A trial should examine the specific uncertainty the workshop needs to resolve. For example, check whether the torch can reach the welds, the part can be held securely and the proposed path supports the intended process. Observe how the robot and welding equipment coordinate, then record any issues with fit-up, access or operator interaction. Treat the findings as assessment evidence, not a guarantee of production results.
Do operators need robot programming experience to use a welding cobot?
Not necessarily. TME Systems’ no-code teaching software lets operators teach robot paths without writing complex code, so prior robot programming experience isn’t the only way to contribute to setup. Operators still need onboarding for the specific system and a clear understanding of their tasks. Their welding experience can inform path adjustments, while training supports confident, appropriate use of the cobot.
How does TME Systems support robotic welding integration in Australia?
TME Systems supports Australian manufacturers with collaborative robot welding cells, welding system integration, mobile demonstrations and operator onboarding. For a Kemppi-equipped application, the work is assessed around the equipment configuration and production task, without assuming model compatibility in advance. A useful starting point is to outline the equipment, the parts you want to weld and the production challenge your team hopes to address.