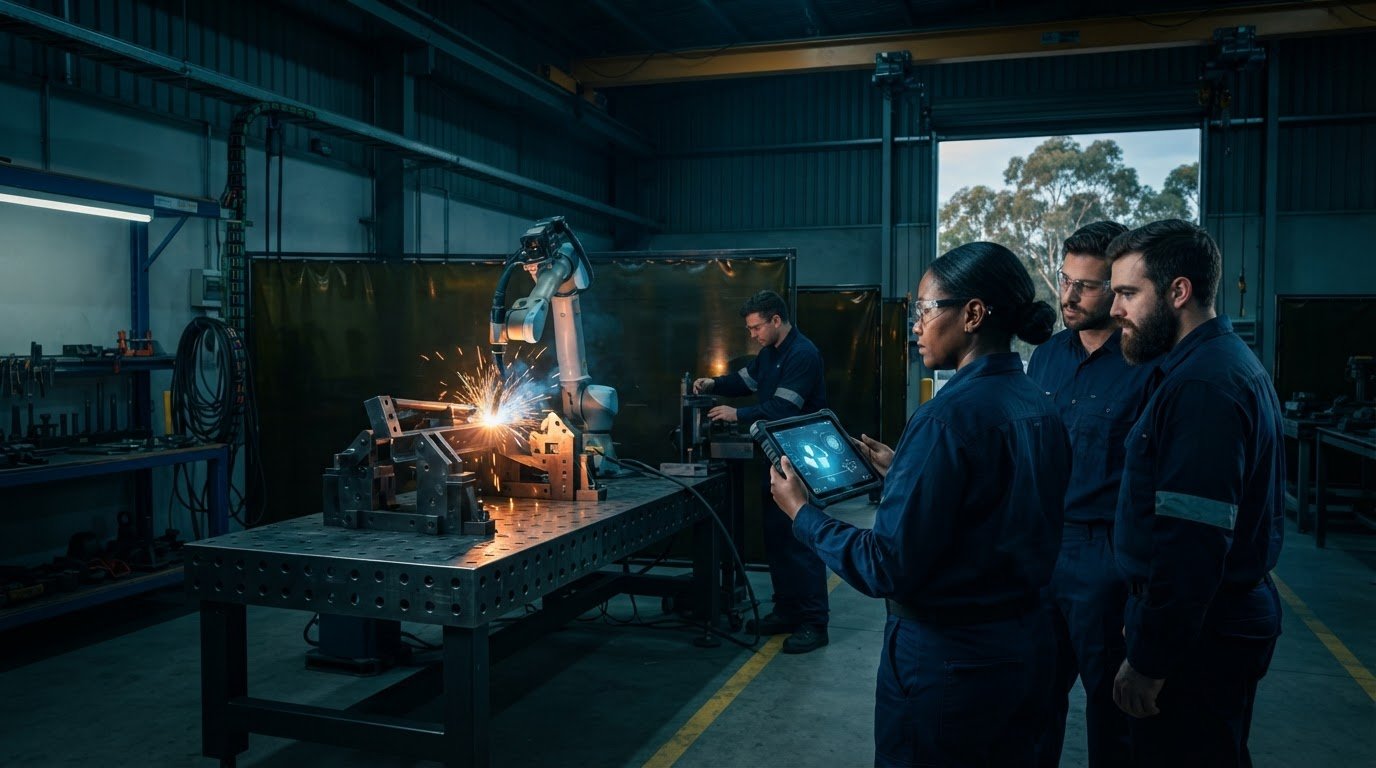
What if the safest first step towards automated welding isn’t buying a robot, but choosing one job to test? Managing the transition to automated welding can feel like a trade-off: protect today’s output, or make room for installation, training and changeovers. It doesn’t have to be either-or.
That uncertainty is understandable. An automated cell needs to suit the parts, fixturing and workshop workflow, while experienced welders need a meaningful role in shaping how it runs. No-code teaching software can help operators teach weld paths and adjust parameters, bringing their process knowledge into the setup.
This guide shows how to move in manageable stages: select a suitable job, plan integration around existing production, onboard operators and run a practical trial before expanding. You’ll learn what to assess, who to involve and how to use trial results to decide what comes next. A mobile demonstration can also help your team evaluate the approach in practice, with operators, workflow and quality goals at the centre.
Key Takeaways
- Start by identifying the workshop pressures automation needs to address, then map how jobs move through production.
- Compare manual welding, cobots and dedicated robots against your job mix, changeovers, space and operator involvement.
- Make managing the transition to automated welding a staged process, with operators contributing their practical knowledge from the outset.
- Use a representative pilot, including normal setup and changeover tasks, to assess whether automation fits your workflow.
- Before expanding, document the process and make sure the team can teach, adjust and run jobs consistently.
Managing the Transition to Automated Welding Starts with the Real Workshop Problem
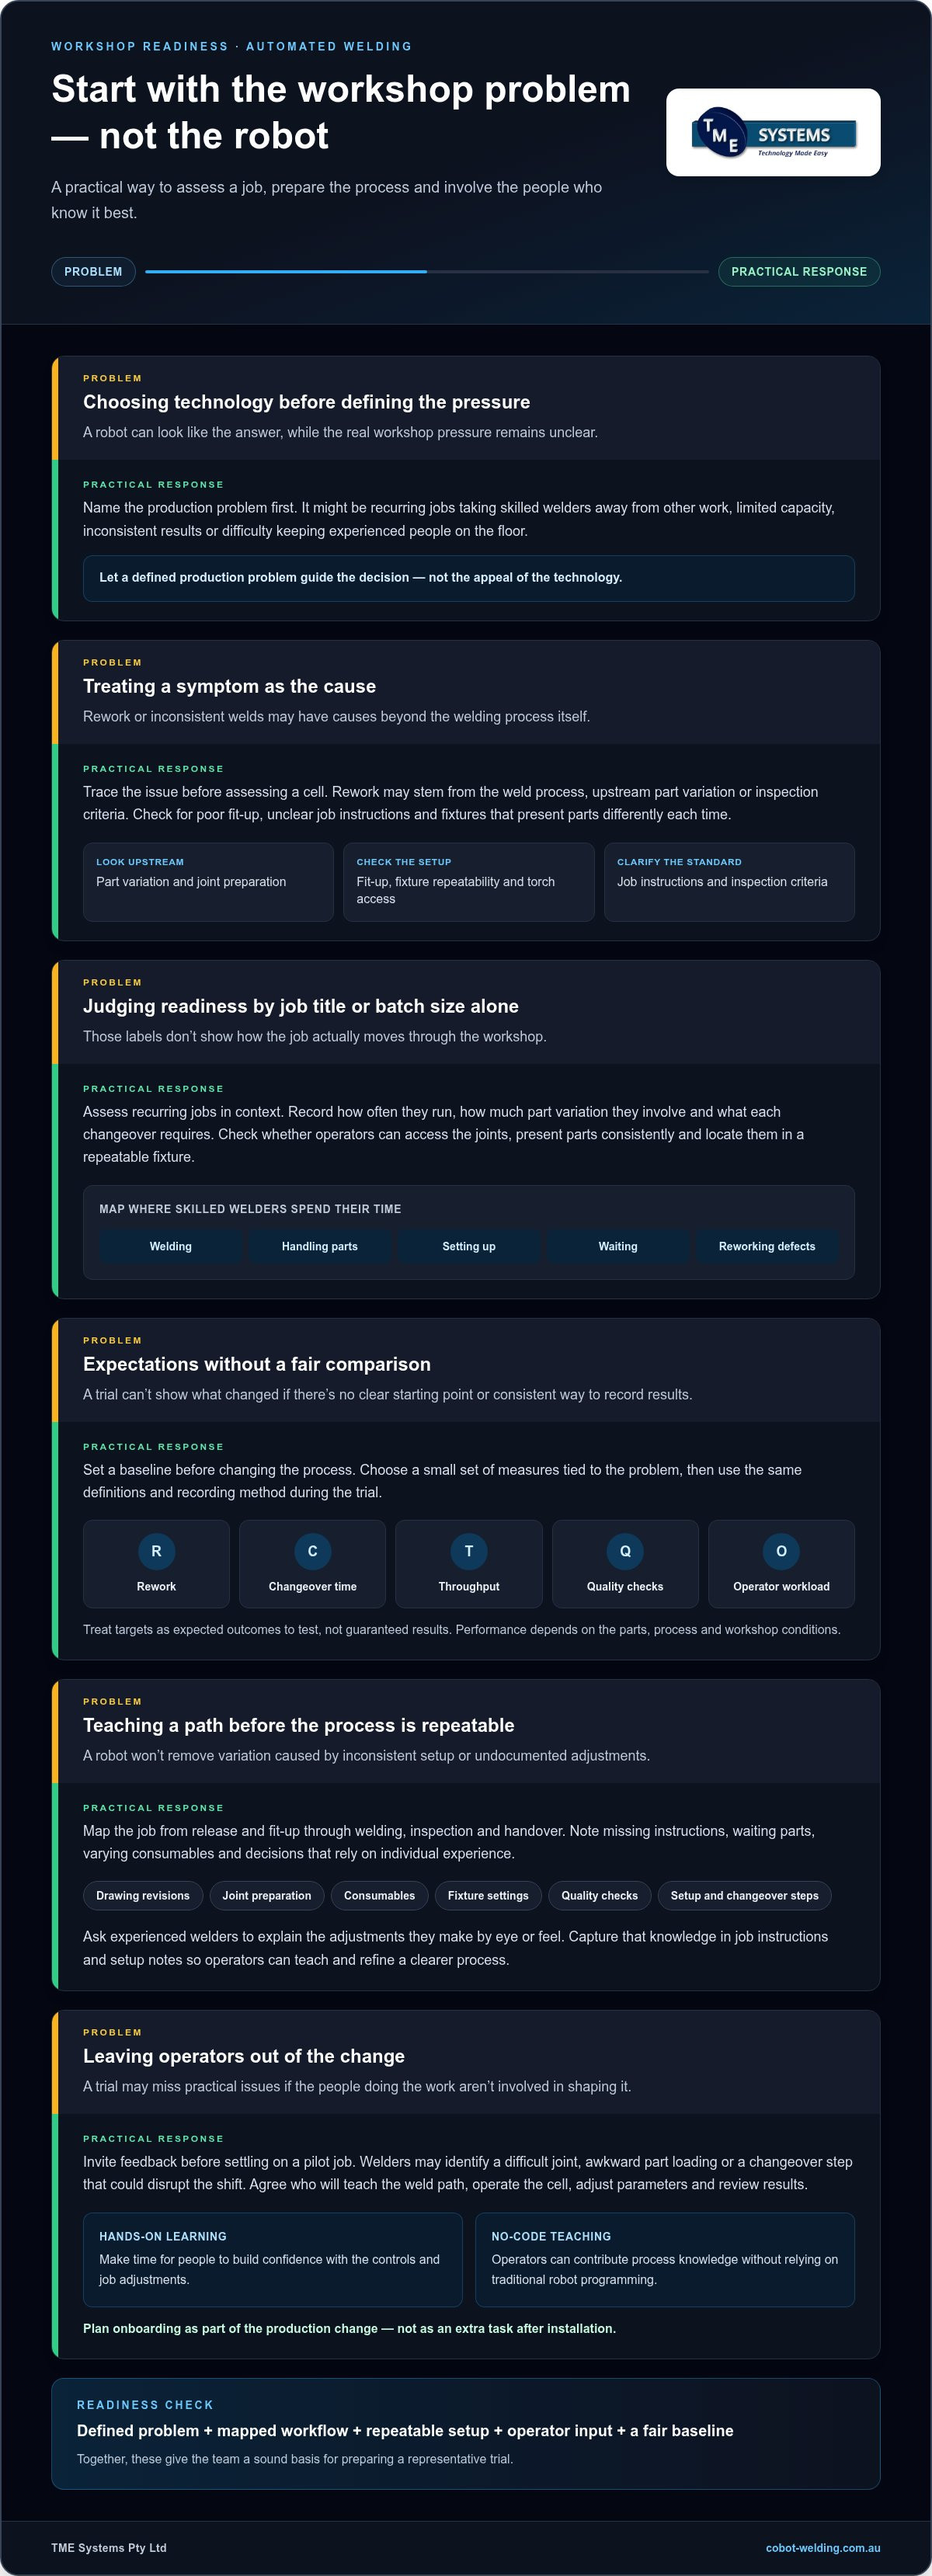
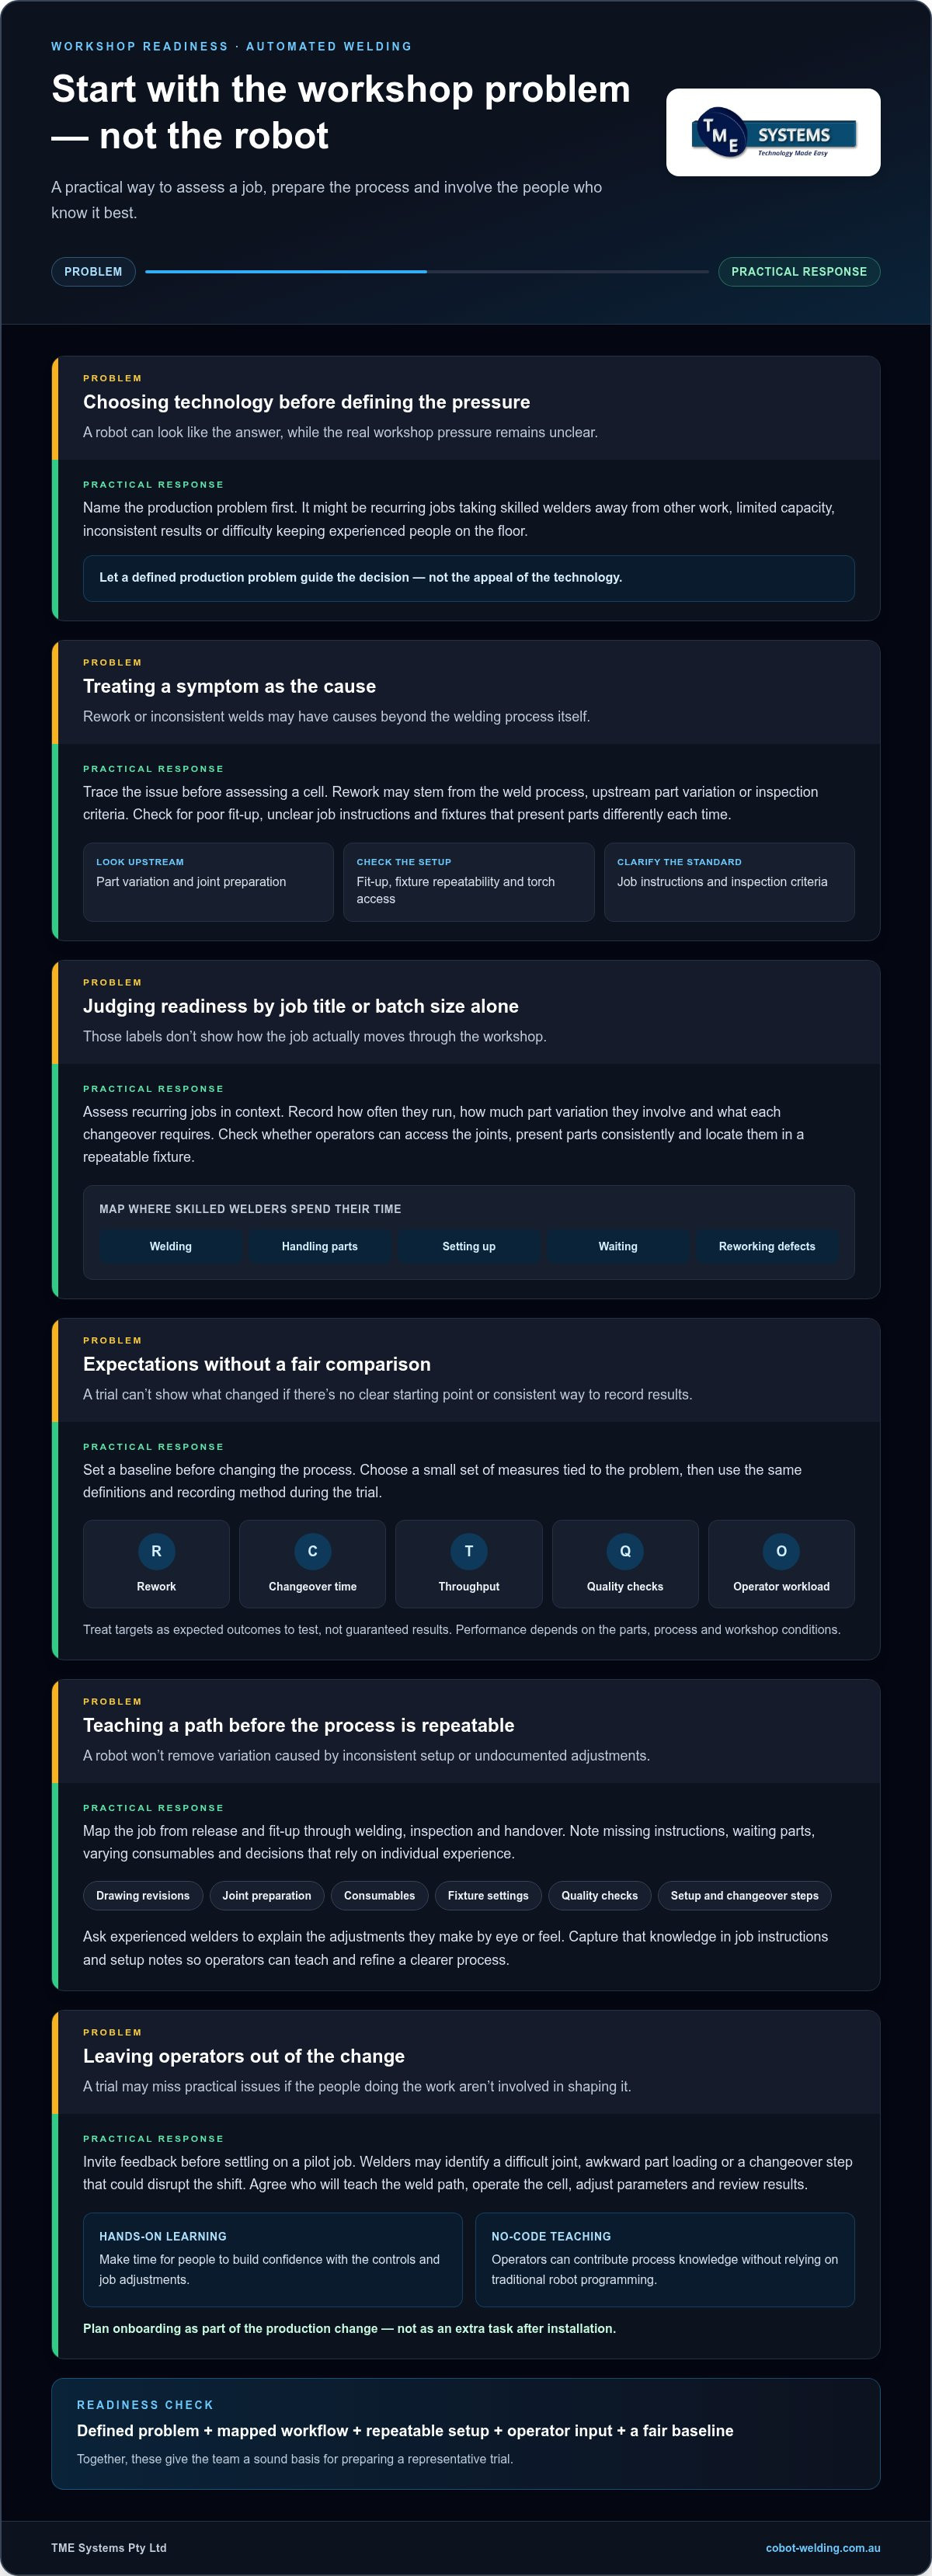
Automated welding is a change to how work moves through the workshop, not simply a robot installation. It can affect job preparation, fit-up, fixturing, welding, inspection and the way operators share their process knowledge. A useful starting point is to identify the pressure behind the change: recurring jobs taking skilled welders away from other work, limited capacity, inconsistent results or difficulty keeping experienced people on the floor.
Let a defined production problem guide the automation decision, not the appeal of the technology. A robot may help with repeatable welds, but it won’t correct poor fit-up, unclear job instructions or a fixture that presents parts differently each time. Separate the symptom from its cause before assessing a cell. If rework is the issue, find out whether it stems from the weld process, upstream part variation or inspection criteria. The Robot welding overview provides useful background on the method and its development, but workshop readiness depends on the job in front of your team.
Which welding workflow is ready for an automation assessment?
Start with recurring jobs. Record how often they run, how much part variation they involve and what each changeover requires. Then check whether operators can access the joints, present parts consistently and locate them in a repeatable fixture. Include the work around the weld, too: note where skilled welders spend time welding, handling parts, setting up, waiting or reworking defects. This makes the real opportunity clearer than a job title or batch size alone.
Set transition goals the workshop can actually measure
Establish a baseline before changing the process. Choose a small set of measures tied to the problem, such as rework, changeover time, throughput, quality checks or operator workload. Use the same definitions and recording method during any trial so the comparison is fair. Treat targets as expected outcomes to test, not guaranteed results; actual performance depends on the parts, process and workshop conditions.
Keep the assessment grounded in the people doing the work. Ask welders and operators which steps cause delays, what makes a job difficult to repeat and where instructions leave room for interpretation. Their answers can reveal practical adjustments to job information or fixturing before automation is introduced. They can also help shape how weld paths and parameters are taught and adjusted, turning hands-on experience into useful process knowledge rather than treating it as a barrier to change.
Once the problem, workflow and baseline are clear, the team has a sound basis for preparing jobs and people before introducing automation.
Prepare Welding Jobs, Workflows and Operators Before Introducing Automation
Once a suitable workflow has been identified, prepare the work around it before teaching a robot. Start with a simple map that follows a job from release and fit-up through welding, inspection and handover. Note where instructions are missing, parts wait, consumables vary or decisions depend on an individual’s experience. This shows how an automated cell will connect with the rest of production, not just where it will sit.
Standardise what you reasonably can: drawing revisions, joint preparation, consumables, fixture settings and quality checks. Keep a record of normal setup and changeover steps. These details help the team distinguish a genuine process variation from an avoidable difference in how a job is prepared. For cell-level planning, the collaborative robot welding cells guide offers further considerations for matching a cell to workshop needs.
Make the welding process repeatable enough to teach
Before teaching a weld path, review the drawing, joint preparation, tolerances and variation between parts. Check that the fixture locates components consistently and gives the torch suitable access to the joint. If a part shifts or fit-up changes from one job to the next, address that first where practical. Ask experienced welders to explain the small adjustments they make by eye or feel. Capturing that knowledge in job instructions and setup notes gives operators a clearer process to teach and refine.
Give operators a meaningful role in the transition
Explain the production problem and invite feedback before settling on a pilot job. Welders may point out a difficult joint, a fixture that makes loading awkward or a changeover step that could disrupt the shift. These aren’t reasons to dismiss automation; they’re practical inputs for shaping a workable trial.
Agree on who will teach the weld path, operate the cell, adjust parameters and review the results. Make time for hands-on learning so people can build confidence with the controls and job adjustments. No-code teaching software can help operators contribute their process knowledge without relying on traditional robot programming. Plan onboarding as part of the production change, not as an extra task after installation. This guide to on-site cobot welder training covers practical training considerations.
With the process mapped and responsibilities clear, a mobile demonstration can help the team evaluate automation against real parts and workflow needs. Explore the cobot welding options as a practical next step in building that assessment.
Compare Manual Welding, Cobots and Dedicated Robots Against Your Production Needs
There’s no single best route for every welding job. Compare manual welding, a collaborative robot (cobot) cell and dedicated automation against the same workshop criteria: job mix, repeatability, changeover effort, available space and how operators will be involved. That keeps the decision grounded in production needs rather than the appeal of a particular machine.
A cobot cell can offer accessible teaching and operator involvement, while dedicated automation may suit stable, specialised production; the right fit depends on the job and workflow. Manual welding remains flexible and skill-led, particularly where parts vary or require adaptable judgement. Its capacity and consistency, though, depend on the work, conditions and people available. Managing the transition to automated welding means considering where each approach supports the whole process, including setup, loading, quality checks and handover.
When does a collaborative welding robot suit the transition?
A cobot cell may suit work with weld paths operators can teach and production patterns worth repeating. Assess how parts will be loaded, located and removed, and whether fixtures support repeatable positioning without making changeovers cumbersome. Also consider how the operator will interact with the cell during normal work. Collaborative design doesn’t remove the need to assess the specific application, including the welding process and how people work around the equipment.
No-code teaching can let operators contribute their process knowledge by teaching weld paths and adjusting parameters without traditional robot programming. That can make the cell more approachable for teams whose experience is built around welding rather than robot code. The fit still needs to be tested against actual parts and working conditions.
When might manual or dedicated automation remain the better fit?
Manual welding may remain the practical choice for highly variable work where each part calls for skilled judgement or frequent adaptation. Dedicated automation may be worth assessing when production requirements are stable and specialised, and the process can support a more fixed setup. Neither choice should be judged in isolation from the wider workflow.
Use the same baseline measures for each option. Compare the time and effort needed to change jobs, how consistently parts can be presented, what quality checks are required and how operator workload changes. A simple side-by-side assessment can expose trade-offs: a process that appears efficient during welding may demand substantial fixture adjustment or setup between jobs. Include these tasks in the decision, not just arc time.
Once you’ve narrowed the options, a practical demonstration can help your team assess operator interaction and job fit. Explore collaborative welding options as part of that evaluation.
Run a Welding Automation Pilot That Proves Fit Before You Scale
A pilot gives your team a chance to test automation against real production conditions before committing to a wider rollout. It should answer a practical question: can this process meet the agreed quality and workflow goals, with operators able to run it consistently?
Set the trial up in a clear sequence: choose representative work, agree on measures, prepare the cell, train the operators, then review the results together. Include realistic parts and expected variation, along with normal setup tasks and a planned changeover. A simple demonstration part may show that a weld path can be taught, but it won’t tell you how the process handles the jobs and adjustments your workshop sees day to day.
Build a pilot around normal production conditions
Before starting, agree on the trial job, production constraints, responsibilities and success measures. Use the fixtures and consumables the job would normally require. Decide who will teach and run the process, who will monitor quality, and how trial work fits around other production. Record issues as they happen, including adjustments, delays, operator observations and any differences in part fit-up.
Keep the notes practical. If an operator changes a parameter or repositions a part, record what prompted the adjustment and whether it resolved the issue. This helps distinguish a one-off problem from a repeatable process need. It also gives the team useful input for refining job instructions, training and integration.
Make a measured go, refine or pause decision
Review the trial with the operators who took part. Compare results with the starting baseline and the goals agreed beforehand, using the same measures where possible. Look at quality checks and rework alongside changeover effort, workflow effects and operator workload. A result that looks promising during welding may still need refinement if setup takes longer than planned or the cell creates a bottleneck elsewhere.
Use the review to choose a clear next step:
- Go: the trial meets the agreed measures and the team can run the process consistently.
- Refine: specific adjustments to fixtures, instructions, training or integration could address the gaps.
- Pause: unresolved safety, quality or workflow concerns need attention before expansion.
Managing the transition to automated welding works best when a pilot is treated as evidence-gathering, not a pass-or-fail sales demonstration. If you’re shaping a practical evaluation, see how a mobile welding robot demonstration works. To explore a demonstration for your production needs, arrange a mobile welding robot demonstration.
Scale Automated Welding with Integration, Training and Ongoing Review
A successful pilot is a reason to plan the next step, not to expand automatically. Scale only when the trial meets the measures you agreed on and the team can run the process consistently. If results depend on one person remembering an undocumented adjustment, pause and capture that knowledge before releasing the work more widely.
Turn a proven pilot into a repeatable production process
Before production handover, name the process owner and clarify who teaches, operates, adjusts and reviews each job. Document the weld paths, job instructions, fixture settings, consumables and quality checks. Include what to do when parts vary, a weld needs attention or the cell behaves unexpectedly, so operators know when to adjust the process and when to escalate an issue.
Schedule hands-on training and a practical handover around production requirements. Operators should have an opportunity to practise the job, make appropriate adjustments and ask questions before the process becomes routine. After launch, review performance with the team. Their feedback can highlight unclear instructions, awkward loading or changeover steps that need refining. Use those observations to improve the workflow before applying the approach to another job.
Plan integration and support as part of the transition
An automated welding cell needs to work with the equipment and processes around it. Integration planning should account for how jobs arrive, how parts are presented, where fixtures and consumables are managed, and how completed work moves into inspection or the next production stage. This helps prevent a capable cell from becoming disconnected from the workshop’s established flow.
Operator onboarding is part of that integration. With no-code teaching software, trained operators can teach weld paths and adjust parameters without traditional robot programming. That gives the people closest to the work a practical role in maintaining and refining jobs. The no-code robot welding software guide explains how this approach supports accessible automation.
Keep reviewing the process after each new job is introduced. Check whether the documented method still matches the parts, quality checks and production handovers, and update it when the workflow changes. This creates a repeatable basis for deciding what to automate next, while keeping operator experience at the centre of the transition.
For support planning integration, operator onboarding and the next stage of your welding automation journey, talk with TME Systems about your automated welding transition.
Take the Next Step at a Pace That Fits Your Workshop
Managing the transition to automated welding is easier to plan when you begin with a real production need, prepare the workflow and involve the people who know the work best. A measured pilot can show whether the process fits before you decide to expand, while clear documentation and ongoing review help make successful jobs repeatable.
Automation can build on your team’s skills. No-code teaching software lets operators teach weld paths and adjust parameters without traditional programming. With welding system integration and operator onboarding, the cell can be connected to workshop processes and the people running it. A mobile demonstration also offers a practical way to evaluate welding automation using your requirements.
Start with the job you want to improve, then take the next step with evidence and your operators’ experience in view. Talk with TME Systems about your automated welding transition and explore an approach that suits your production goals.
Frequently Asked Questions
What is the best way to start managing the transition to automated welding?
Start by identifying a recurring production problem, then map the workflow and record a baseline. Choose a representative job with manageable variation and involve the welders who understand its fit-up, access and setup requirements. Compare manual welding, cobots and dedicated automation against the same practical measures before committing to a pilot. This keeps the decision tied to workshop needs, rather than assumptions about what a robot can do.
How do I know if my welding work is suitable for automation?
Look for work that repeats often enough to assess, has accessible joints and can be presented consistently. Review part variation, fit-up, fixture repeatability, setup time and handling tasks. Batch size alone doesn’t determine suitability. Consider the job’s quality requirements, the skills operators need to run it and how it connects with inspection and the rest of production. A practical assessment should account for these factors together.
Will automated welding replace experienced welders?
Automated welding changes how some tasks are performed, but experienced welders’ process knowledge remains valuable. They can help select suitable work, identify setup constraints, teach weld paths, assess quality and refine instructions. Explain responsibilities early and include operators in hands-on onboarding. No-code teaching software can let trained operators teach weld paths and adjust parameters without traditional programming, helping the team contribute directly to job setup and ongoing improvement.
How can a welding automation pilot minimise production disruption?
Plan the pilot around a representative job, with responsibilities, timing and measures agreed before it starts. Fit setup and training around production requirements, then test realistic parts, normal changeovers and expected variation rather than an unusually simple sample. Keep a record of issues and adjustments as they occur. Review the findings with operators before deciding whether to refine the setup, introduce the process into production or pause for further preparation.
What should I measure before and during a welding automation trial?
Measure the factors linked to the production problem you want to solve. Depending on the job, these may include weld quality, rework, setup and changeover effort, throughput and operator workload. Define each measure before the trial and use the same method to record it during the trial. Note any changes in parts or conditions, and consider the results alongside operator feedback and effects on the wider workflow.
Do operators need training to work with a welding cobot?
Yes, operators need practical onboarding for the tasks they’re expected to perform. This may include loading parts, running jobs, teaching or adjusting weld paths and responding to process issues. Training should reflect the cell, workflow and assigned responsibilities. Involve operators during the trial so they can build familiarity with the process, raise practical concerns and contribute to a clear production handover. No-code teaching software can support job adjustments without traditional robot programming.
How do I move from a successful welding pilot to production?
Move into production after the pilot meets its agreed goals and outstanding quality, safety or workflow concerns have been addressed. Document weld paths, job instructions, fixture settings, quality checks, responsibilities and escalation steps so the process is repeatable. Plan integration with existing welding equipment and workflows, then provide operator onboarding and review performance after launch. Use what the team learns to refine the process before extending automation to other jobs.