What if setting up a welding robot didn’t mean waiting for someone to write code? For fabricators considering programming free welding robots, that possibility is appealing, but the name can sound too good to be true.
Conventional robot programming can become a bottleneck, especially when jobs change often and production runs are short. A no-code approach changes how the weld path is taught, not the need for welding know-how: an operator teaches the path and adjusts welding parameters without writing traditional robot code.
This guide explains what operators do in practice, how operator-led teaching differs from CAD-based offline programming, and where each approach may fit on a workshop floor. You’ll also learn what to assess before automating a job, and how integration and operator onboarding can support a new setup. The aim is a practical picture of what programming-free welding can, and can’t, take off your plate.
Key Takeaways
- Programming free welding robots shift path teaching away from traditional code, while keeping practical welding decisions in the operator’s hands.
- Assess how part repeatability, weld access and job changes affect the fit of operator-led teaching in your workshop.
- Compare no-code teaching with CAD-based offline programming by looking at the inputs, workflow and operator involvement each requires.
- Use representative parts and your actual production workflow to evaluate the teaching process, then refine the setup through testing.
- Integration and operator onboarding can help connect a collaborative welding cell with production work. A mobile demonstration offers a practical way to explore the approach.
What programming-free welding robots mean for Australian fabricators
For a fabricator, the practical difference is how a weld path gets from the job in front of you to the robot. Traditional programming involves writing or editing robot instructions. With no-code teaching, an operator sets the path and adjusts welding parameters through the system’s teaching method, without writing traditional robot code.
Programming-free welding is operator-led teaching and adjustment of a robot’s weld path without traditional code. It doesn’t mean the robot works without human setup, judgement or oversight. The operator still needs to understand the joint, part position and desired weld. The method changes how instructions are entered, not the knowledge needed to produce a suitable weld or operate equipment safely.
This is one way to approach robot welding, where the robot follows a defined path to perform welding work. The difference is that the operator teaches that path rather than relying on traditional robot coding.
What does programming-free mean in robotic welding?
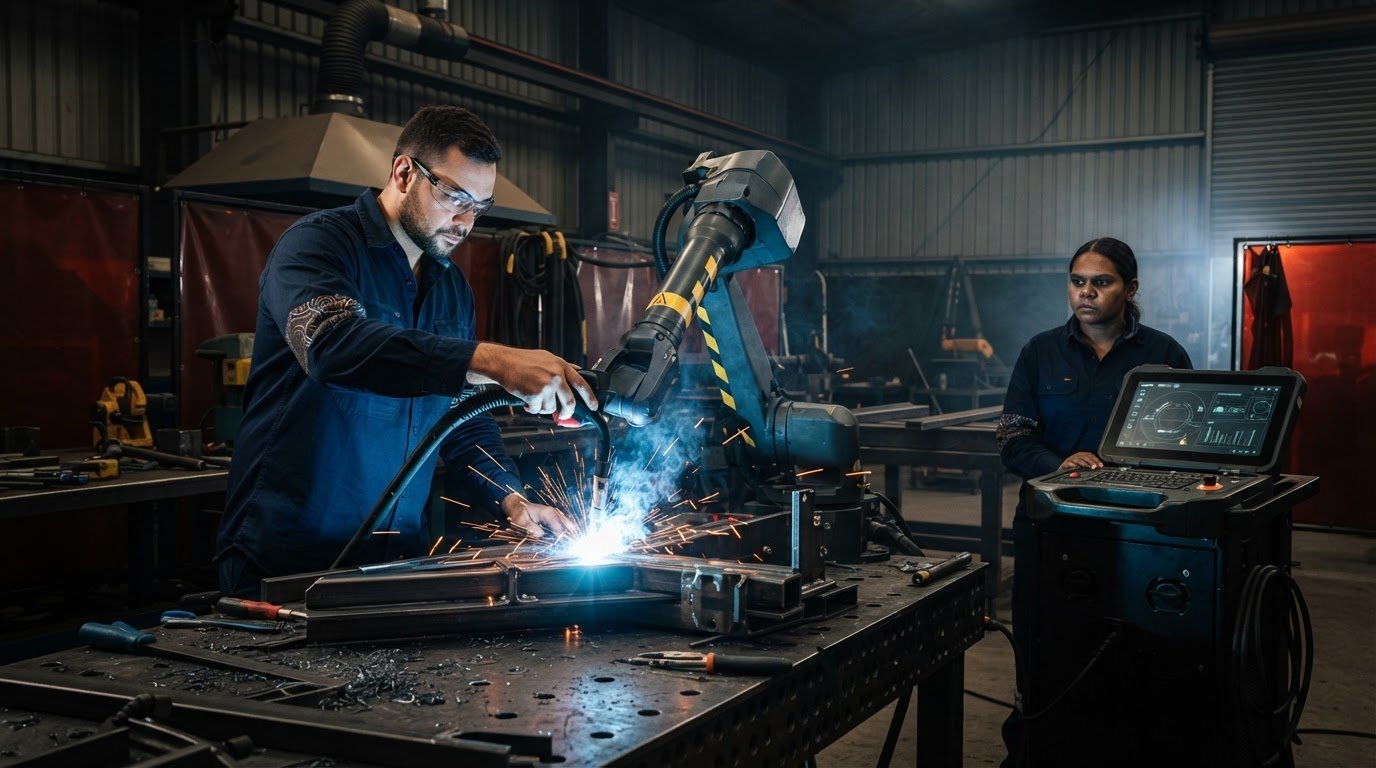
Consider a bracket with a joint running along one edge. Instead of writing a sequence of robot movements in code, an operator teaches the robot the intended weld path and sets or adjusts the relevant parameters. The exact teaching steps depend on the cell, software and application. The key point is that a person still decides what path suits the part and weld.
That makes programming free welding robots a description of the teaching method, not a promise of automatic decision-making. Part fit-up, torch access, weld requirements and setup still call for practical judgement. The robot follows the taught instructions, while the operator remains involved in preparing and managing the job.
Why are fabricators looking for easier robot teaching?
When every new job requires specialist programming, moving from a changed part or drawing to a usable robot path can create a hold-up. That can make automation harder to apply in workshops handling varied work, where the next job may need a different path or parameter settings. More accessible teaching gives operators a direct role in setting up the work.
It doesn’t make every job suitable for a robot. The part still needs to be presented consistently enough for the taught path to make sense, and the weld must be accessible. But reducing reliance on traditional code can make it more practical to assess automation across changing production demands. TME Systems’ no-code robot welding software guide explores how this operator-led approach can support accessible automation.
Operators bring knowledge that sits close to the work: how the part is positioned, where the weld begins and ends, and what may need adjusting after a test. A teaching method can help translate that knowledge into robot movement, but it doesn’t remove the need to prepare the cell, understand the welding process or follow safe operating procedures. That distinction matters when deciding whether no-code teaching fits your workshop workflow.
How no-code teaching turns a weld path into robot movement
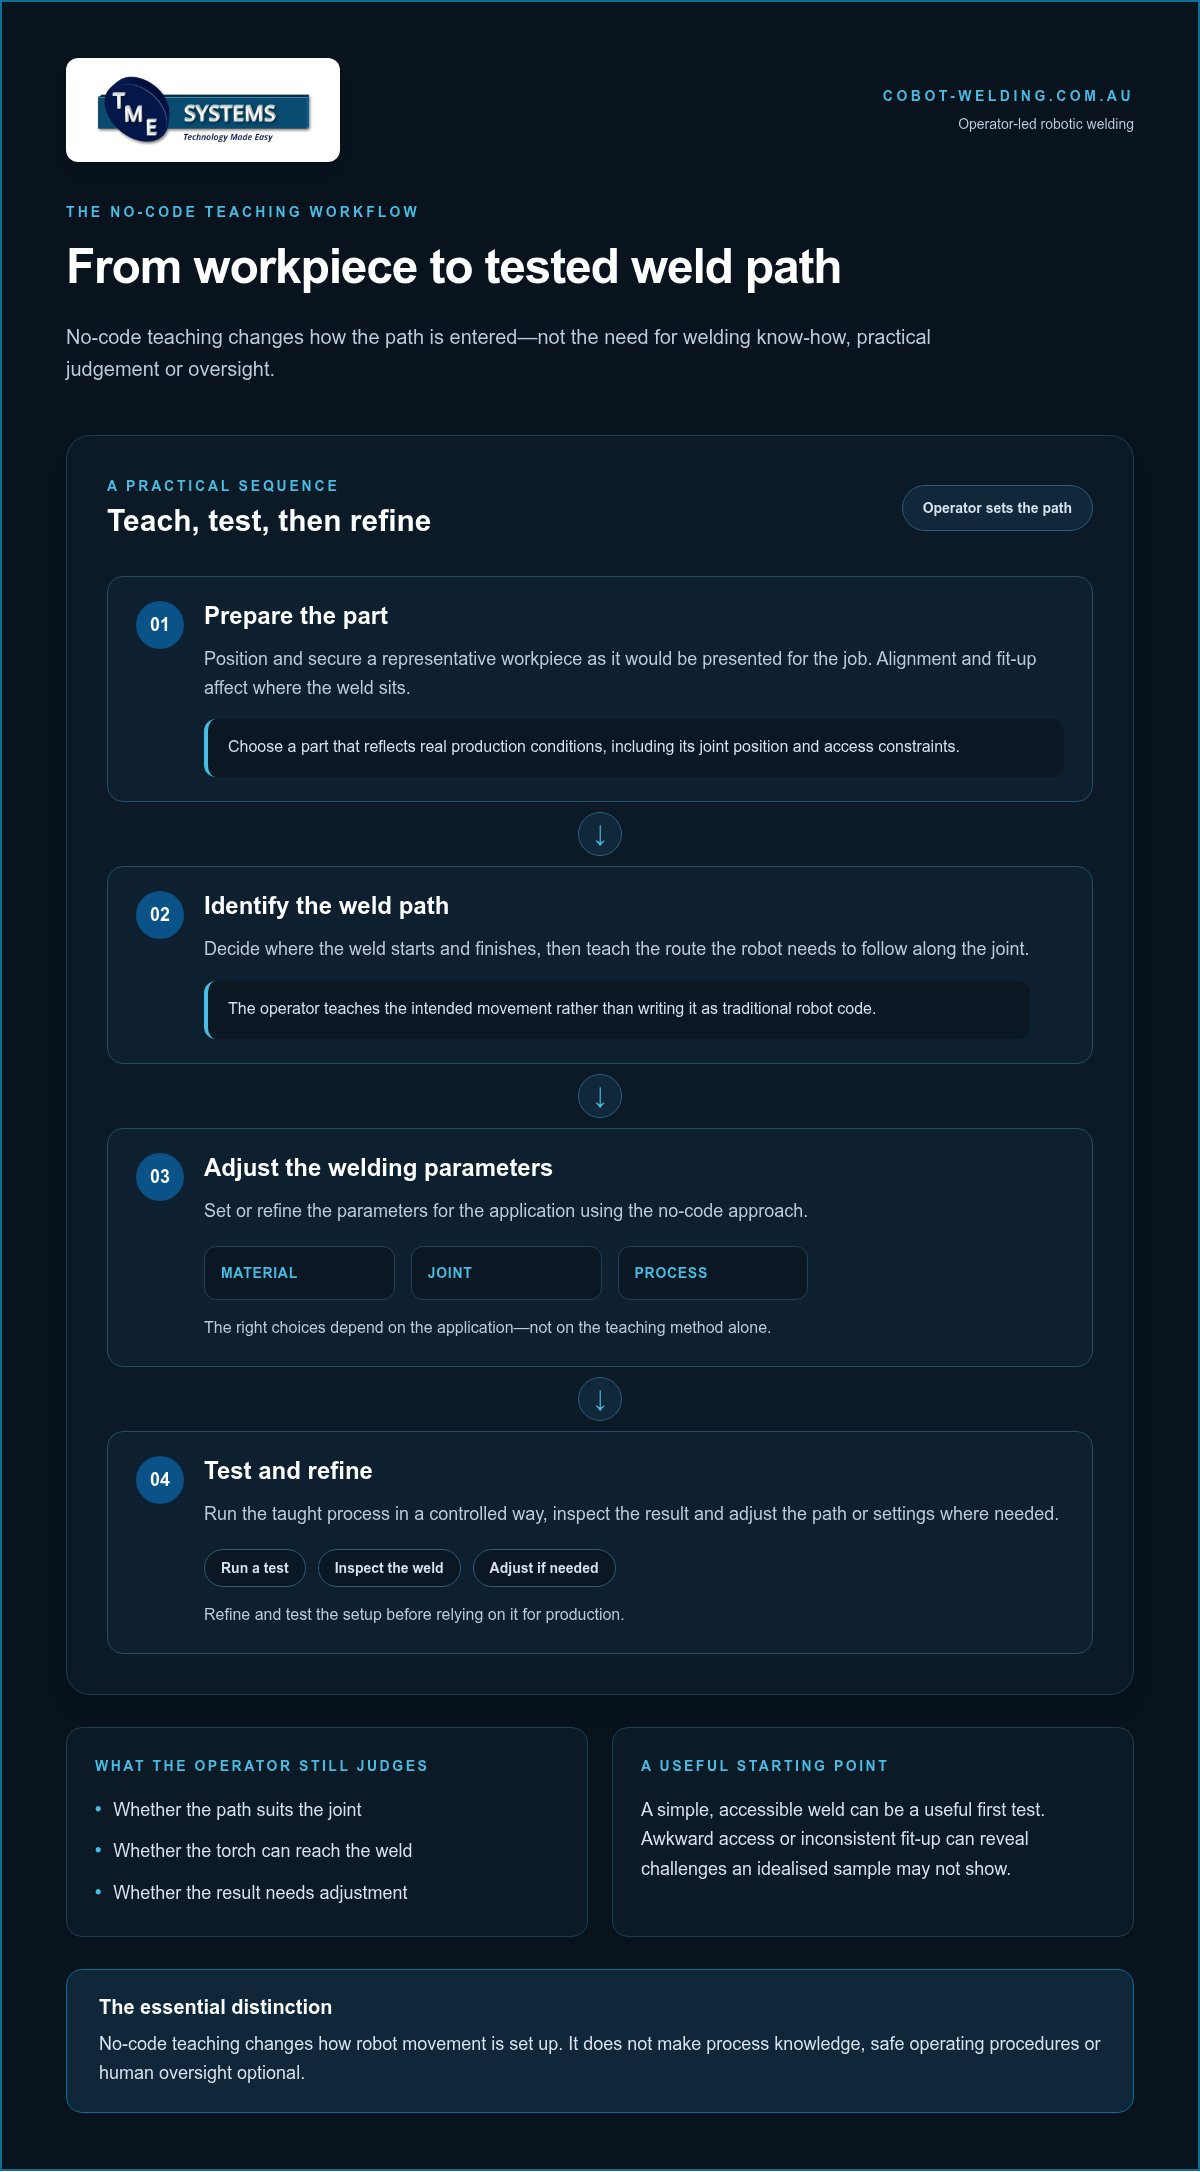
No-code teaching makes path-setting more direct, but it still follows a practical sequence. The operator prepares the part, identifies the weld, teaches the route the torch needs to follow, adjusts relevant welding parameters, then tests and refines the setup. The exact steps vary with the cell, teaching software and welding application, so there isn’t one sequence for every workshop.
No-code changes how a weld path is taught, not why weld quality needs attention. Operators still draw on welding experience to judge whether the path suits the joint, whether the torch can reach it, and whether the weld needs adjustment after a test. The interface may reduce reliance on traditional robot code, but it doesn’t make process knowledge optional.
- Prepare the part. Position and secure a representative workpiece as it would be presented for the job. Part alignment and fit-up affect where the weld sits, so the teaching task should reflect real production conditions.
- Identify the weld path. Decide where the weld starts and finishes, then trace the route the robot needs to follow along the joint. The operator teaches the intended movement rather than writing it as code.
- Adjust the parameters. Set or refine the welding parameters for the application using the no-code approach. The right choices depend on the material, joint and process, not on the teaching method alone.
- Test and refine. Run the taught process in a controlled way, inspect the result and make adjustments where needed. Refine and test the path or settings before relying on the setup for production.
A representative job makes the exercise more useful. Choose a part that reflects the work you want to automate, including its joint position and access constraints. A simple, accessible weld may be a useful starting point. A part with awkward access or inconsistent fit-up can reveal challenges that a demonstration on an idealised sample won’t show.
Teaching also gives the operator a chance to apply judgement at each stage. They can consider whether the torch angle and travel path suit the joint, then assess whether adjustments are needed after examining the test weld. The Certified Robotic Arc Welder (CRAW) credential provides context for the specialised knowledge associated with robotic arc welding. No-code teaching changes how robot movement is set up; it doesn’t remove the value of that knowledge.
For a cell to work in a real production environment, the teaching workflow also needs to fit the equipment and the way jobs move through the workshop. TME Systems integrates welding systems with production equipment and workflows. If you’re considering programming free welding robots, a practical next step is to see how a collaborative welding setup handles a representative part through TME Systems’ mobile demonstration system.
No-code teaching versus CAD-based robotic welding programming
Both operator-led no-code teaching and CAD-based offline programming help translate a welding job into robot movement. The difference is where the instructions begin and how the path is developed. With no-code teaching, an operator teaches and adjusts the path directly. With an offline workflow, programming starts with digital part information and planned movements before the robot runs the job.
Neither method is automatically better. The right fit depends on the parts, the available digital information, job variation and how the robot can be scheduled around production. Use this comparison as a starting point, then assess the actual part and welding process.
| Consideration | Operator-led no-code teaching | CAD-based offline programming |
|---|---|---|
| Starting input | The physical part and the weld path an operator wants the robot to follow. | Digital part information, such as a CAD model, used to plan the robot’s work. |
| Where path work happens | The operator teaches and adjusts the path through the no-code teaching approach. | Path planning is developed from the digital model before the robot runs the job. |
| Operator involvement | Direct involvement in teaching the path and making practical adjustments. | Involvement in preparing or using digital information, reviewing the plan and applying it to the real job. |
| May be worth assessing when | The work calls for hands-on teaching on the part, or the operator needs to make path adjustments directly. | Useful digital part information is available and planning before the robot runs the job suits the workflow. |
When operator-led no-code teaching may suit the job
This approach is worth assessing when operators need to teach or adjust a path directly for the parts being made. Job mix matters: a frequently changing schedule can make hands-on teaching relevant, while the time available to prepare each job also shapes the decision. Part access matters too. The final fit depends on the real workpiece, its presentation and the welding process, not just the teaching method.
When CAD-based offline programming may suit the workflow
CAD-based workflows begin with digital part information. A model can support path planning away from the production cell, helping teams consider the robot’s movements before running the job. That planning still needs to reflect the physical part and production setup. For broader considerations around the equipment and work area, see this collaborative robot welding cell guide.
Some workshops may find that one approach suits a particular job better than another. The choice shouldn’t rest on broad claims about speed or accuracy. For programming free welding robots, focus on whether operators can work with the physical part and teach the required path in the time available. For CAD-based programming, consider whether reliable digital information is ready to support planning. In either case, test the workflow against representative work and account for the production process around the cell.
How to assess whether programming-free welding fits your workshop
Assess the work, not the label. A no-code teaching method may make it easier for operators to teach paths, but that doesn’t guarantee every job will suit a welding robot or deliver a particular productivity, quality or labour outcome. Start with representative parts and follow the way each job actually moves through your workshop.
Use this checklist to guide an initial assessment:
- Part repeatability: Do parts arrive in a consistent position, with the joint in a predictable place? Note variation in fit-up and presentation, as these can affect how well a taught path applies to the next part.
- Weld access: Can the robot reach the weld along the intended route? Consider the part’s shape and how it’s held, rather than judging access from a drawing alone.
- Job changes: How often does the job change, and what needs to be retaught or adjusted each time? High-mix or small-batch work isn’t automatically suitable. The setup and teaching effort still need to make sense for the workflow.
- Operator involvement: Who knows the weld requirements, prepares the part and can assess the result? A practical teaching approach works best when those decisions are understood and accounted for.
- Production fit: Where does setup happen, and how would teaching and testing fit alongside other work? Include handling and preparation steps, not just the robot’s welding task.
Which welding jobs are worth assessing first?
Begin with a job where the weld location and part presentation are easy to examine. Gather representative parts, including normal variation, and consider how often the job returns to production. A frequently repeated job may be a useful starting point, but only if access, fit-up and the surrounding workflow are workable. Check the real part rather than assuming a neat sample reflects production conditions.
What should operators and production teams consider?
Map the work from preparation to production: who positions the part, teaches the path, adjusts parameters and oversees the process? Then identify where conventional programming currently causes delays and whether operator-led teaching could address that specific hold-up. This also helps identify who needs onboarding and what practical knowledge they’ll need to apply.
Simpler teaching supports operators; it doesn’t replace welding judgement, process understanding or safe work practices. Teams still need to assess the weld, part and work environment, and ensure the cell is operated safely. The cobot welder training guide provides useful context for preparing staff to work with a new teaching workflow.
Use the checklist to select a real application, then assess whether programming free welding robots suit its parts and production demands. To see a collaborative welding system in a practical setting, explore TME Systems’ mobile demonstration.
Putting programming-free welding into practice with TME Systems
Once you’ve identified a job worth assessing, connect the teaching method to the wider production task. TME Systems supplies no-code teaching software and collaborative robot welding cells, so operators can teach weld paths and adjust parameters without traditional robot code. Assess the complete application, not software in isolation.
That means considering the part, how it’s prepared and presented, the welding work, and who will operate the system. A representative job gives the discussion a practical focus. It helps the team consider whether the taught path suits the real part and how a robotic welding cell could fit into the existing workflow.
From application assessment to operator onboarding
Start with the welding task you’ve selected for assessment. Discuss the part and weld, how the job currently moves through production, and where programming or setup affects the workflow. TME Systems’ integration work connects collaborative welding solutions with production equipment and processes, while operator onboarding supports staff as they learn to use the system. This keeps the focus on a workable handover into day-to-day production, not just the initial teaching task.
Onboarding also helps operators become familiar with their role in the process: preparing the job, teaching paths and making relevant adjustments. Their welding experience remains central. The robot follows the taught movement, while people continue to assess the work and oversee how the cell is used.
What to do next if the approach looks suitable
A mobile demonstration makes the assessment more concrete. Focus on a representative welding application and the conditions that matter in your workshop, such as part variation, weld access and how the job fits into production. Seeing a collaborative welding system in use helps the team explore the teaching approach against practical questions, without assuming it will suit every job.
Before taking the next step, align the people involved in production, welding and setup. That way, the discussion includes operator needs as well as the technical application. TME Systems supports the assessment through welding system integration and operator onboarding, connecting the cell and teaching workflow with the work it’s intended to support.
If programming free welding robots look relevant to a job in your workshop, discuss the welding task, production workflow and operator requirements with TME Systems. You can arrange a mobile welding robot demonstration to explore the application, or talk with TME Systems about programming-free welding.
Choose a practical next step for your workshop
Turn interest in programming free welding robots into a focused application discussion. Choose a welding task your team wants to assess, then consider what a useful demonstration needs to show: how the path is taught, how the workflow fits around production, and what operators need to learn.
TME Systems can bring those questions into a practical conversation about no-code teaching software, collaborative cell integration and operator onboarding. Its mobile demonstration system offers a way to explore the approach against relevant workshop work, rather than relying on assumptions about how it might perform.
You don’t need to have every detail resolved before exploring the idea. A clear picture of the task, current workflow and operator needs gives the discussion a useful starting point. Discuss programming-free welding with TME Systems and take the next step at a pace that makes sense for your production needs.
Frequently Asked Questions
What does programming-free mean for a welding robot?
Programming-free means setting up a robot’s welding movements through a teaching method rather than writing traditional robot code. It changes how instructions are entered, not who decides what the weld needs. For example, an operator still needs to consider the joint and part position when defining a path. The robot then follows the taught instructions. The term doesn’t mean the system makes every process decision or works without people overseeing the job.
Can operators teach a welding robot without writing code?
Yes. No-code teaching software lets operators teach weld paths and adjust parameters without writing traditional robot code. This can make path setup more accessible to staff who understand the welding task but aren’t specialist robot programmers. With programming free welding robots, operator experience remains important: the person teaching the system needs to understand the intended weld and assess whether the taught movement suits the workpiece and production task.
Is programming-free welding the same as offline robot programming?
No. Programming-free teaching and offline programming use different workflows. No-code teaching centres on an operator teaching the robot’s path, while offline programming generally starts with digital part information to plan robot movements away from the production cell. The practical distinction is the starting point: hands-on work with the application or a digital model. Which is more suitable depends on the job and the information available to the team.
Do programming-free welding robots still need operator supervision?
Yes. Operators remain responsible for overseeing the work, checking that the part is presented as expected and assessing the weld produced. They also need to follow the cell’s safe operating procedures and understand what to do if the job or setup changes. No-code teaching can simplify how a path is taught, but it doesn’t make welding judgement, process awareness or safe operation unnecessary.
Can programming-free teaching work with different welding jobs?
It may suit more than one job, but each application needs to be considered on its own. A change in part shape, joint location, fit-up or access can affect whether an existing taught path is appropriate. For instance, a family of similar components may share useful features, while a substantially different part may need a fresh assessment. Test representative work rather than assuming one setup transfers unchanged to every job.
Does no-code welding software adjust weld parameters as well as paths?
Yes. Operators can use no-code teaching software to adjust welding parameters as well as teach weld paths. The software provides a way to make those adjustments, but it doesn’t remove the need to choose settings with the welding application in mind. Operators should use their process knowledge to assess the result and refine the setup where needed, rather than assuming the software automatically selects the right parameters for every part.
Can a programming-free welding system be integrated with existing workshop equipment?
Yes. TME Systems provides welding system integration to connect collaborative welding solutions with existing equipment and production workflows. The practical assessment should consider how parts are presented, what equipment is already involved and how operators will work with the cell. That helps shape an integration approach around the workshop’s actual process, rather than treating the welding robot as a standalone purchase.