What if the hardest part of programming welding cobots isn’t teaching a path, but making it repeatable on the workshop floor? Traditional robot programming can seem specialised, and setup may feel daunting when jobs vary. A practical starting point is to use operators’ welding knowledge to teach and adjust the cobot for the work at hand.
This guide covers the main stages of programming a welding cobot, from teaching the weld path to refining settings and checking the result. You’ll see what the operator, welding equipment and system integrator each contribute, and where no-code teaching software may help. Interfaces and functions vary, so the right approach depends on the system and application.
Reliable programming is a repeatable workshop process, not just a robot path. The checks below can help you decide whether the setup suits your parts and production mix, assess weld quality and prepare a programme for production. They also keep people and safe work procedures in view at every stage.
Key Takeaways
- Separate the robot’s movement path from the welding settings to pinpoint which part of the process needs adjusting.
- Start programming welding cobots with a representative part, a secure fixture and a clearly defined joint. Teach and refine the path for the specific system.
- An operator-friendly interface can make teaching more accessible, but sound welds still depend on practical process knowledge.
- Use a pre-production checklist to catch fit-up, torch access, clearance and cable issues before welding.
- Plan how operators will learn routine adjustments and receive a validated programme before bringing the cell into production.
What does programming a welding cobot involve?
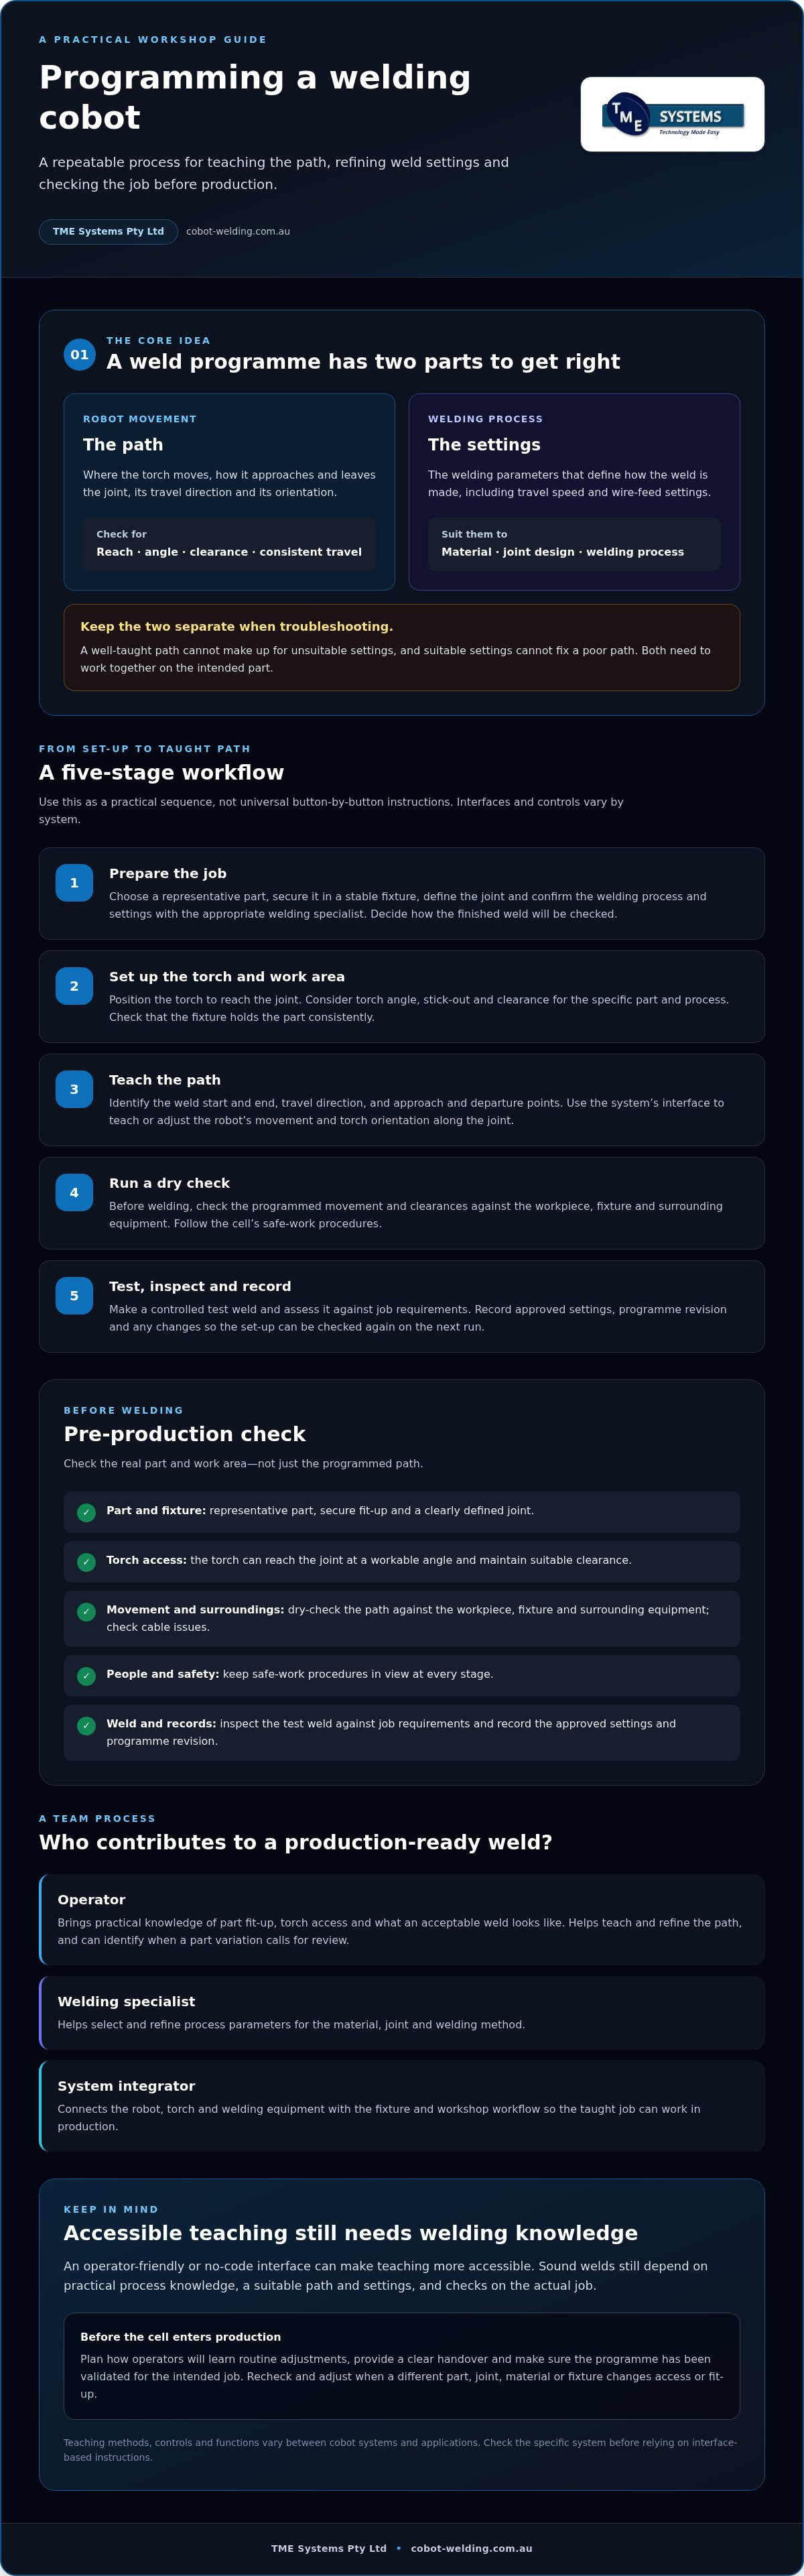
Featured snippet definition: Programming a welding cobot means setting up and checking its movement path and welding process for a specific job, then confirming they work together on the intended part.
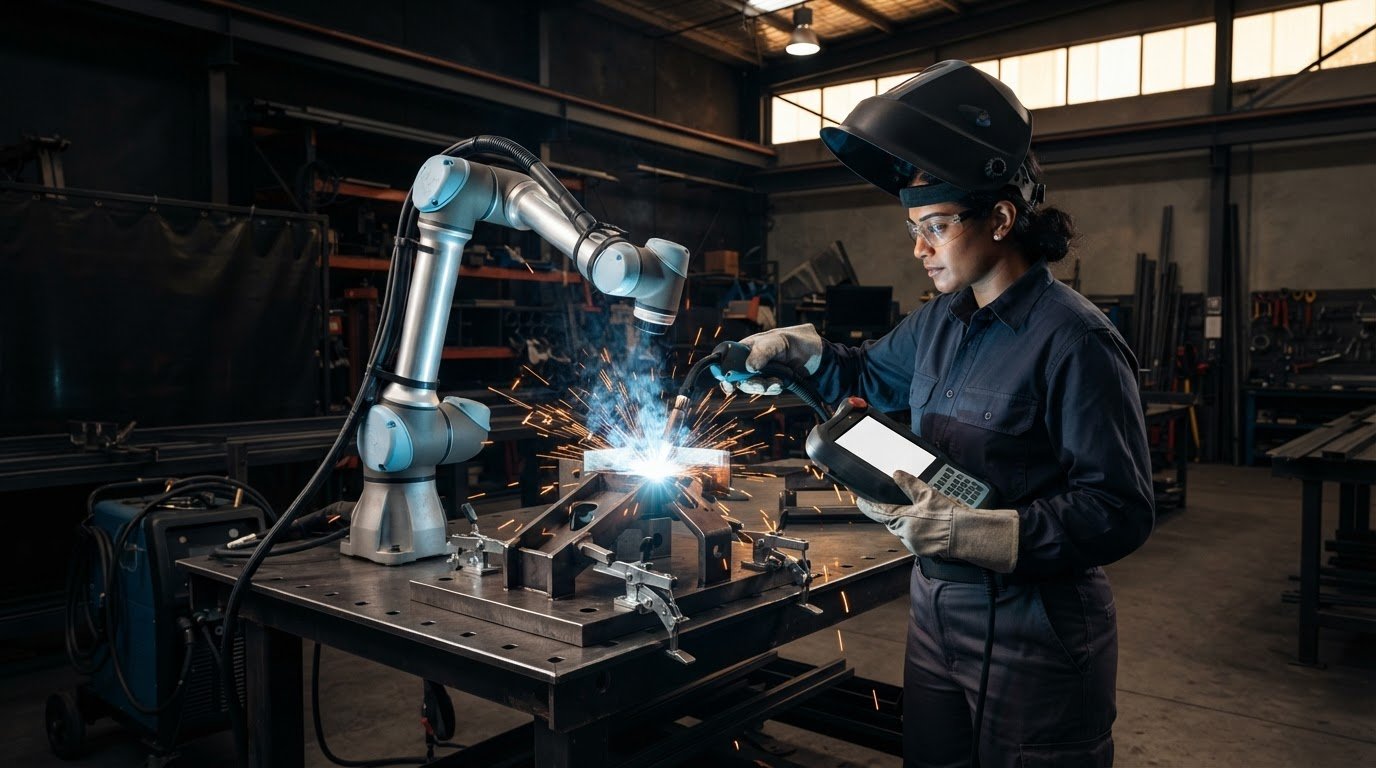
That involves more than showing the robot where to move. The operator positions the workpiece and torch, the robot follows the taught path, and the welding power source supplies the process. The torch needs to reach the joint at a suitable angle and travel consistently, while the workpiece needs to sit where the programme expects it. A collaborative robot (cobot) is designed for interaction with people, but how it is programmed and used depends on the system and application.
Keep the path separate from the weld settings. The path defines where the torch moves, its approach and direction, and its orientation to the joint. Welding parameters, such as travel speed and wire-feed settings, define how the weld is made. Both need to suit the material, joint design and welding process. A well-taught path can’t make up for unsuitable settings, and suitable settings can’t fix a poor path.
Interfaces differ between systems. Some offer no-code teaching, while others use different programming methods. Don’t assume the same controls or steps apply to every cobot. Check the specific system’s functions before following interface-based instructions. The goal is the same: establish and verify a repeatable process for the job.
What information does a welding cobot programme contain?
A programme can include the taught weld path, approach and departure points, travel direction and torch orientation. It may also store reusable job details, such as the intended sequence or setup information. Reuse still requires a check: a different part, joint, material or fixture can change access and fit-up, so the path or welding settings may need review and adjustment.
Who contributes to programming a cobot weld?
Programming welding cobots works best when practical welding knowledge informs the setup. Operators understand how parts fit, where the torch can reach and what an acceptable weld looks like. Welding specialists help select and refine process parameters for the material, joint and welding method. An integrator connects the robot, torch and welding equipment with the fixture and workshop workflow, so the taught job can work in production.
The operator’s contribution continues after teaching. Their judgement can help identify when a variation in the part calls for a review rather than running the same programme unchanged. A clear handover and operator onboarding make routine adjustments easier to understand and help maintain the intended process.
Programming Welding Cobots: From Set-up to Taught Path
A dependable programme starts with a job that’s ready to teach, not with moving the robot at random. The exact interface and controls depend on the cobot and teaching software, so use the steps below as a practical workflow, not as universal button-by-button instructions.
- Prepare the job. Choose a representative part, secure it in a stable fixture, identify the joint and confirm the welding process and settings with the appropriate welding specialist. Decide how the finished weld will be checked.
- Set up the torch and work area. Position the torch to reach the joint. Consider torch angle, stick-out and clearance for the specific part and process. These are setup variables, not universal values. Check that the fixture holds the part consistently.
- Teach the path. A trained operator identifies where the weld starts and ends, the direction of travel, and the approach and departure points. Using the system’s own interface, they teach or adjust the robot’s movement and torch orientation along the joint.
- Run a dry check. Before welding, check the programmed movement and clearances against the workpiece, fixture and surrounding equipment. Follow the cell’s safe-work procedures.
- Test, inspect and record. Make a controlled test weld, then assess it against the job requirements. Record the approved settings and programme revision, along with any changes, so the setup can be checked again on the next run.
How do operators teach a weld path?
Operators bring practical knowledge of fit-up, torch access and the intended weld. They guide the path so the torch can reach the joint at a workable angle and maintain suitable clearance as it travels. Teaching methods and interface terminology vary, so check the specific system’s controls and terminology with TME Systems before following interface-specific steps. For more on operator-led approaches, see this no-code robot welding software guide.
How should the first programme be tested?
Start with a dry-run movement check, then weld a test part under controlled conditions. Inspect the result against the job’s acceptance requirements and make changes methodically, adjusting one variable at a time where practical. Record approved settings and programme revisions, then check repeatability before releasing the job for production. OSHA’s robotic arc welding safety standards page is a supplementary reference, not a substitute for Australian safety advice, the cell’s risk assessment or its safe-work procedures.
Fabricators considering operator-led path teaching can explore TME Systems’ cobot welding systems and teaching options as a starting point for assessing how a setup may fit the workshop.
Is programming a welding cobot difficult or less precise?
Not necessarily. An accessible teaching interface can make it easier for an operator to enter or adjust a robot path, but it doesn’t remove the need for welding knowledge or careful setup. Code-based programming and operator-led teaching are different ways to define robot movement. Neither guarantees an acceptable weld by itself.
| Consideration | Code-based programming | Operator-led teaching |
|---|---|---|
| Workflow | Movement is defined through robot code or a programming environment. | The operator teaches or adjusts the path using the system’s interface. |
| Skills | Requires familiarity with the robot’s programming method. | Uses an accessible interface alongside practical welding and setup knowledge. |
| Adjustments | Changes may involve editing and checking the relevant code or instructions. | Path changes may be made through the teaching interface, depending on the system. |
These are broad distinctions, not a verdict on which approach is best. The right fit depends on the jobs, the system available and the skills in the workshop. To compare intuitive teaching software with traditional coding, consider which method suits the adjustments operators need to make.
Does easier programming mean less welding expertise is needed?
No. Easier path teaching changes how instructions are entered, not what makes a sound weld. Operators still need to understand the relevant weld procedure, job acceptance criteria and how fit-up affects the result. They also need to recognise when a change to the part or setup calls for a review, rather than just a path adjustment.
For welding process guidance, the American Welding Society (AWS) provides resources on welding processes and practice. Use the applicable job specifications and qualified advice to determine requirements for the work.
What affects repeatability beyond the robot path?
A robot can repeat its programmed movement, but the weld can still vary if the real-world setup changes. Check the part’s fit-up, fixture condition, torch consumables and welding equipment setup. Changes in material, joint geometry or torch access may mean the path or process needs review. Assess weld quality against the job specification and applicable requirements. Consistent movement alone doesn’t confirm a consistent weld.
What should you check before running a programmed cobot weld?
A programme isn’t ready for production just because the robot can follow its path. Before programming welding cobots moves from a test into routine work, check that the part, fixture, welding setup and work area match the conditions the programme was built for. A consistent pre-run check can catch changes before they affect weld quality or safe operation.
What belongs on a pre-run programming checklist?
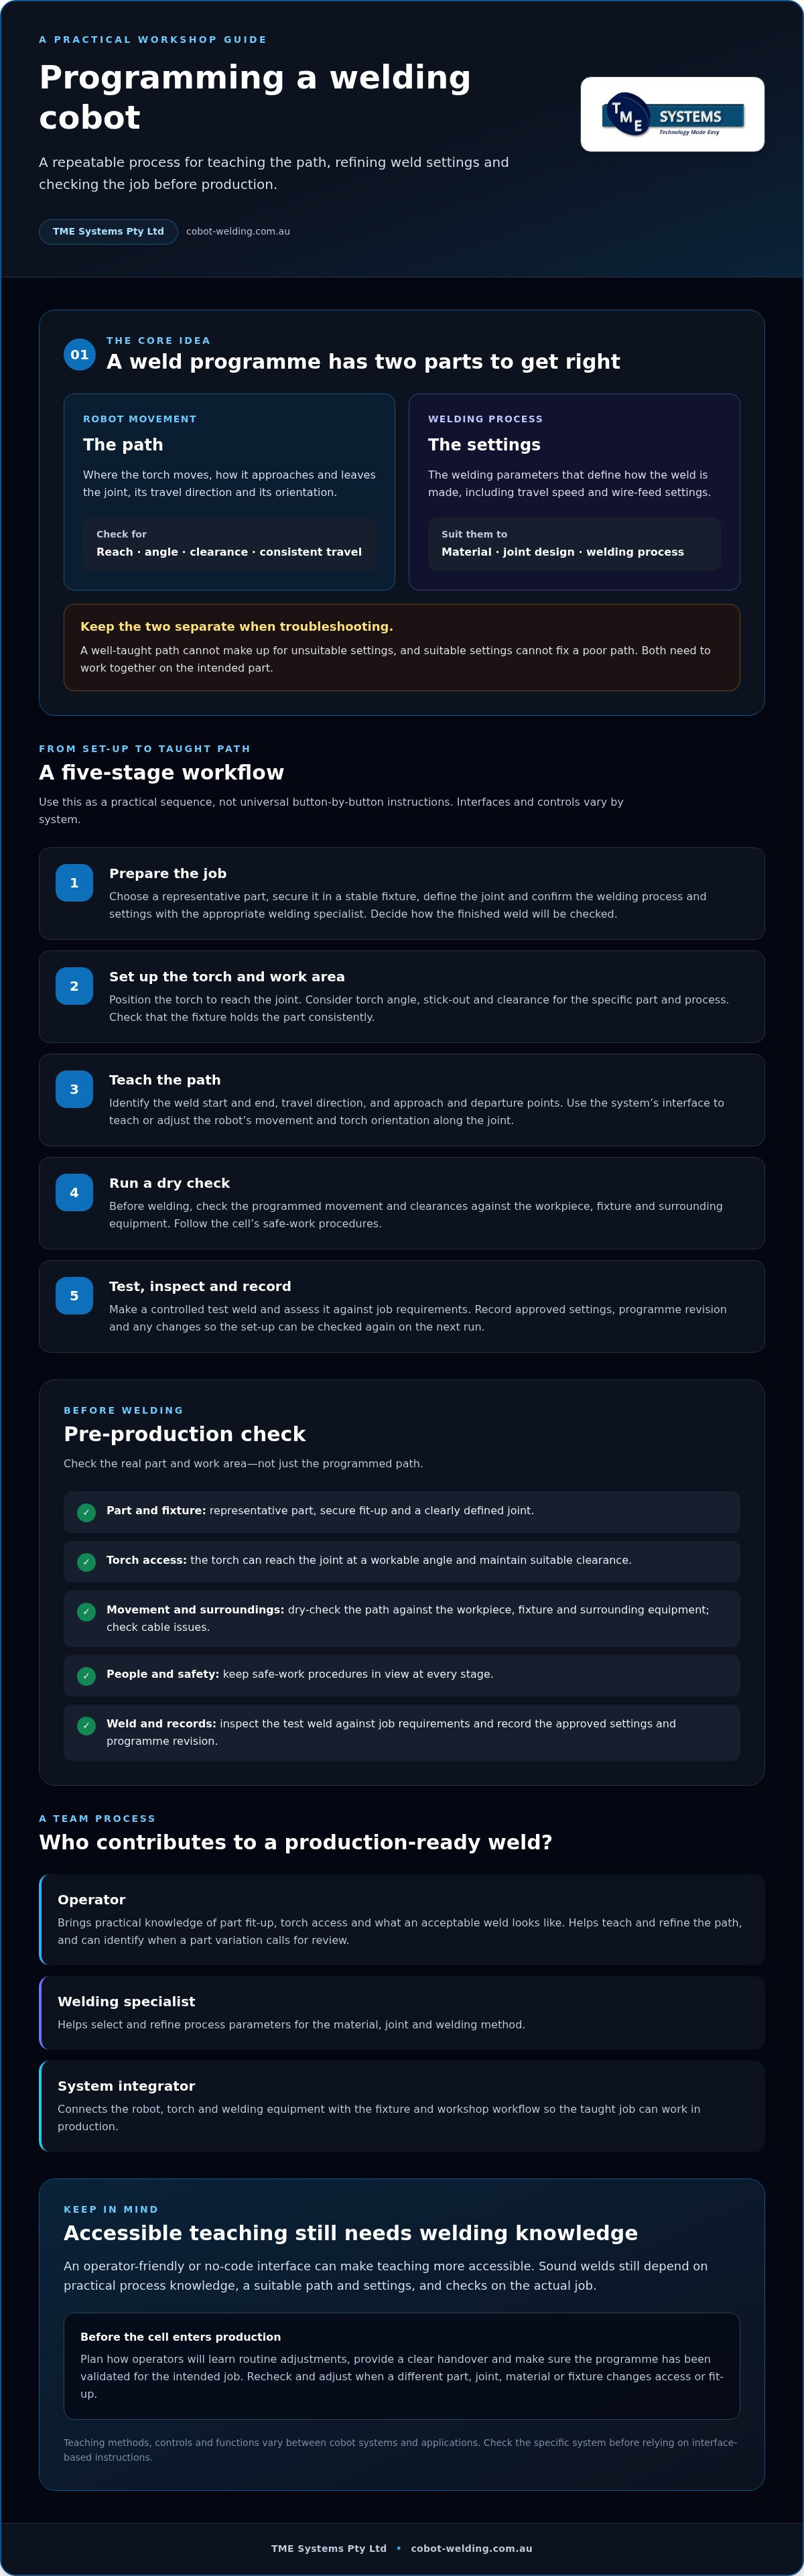
Use a checklist suited to the job and the specific cell. Confirm:
- Workpiece and fixture: The correct part is loaded, located as intended and held securely. Check that the fixture is in sound condition and the joint sits where the programme expects it.
- Programme and welding setup: Select the approved programme revision and verify the welding equipment setup, torch and consumables against the job requirements.
- Path and access: Before striking an arc, run the movement check required by the system and site procedure. Look for possible collisions, unexpected movement, restricted joint access or a torch position that doesn’t suit the workpiece.
- Cell and surrounding area: Check clearances and cable routing. Make sure cables won’t snag or interfere with movement. Operators should know where the emergency stop is and how to use it for their cell.
- Weld inspection and approval: Confirm the required inspection method and who is responsible for accepting the weld. Keep the test-weld result, approved settings and programme revision with the job record.
If any part of the setup differs from the approved conditions, pause and check whether the programme or process needs review. A previous successful run doesn’t automatically approve a changed fixture, material or joint.
How should cobot safety be considered during programming?
A cobot’s collaborative capability doesn’t make every welding application safe by default. Consider the complete task and cell, including robot movement, the welding process, access and nearby work activities. Follow a task-specific risk assessment and the site’s safe operating procedures before testing or production. Safeguards and operating controls need to suit the actual application. Check references to standards such as AS/NZS ISO 10218 or ISO/TS 15066, and any Australian WHS duties, with a qualified source before relying on them.
Keep testing controlled. The people responsible for weld quality should assess the documented test weld against the job specification and applicable requirements before production release. If you’re reviewing cell setup or operator preparation, explore cobot welding systems and operator onboarding as part of planning a practical process.
How integration and operator support make cobot programming work in production
A taught path needs to work with the equipment and routines around it. An integrator can connect the robot, welding equipment and fixtures, and consider how the cell fits into the workshop workflow. This is useful when an existing power source, part-handling approach or production sequence needs to work alongside the cobot. Integration is not just a technical connection. It also means making the complete setup practical for the people who use it.
What should an integration discussion cover?
Bring information about real jobs, not just a general description of the work. A useful discussion can cover:
- Representative parts, joint details, materials and current welding requirements.
- The existing power source, fixtures, work area and how operators prepare and handle parts.
- How a programme will be tested and accepted, who will approve the weld, and how future job changes will be reviewed.
These details help identify what needs consideration before introducing a cell and where the proposed setup may need to align with existing processes. For more on the factors involved, read this guide to welding system integration.
A mobile demonstration can also help fabricators discuss a representative job in a practical setting. Bring a part or describe the joint, access and production requirements, then explore whether the teaching approach and equipment warrant closer consideration. A demonstration can inform planning, but it can’t guarantee a particular production outcome.
How can operators build confidence with a new system?
Good onboarding gives operators the chance to learn the system in the context of their work. Ask how training will cover setup, teaching paths, routine adjustments and safe operation, and how approved programmes will be handed over between shifts or users. Agree on who can make changes and when a process or equipment issue should be escalated for review.
That clarity matters. An operator may notice that a part isn’t sitting as expected or that the torch needs attention. They should know whether the issue calls for a routine adjustment or a pause and escalation. Documenting these responsibilities helps maintain a consistent process without expecting every operator to resolve every fault.
Programming welding cobots can be more accessible with operator-facing teaching tools, but operators’ experience remains essential for setup and weld acceptance. TME Systems supplies collaborative robot welding cells and no-code teaching software, with integration support and operator onboarding. To discuss your application with TME Systems, talk through your cobot welding requirements.
Make your next cobot programme production-ready
Programming welding cobots is more than teaching a robot to follow a path. A dependable process combines a suitable weld path, the right welding setup, a stable workpiece and checks that confirm the result meets job requirements. Accessible, no-code teaching software can help operators teach weld paths without traditional programming, while their experience remains central to setup, adjustments and weld acceptance.
Before production, test the programme against the real part and fixture, document approved changes, and make sure operators understand safe operation and when to escalate an issue. Integration and onboarding help connect the cobot and welding equipment to the way work is done in your workshop. A mobile demonstration can also provide a practical way to discuss a representative job.
If you’re considering a cobot welding application, discuss your welding cobot application with TME Systems and explore the options that may suit your work.
Frequently Asked Questions
Can you program a welding cobot without coding?
Yes, some systems use operator-facing teaching software to teach weld paths without writing traditional code. Functions and workflows vary, so check the specific system with its supplier before choosing an approach. No-code teaching can make path entry more accessible, but it doesn’t replace welding knowledge. Operators still need to prepare the workpiece correctly, understand the process and validate the finished weld against job requirements.
How do you teach a welding cobot a weld path?
Start with a representative workpiece secured in the intended fixture, then use the system-specific interface to teach the approach, weld path and exit. Check torch orientation and clearances before welding. When programming welding cobots, follow the cell’s procedures and operator training requirements, run a controlled test, inspect the weld against job criteria, and document approved changes before using the programme in production.
Do welding cobots need to be programmed for every job?
Not always. Similar jobs may allow approved programmes or settings to be reused, but a new part may need its own path or process setup. Before reusing a programme, confirm that the fixture, joint, material, torch access and welding requirements match the approved conditions. Test and approve the setup for the intended task, especially if the workpiece or job conditions have changed.
Does a welding cobot guarantee consistent weld quality?
No. A cobot can repeat programmed movement, but weld quality also depends on joint preparation, fit-up, fixture condition, consumables, welding settings and inspection. Treat the robot path as one part of a controlled process. Test the programme on representative parts and assess the weld against its acceptance requirements. Review the setup if material, joint geometry or other job conditions change.
Are welding cobots safe to program and operate?
Safety depends on the complete application, not the cobot label alone. Consider the robot, welding equipment, work area, task and people nearby through a suitable risk assessment and site procedures. Operators should receive system-specific onboarding and follow approved safe-work practices. Check the Australian WHS obligations and standards relevant to the workplace and application with a qualified source.
Who should program a welding cobot?
Programming may involve an operator, welding specialist and systems integrator, with responsibilities depending on the application. Operators contribute knowledge of the parts and workshop workflow. Welding specialists help establish suitable process settings, while integrators connect the robot and welding equipment with the production setup. Ensure people who will run or adjust the cell receive appropriate onboarding and know how to escalate process or safety concerns.
What information should I prepare before discussing cobot welding programming?
Gather representative parts, joint details, material information and current welding requirements. Note the existing welding equipment, fixtures, access constraints and expected production workflow, as well as who will operate the cell. Real parts can reveal fit-up or presentation differences that a drawing may not show. This information gives an integrator a practical starting point for discussing teaching, testing, acceptance and operator onboarding.