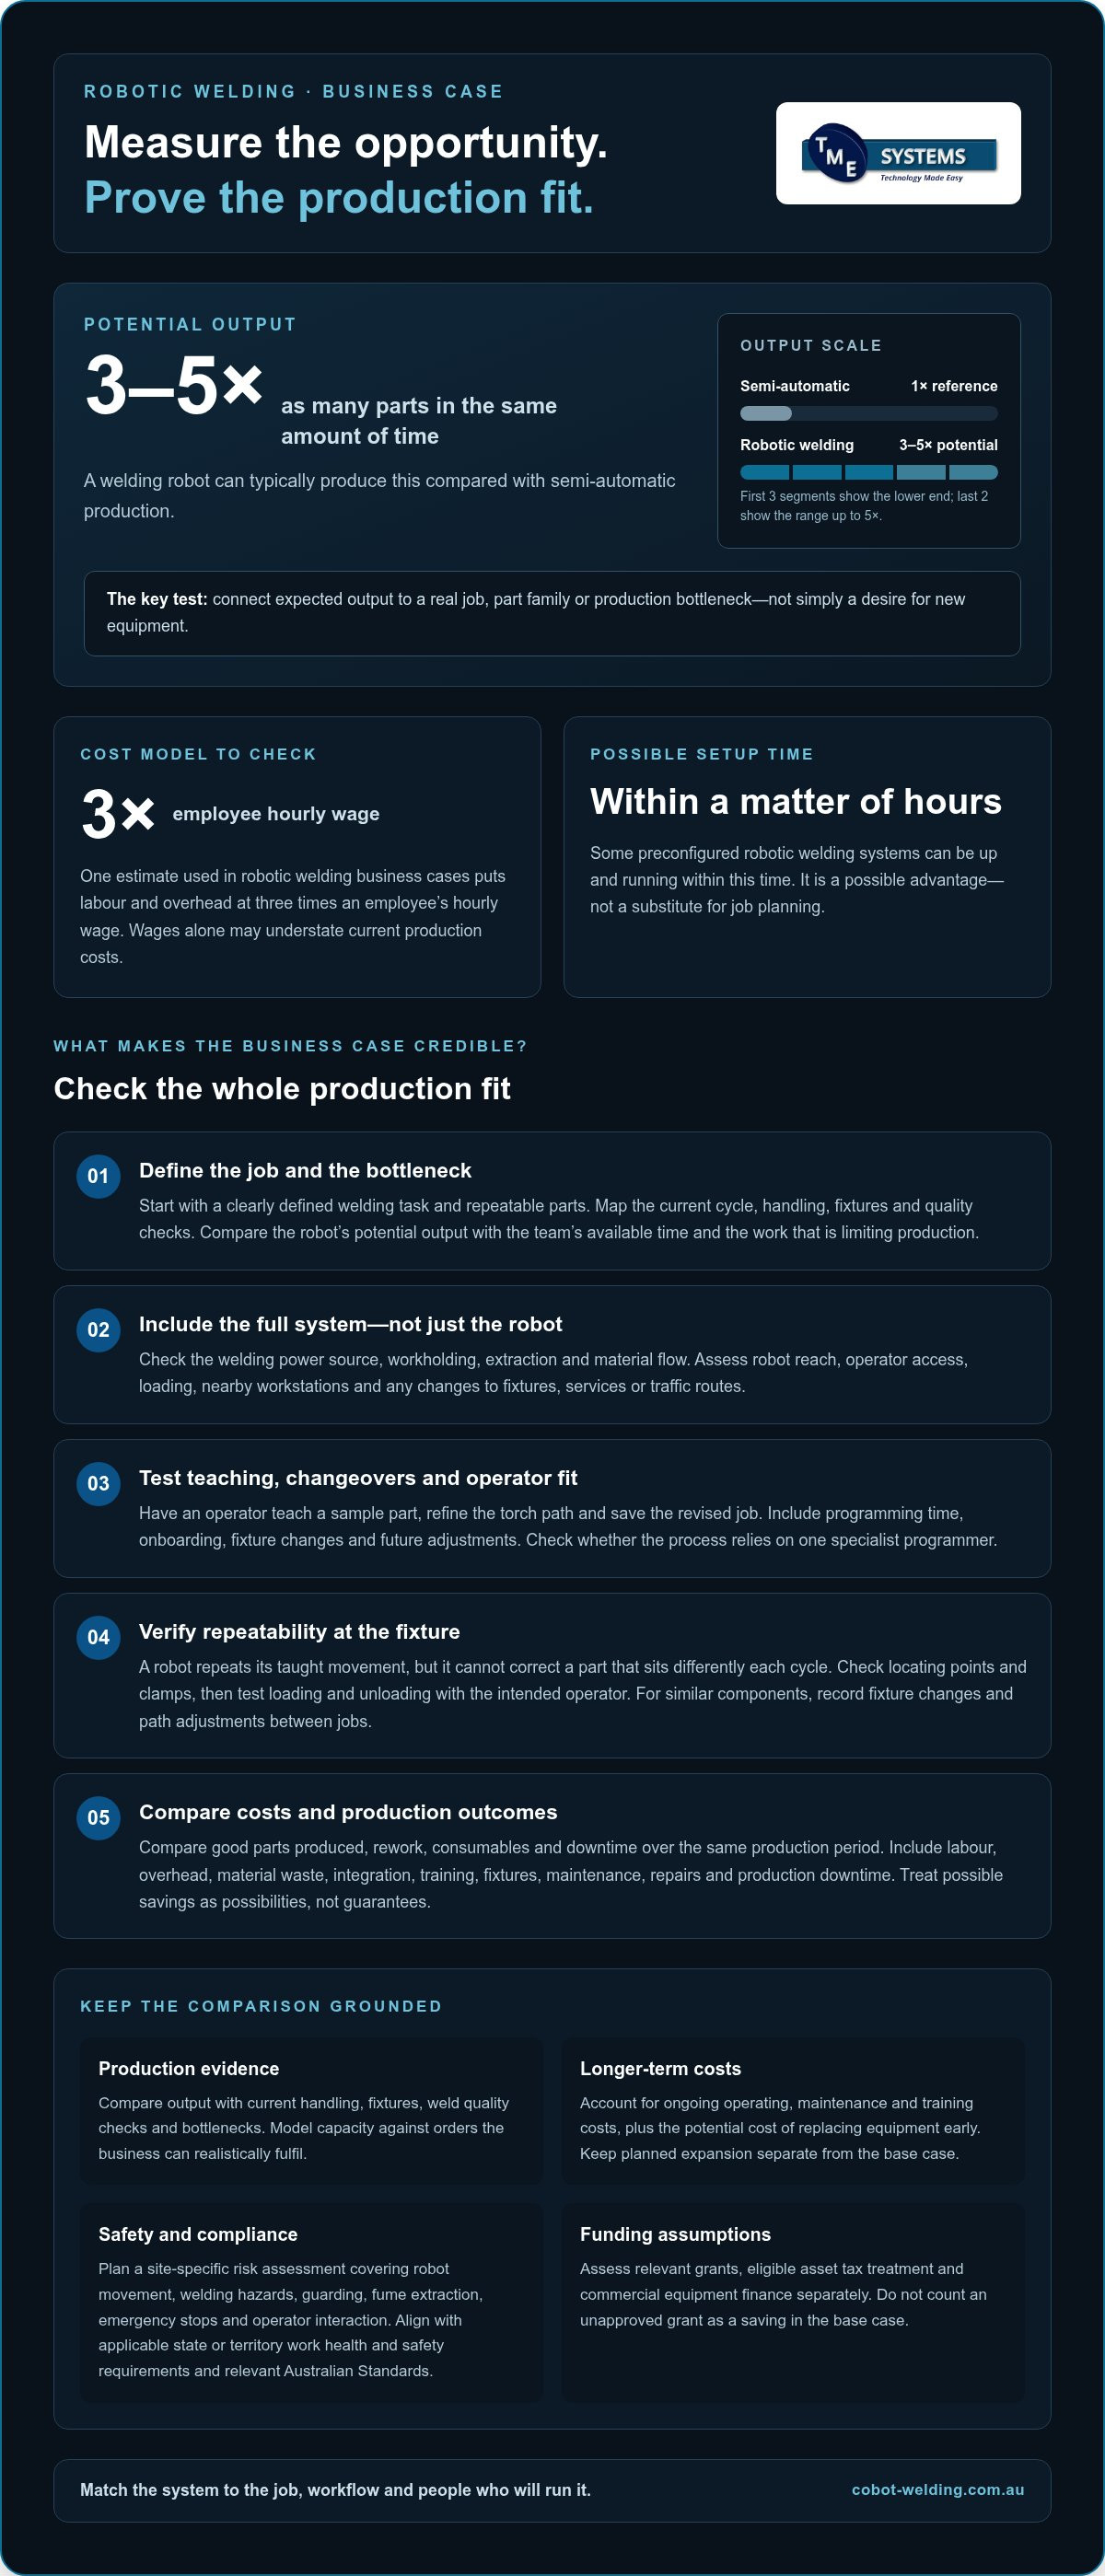

A welding robot can typically produce three to five times as many parts in the same amount of time as semi-automatic production. To work out how to justify buying a welding robot, compare that potential output with your current bottlenecks, the parts you make and the time your team can give to each job. The case is strongest when automation addresses a real production need, not just a desire for new equipment.
It makes sense to weigh the investment carefully. A robot needs suitable parts, repeatable welds and operators who can set up and manage the work. The benefits depend on how well the system fits your production process.
This guide explains five practical ways robotic welding can support productivity, from simpler programming and repeatable results to faster output and collaborative robots for high-mix, low-volume work. You’ll also see how to assess whether those advantages align with your production needs, so you can build a grounded case for your next step.
Key Takeaways
- Start with a defined welding task and assess your parts, workflow and integration needs before setting the project scope.
- Choose a system operators can learn to teach and adjust, so programming doesn’t become a production bottleneck.
- Look for repeatable parts and weld paths to make robotic consistency useful across production runs.
- Compare a robot’s potential output with your current process, including the time needed for setup and handling.
- For high-mix, low-volume work, consider whether a collaborative robot can adapt to different jobs and make use of existing assets or manual jigs.
1. What are the advantages of robotic welding?
A robotic welding system can typically produce three to five times as many parts in the same amount of time as semi-automatic production. That potential matters when labour availability, rising hourly rates or a difficult-to-reach weld is limiting output. To justify buying a welding robot, connect the expected production gain to a specific job, part family or bottleneck in your Australian workshop.
Start with a clearly defined task that uses repeatable parts. Map the current cycle, handling, fixtures and quality checks, then identify what equipment already suits the job and what needs to change. Consider the welding power source, workholding, extraction and material flow. A defined first project keeps the scope practical and makes clear that the robot is part of an integrated production system, not a standalone purchase.
Include labour, overhead and material waste in the comparison. An estimate used in robotic welding business cases puts labour and overhead at three times an employee’s hourly wage, so wages alone may understate current production costs. Compare good parts produced, rework, consumables and downtime across the same production period. If a robotic welding system reduces inconsistent welds or repeated handling, show how that could affect scrap and available labour, without assuming every saving will occur automatically.
Facility changes can also affect the investment. Walk through the proposed cell location and map robot reach, operator access, material loading and movement around nearby workstations. A system may fit the floor plan but still require changes to fixtures, services or traffic routes. Add these tasks to the project scope before comparing options. Match the collaborative welding cell to the job and workflow, rather than assuming a larger installation is necessary.
For a longer-term view, compare the initial system and integration work with ongoing operating, maintenance and training costs. Model production capacity and potential revenue against orders the business can realistically fulfil, and keep planned expansion separate from the base case. Consider whether the setup can adapt to future jobs or processes, and include the potential cost of replacing equipment early, not just its initial setup.
What Australian workplace safety standards and regulations apply to welding robots? Plan a site-specific risk assessment around robot movement, welding hazards, guarding, fume extraction, emergency stops and operator interaction. Align the installation with applicable state or territory work health and safety requirements and relevant Australian Standards.
What training, integration, maintenance and ongoing costs belong in the business case? Include operator training, system integration, fixtures, consumables, planned maintenance, repairs and production downtime. What Australian grants, tax incentives or financing options support buying manufacturing robots? Assess relevant federal or state grant programs, eligible asset tax treatment and commercial equipment finance separately. Don’t count an unapproved grant as a saving in the base case.
2. Choosing a robot that is easy to program
How operators teach and adjust weld paths can affect whether automation supports production or creates a new bottleneck. TME Systems’ No-Code Teaching Software is designed for welders and operators, and no coding experience is needed. Ease of teaching is a practical factor in the business case, alongside the robot’s welding capability.
Compare how operators create and adjust a weld path. Traditional robot systems may rely on specialist programming, while operator-focused no-code teaching lets experienced welders apply their process knowledge directly. During a demonstration, ask an operator to teach a sample part, refine its torch path and save the revised job. This shows how teaching fits the skills and workflow on your production floor.
Offline programming can help prepare jobs before a robot reaches the cell. Build a digital model of the part, torch and fixture, then plan the weld sequence and check access. The model is useful only if it reflects the real setup. Confirm fixture dimensions, clamping positions and part orientation against the physical components. A mismatch can send the torch along an incorrect path, so include a fit check and controlled weld test in the first trial.
Fixture setup deserves equal attention. A robot repeats its taught movement, but it cannot correct a part that sits differently in each cycle. Use locating points and clamps that hold the workpiece consistently, then test loading and unloading with the intended operator. For similar components, record the fixture changes and path adjustments needed between jobs. This shows whether changeovers are straightforward or require substantial re-teaching.
Some preconfigured robotic welding systems can be up and running within a matter of hours. Treat that as a possible setup advantage, not a substitute for planning the job. Before commissioning, prepare sample parts, confirm the weld sequence and agree on acceptance checks. Include programming time, operator onboarding, fixture changes and support for future adjustments in the project evaluation. These tasks influence how quickly a team can put a new job into production.
Keep the learning curve visible in the business case. Compare who can teach a job, how changes are made and whether the process depends on one programmer. If collaborative automation suits the task, exploring a cobot welding approach can help clarify how operators might teach and refine weld paths in their own workflow.
3. Robotic welding productivity and consistency
A robotic welding system repeats a taught path, so consistency depends on repeatable parts and reliable positioning. Parts don’t need to be perfect, but gaps, distortion and inconsistent fit-up can affect the weld. Identify variations in current production, then decide whether preparation or fixturing can reduce them. Consistent locating points, for example, help present each component in the same position.
Group production by part family before estimating output. Compare components with similar geometry, joint types, materials and weld positions, then identify where one setup could serve several jobs. A batch of matching brackets may suit a stable path, while a mix of frames may need frequent adjustments. This shows whether the robot can run useful work between changeovers or sit idle while the team resets fixtures.
Measure output using accepted parts, not just arc-on time. Record how many finished components pass your existing inspection process, how much rework each job needs and where operators spend time loading or repositioning parts. Compare the same measures during a representative robotic run. This makes the productivity question specific: does automation increase saleable output, free skilled workers for other tasks or reduce delays at a particular station?
Production costs may fall when a repeatable process reduces rework, scrap or manual handling. Build the comparison around a particular part family. Track material use, rejected components, consumables and labour time, then identify which costs the robot could influence. Keep fixture preparation, teaching and equipment downtime visible too. A lower cost per accepted part is useful only when the calculation includes the work required to produce it.
Consistency can also make process drift easier to spot. Set a first-piece check after a new setup and compare the weld against the same inspection criteria used for manual work. If a part shifts in its fixture or fit-up changes, investigate the cause before repeating the run. A recorded path can support repeatability, but it won’t correct poor part location or replace sound process checks.
Use production records to test the business case at different demand levels. Compare a steady run of one component with a schedule that switches between related parts. Note changeover time, completed units, rework and operator involvement in each situation. This reveals whether the expected output depends on long, uninterrupted runs or remains useful across the mix your workshop receives.
Finally, separate measured results from projected gains. Use an actual production trial or a representative sample job to validate cycle steps, handling and weld quality. If output improves but finished stock cannot be sold or used, the extra capacity has limited value. Tie the investment decision to customer demand, available materials and the production constraint the robot is intended to relieve.
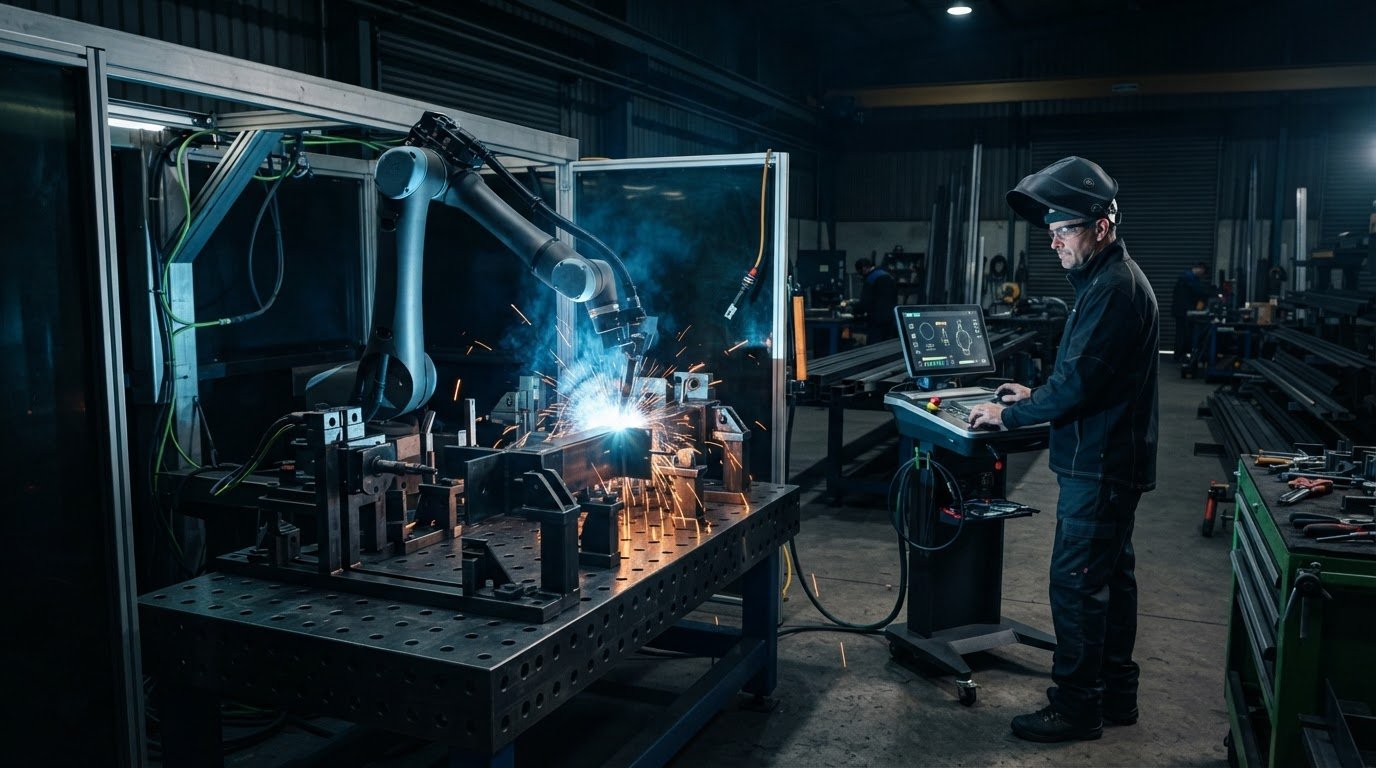
4. Welding speed compared with human welders
Speed can strengthen a business case, but compare complete production cycles rather than welding time alone. A conservative estimate is that one welding robot can double a manual welder’s output; another estimate puts a robot’s production rate at triple that of a manual welder. Collaborative robots are described as welding 3-10 times as fast as human welders. Treat these as potential benchmarks, then measure your own parts, weld lengths and changeovers.
Output also depends on what happens around the arc. A robot may weld while an operator prepares the next component, but loading, clamping, inspection and repositioning still take time. Select a representative job and record each step, from loading the fixture to removing the finished part. Compare accepted parts per shift, not just torch-on time. This reveals whether the robot can improve the whole cell’s output.
How do robotic welding costs compare with manual welding and cobots? Manual welding avoids buying a robot, while a robotic system adds equipment, integration, fixtures, training and ongoing operating costs. A collaborative robot may suit a different production setup, so compare each option against the same parts, staffing needs and expected output.
The purchase price depends on the configuration and is provided after a quote request; cost factors include robot capability, welding equipment, fixtures, integration, safety measures and operator training. Include these alongside maintenance and consumables when comparing a robotic welder with manual production. Don’t base a decision on purchase cost alone. The relevant measure is the cost of producing accepted parts over the period used in your business case.
Skilled welder availability can also shape the decision. If recruitment is difficult or experienced staff spend much of their time on repetitive welds, automation may help allocate their skills to setup, quality checks and complex work. Involve welders early. Their knowledge of joint preparation, fit-up and weld defects helps establish workable robot settings and can reveal practical concerns before integration.
Retaining experienced people matters. Present the robot as a production tool that supports skilled work, not as a replacement for trade knowledge. Train existing welders to teach paths, adjust parameters and troubleshoot common issues. Start with a defined job, provide hands-on practice, then let operators run and review sample parts. This builds team capability and reduces reliance on one specialist.
Finally, match speed to demand. If orders cannot use the extra capacity, faster welding may not improve business performance. Compare expected output with the production schedule, available materials and downstream capacity. A robot earns its place when it addresses a real constraint and the team can keep it supplied with work.
5. Collaborative robots for high-mix, low-volume welding
High-mix, low-volume shops may run several part types without long production batches. A system built around one fixed job can spend valuable time waiting through changeovers. A collaborative robot can suit work that requires operators to switch between different weld tasks. Compare the time spent teaching paths, changing settings and repositioning parts with the production time available for each job.
Start by selecting a small family of parts with similar joints or weld positions. For example, a workshop producing different support frames could group jobs that share a fixture or torch approach. Check each part’s material, joint access and fit-up, then identify which settings need adjustment between jobs. Changing a robot’s settings can help adapt it to different requirements, but each change still needs a repeatable process.
Existing workshop assets may help reduce disruption. Some collaborative welding setups can use existing assets and manual jigs. Before planning around a jig, assess its locating points, clamping method and repeatability across the part family. A jig that holds one frame securely may not position a smaller bracket consistently. Trial each representative component and record the setup changes required.
Measure changeover work carefully. Record the steps an operator takes to switch jobs, including fixture changes, parameter selection and path teaching. Then run a representative mix of jobs and note completed parts, rework and time spent resetting. Compare this with the current manual process. A robot’s potential speed matters less if short runs create frequent interruptions.
Collaborative robots are described as welding 3-10 times as fast as human welders. That comparison is a useful prompt for a trial, not a complete production forecast. Measure the full task, including loading, checking and moving each workpiece. Also consider whether the operator can prepare the next part while the robot welds. This reveals where faster arc work translates into useful output.
Use a practical decision rule: collaborative welding suits a job when the parts can be positioned consistently, operators can manage the changes, and the work mix keeps the cell usefully occupied. If your shop is weighing up that approach, explore collaborative robot welding as part of assessing the right setup for your parts and workflow.
TME Systems: No-Code Teaching Software
TME Systems’ No-Code Teaching Software lets operators teach weld paths and adjust parameters without traditional programming. It may suit a workshop looking to make robot setup more accessible to its welding team, especially when jobs and weld paths change.
TME Systems offers Collaborative Robot Welding, Welding Automation Integration and a Mobile Demo System. The demonstration brings the welding cell to your site so you can explore how a collaborative welding setup fits your parts, existing workflow and production goals.
Contact TME Systems or visit cobot-welding.com.au to discuss your welding automation plans.
Turn your production case into a practical next step
If you’re weighing how to justify buying a welding robot, define the decision around a real production challenge. Choose a part or job that shows where time, consistency or flexibility matters, then discuss that example with TME Systems. A focused conversation can connect your workshop’s requirements with a suitable approach, rather than starting with equipment alone.
TME Systems offers No-Code Teaching Software, Collaborative Robot Welding and a Mobile Demo System. These can help you explore how operators might teach weld paths and how a collaborative setup could fit your parts and workflow. To get started, outline what you make, how jobs change and what you want the system to improve.
Contact TME Systems about robotic welding and take the next step towards a considered decision for your shop.
Frequently Asked Questions
What are the advantages of robotic welding?
Robotic welding can help a workshop produce more consistent welds, increase available capacity and manage repetitive or awkward tasks. The practical advantage depends on the job: a robot may suit a component that repeatedly ties up an experienced welder, while a highly variable, one-off job may remain better suited to manual work. Consider quality requirements, operator workload and the production constraint together.
What is the typical cost of a welding robot system in Australia?
There isn’t one typical cost for every Australian welding robot system because the final configuration depends on the robot, welding equipment, fixtures, integration and operator training required. A system designed for a repeatable part differs from one needing changes for varied jobs. For a business-specific figure, the price depends on the case and is provided after a quote request; cost factors include the equipment, cell design and integration scope.
How to calculate ROI and payback period for a welding robot?
To calculate ROI, compare the investment with the net financial benefit over your chosen assessment period. Include additional saleable output and measurable reductions in rework or labour time, then subtract operating, maintenance, training and integration costs. Estimate payback by dividing the upfront investment by the net benefit per year. Use actual job records and test assumptions against demand so unused capacity doesn’t inflate the projected return.
How much can a welding robot reduce labour costs and increase productivity?
There’s no single labour-cost reduction that applies to every workshop. The research estimates robotic welding can produce three to five times as many parts in the same time as semi-automatic production, while output comparisons with manual welding vary by task. Treat these as benchmarks, not a staffing forecast. Calculate labour effects from your own cycle times, operator duties and accepted parts, including setup and handling.
What production volumes and weld types justify investing in a welding robot?
No fixed production volume alone determines whether a robot is worthwhile. Strong candidates include repeat jobs with stable fit-up, suitable torch access and fixtures that position parts consistently. MIG and TIG welding are supported when the robot, power source, torch package and process requirements are matched correctly. For mixed production, assess whether related parts share fixtures, weld strategies or setup steps.
What risks and limitations should be considered before buying a welding robot?
Key risks include variable part fit-up, poor access to joints, unsuitable fixtures and integration problems between the robot and welding equipment. A robot repeats its taught path, so it won’t automatically correct inconsistent components. Also consider operator training, maintenance, downtime and how the cell fits the production process. Worker safety depends on the specific application, tooling, process and site risk assessment, not the robot type alone.
How to prepare a business case and present a welding robot investment to management?
To decide how to justify buying a welding robot, build the case around a specific production problem and evidence from that job. Show current output, rework, labour involvement and delays, then compare them with a representative trial. Present the full investment and ongoing costs alongside realistic additional demand. Include operator input, integration requirements and the assumptions behind projected savings, so management can see what drives the decision.