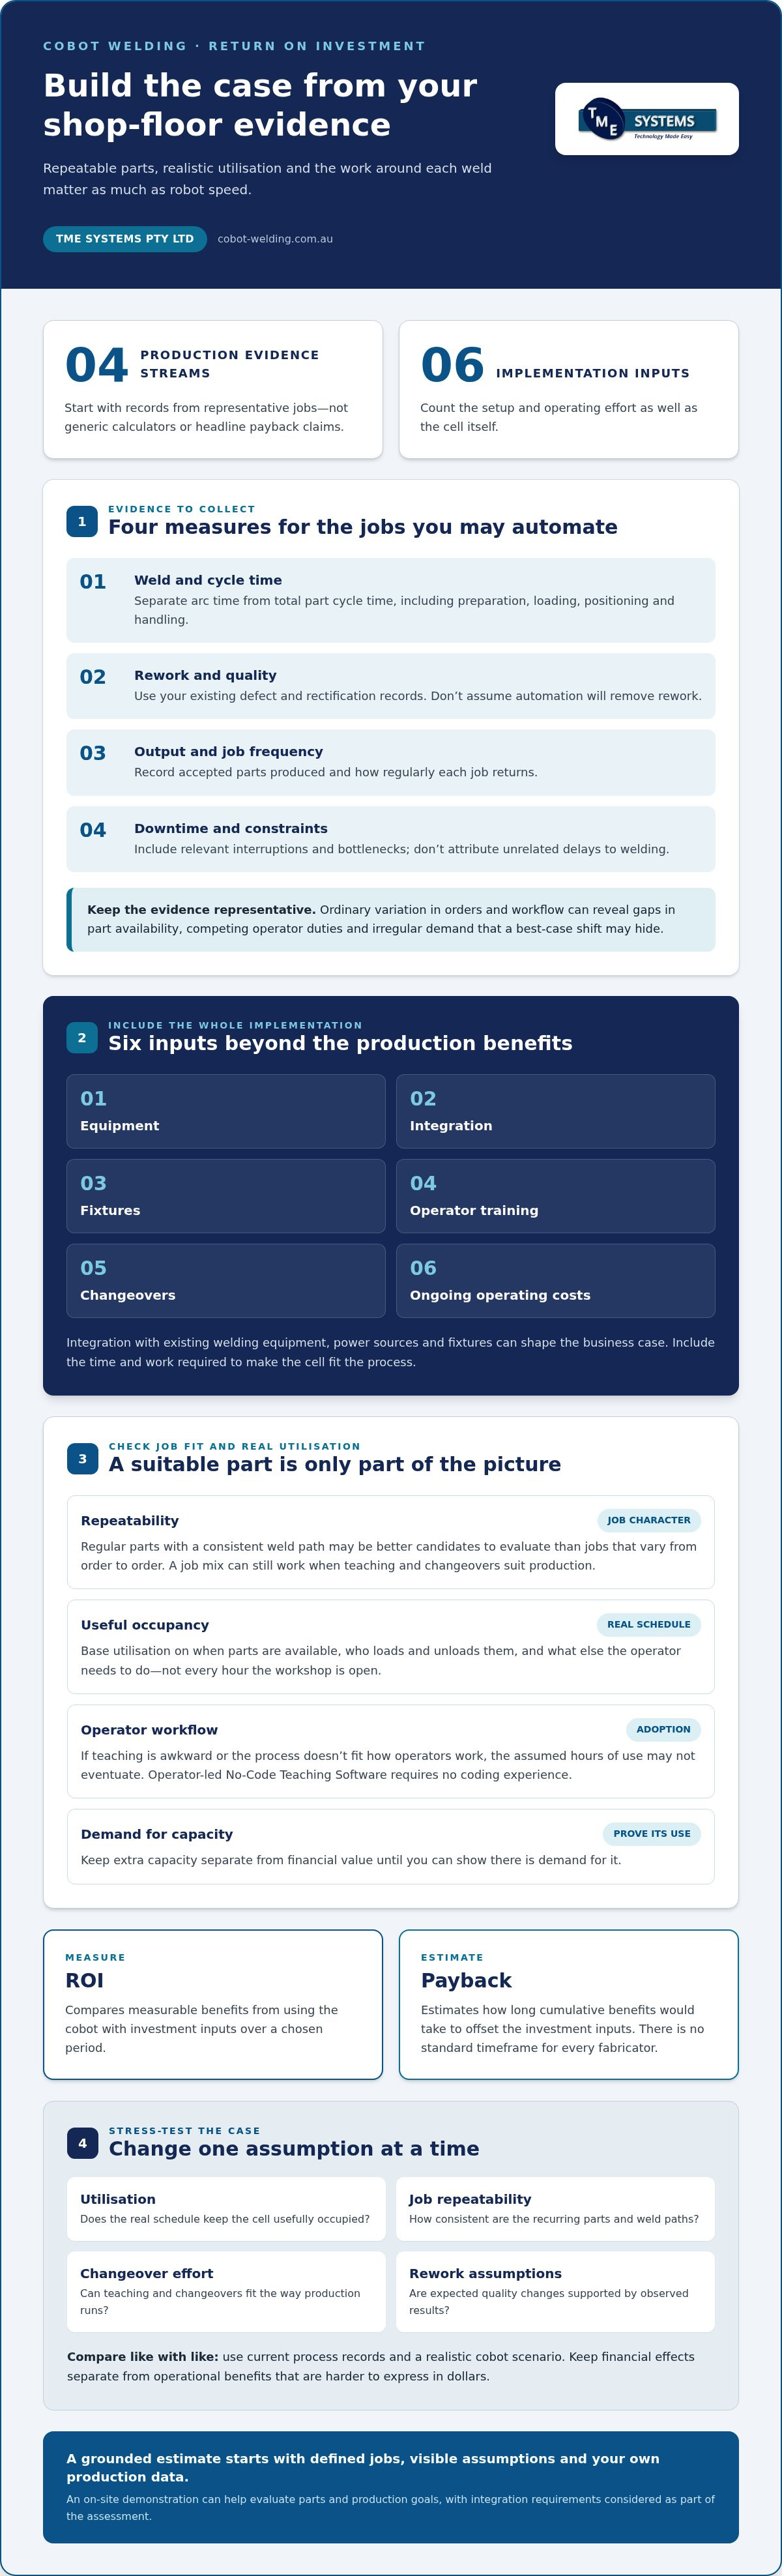

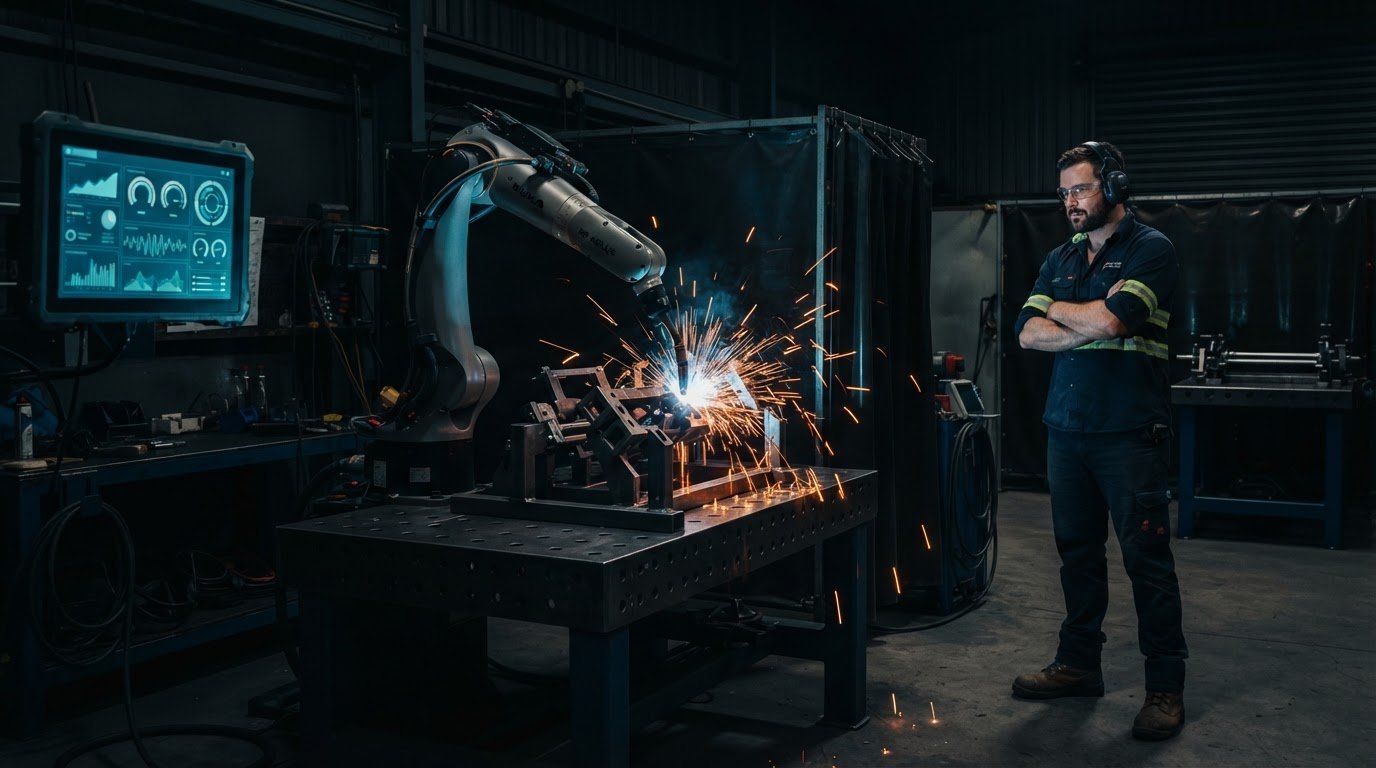
What if a cobot’s return depends less on its advertised cycle time and more on how often your workshop can keep it welding? When you assess cobot welder return on investment, repeatable parts, realistic utilisation and the work around each weld matter as much as the robot’s speed.
It’s reasonable to be cautious about headline payback figures. Your production mix, part changeovers, integration with existing welding equipment, power sources and fixtures, and time spent training operators all shape the business case. A calculation that leaves out those inputs may look tidy on paper but tell you little about your shop floor.
This guide will help you build a grounded estimate using your own production data, identify which jobs and assumptions have the greatest impact, and test the case before committing. We’ll look at measurable production gains alongside implementation effort and operator readiness. No coding experience is needed to use operator-led No-Code Teaching Software. An on-site demonstration can help you evaluate parts and production goals in practice, with integration requirements considered as part of the assessment.
Key Takeaways
- Build your cobot welder return on investment estimate from job-level production records, not a generic calculator or headline payback claim.
- Separate measurable production benefits from setup, integration, training and ongoing operating inputs so the business case reflects the whole implementation.
- Use a clear calculation method to compare current performance with estimated changes, keeping assumptions visible rather than relying on invented savings figures.
- Stress-test the case by changing utilisation, job repeatability, changeover effort and rework assumptions one at a time.
- Operator-led No-Code Teaching Software requires no coding experience. An on-site demonstration can help evaluate parts and production goals, while integration with existing welding equipment, power sources and fixtures is discussed and required.
Why assess a cobot welder’s return on investment before choosing automation?
A cobot can help with suitable welding work, but buying one doesn’t automatically create a financial return. The useful question is whether a defined set of jobs, run under your actual workshop conditions, can produce enough measurable benefit to justify the investment and the effort involved in adopting it.
Cobot welding ROI compares the measurable benefits of using a collaborative welding robot with the investment inputs over a chosen period. Inputs can include the cell and its integration, operator training and ongoing operating costs. ROI describes the relationship between benefits and inputs; it isn’t a promise that a particular result will follow. Payback is different: it estimates how long cumulative benefits would take to offset the investment inputs. Neither measure has a standard timeframe that applies to every fabricator.
A sound assessment compares a realistic cobot scenario with your current process, not with an idealised version of production. Allow for suitable work, operator tasks and the time needed to set up or change over jobs. Separate financial effects, such as a measured change in rework, from operational benefits that may be valuable but harder to express in dollars, such as reducing dependence on one person’s availability.
What does cobot welder ROI measure?
Set the measurement period and decide which effects you can support with records. For example, compare current labour time and rework for a repeatable part with the time and quality results observed in a cobot evaluation. Keep less certain benefits, such as extra capacity, separate until you can show there’s demand for that capacity. This prevents an operational improvement from being counted as financial value before it has a practical use.
Why headline ROI claims may not fit your workshop
Job mix changes the calculation. A part made regularly with a consistent weld path may suit evaluation better than a job that varies from one order to the next. Even a promising part may not support the case if there isn’t enough recurring work to keep the cell usefully occupied. A mix of jobs may still be workable when teaching and changeovers fit the way your team runs production.
Utilisation should reflect your real schedule, not every hour the workshop is open. Account for when parts are available, who loads and unloads them, and what else the operator needs to do while the cobot welds. Staff adoption matters too. If the process is awkward to teach or doesn’t fit operator workflows, the assumed hours of use may not eventuate. These are practical questions to test, not reasons to dismiss automation outright.
For broader context on where production improvements may come from, see improving welding productivity with cobots. A cobot, or collaborative robot, is designed for collaborative applications, but the label alone doesn’t determine how it will perform in your process. Start with your jobs and evidence, then assess the application and site requirements. That keeps the cobot welder return on investment case tied to your production reality rather than a headline figure.
Which cobot welding benefits and implementation inputs belong in the calculation?
A useful ROI estimate starts with an inventory, not a savings claim. Separate potential benefits from the one-off work of setting up the cell and the ongoing effort of running it. Then use production records to decide which benefits are measurable in your workshop and which remain possibilities to test. This makes assumptions visible before they’re rolled into a single payback figure.
ROI checklist: compare evidence for weld time, output, rework and relevant downtime against equipment, integration, fixtures, training, changeovers and ongoing operating inputs.
Production evidence to collect before calculating
Choose representative jobs, including repeat work you expect the cobot to handle and any jobs that expose constraints. Record how often each job runs, the current weld cycle, completed output and rework. Define each measure consistently. For example, distinguish arc time from total part cycle time, which may also include loading, positioning and handling.
- Weld and cycle time: separate time spent welding from time spent preparing, loading and handling parts.
- Rework and quality: use your existing way of recording defects and rectification, rather than assuming automation will remove them.
- Output and frequency: note accepted parts produced and how regularly each job returns.
- Downtime and constraints: record relevant interruptions and bottlenecks, but don’t attribute unrelated delays to welding.
Use a representative stretch of production that includes ordinary variation in orders and workflow. A best-case shift can hide gaps in part availability, competing operator duties or irregular demand. The Association for Advancing Automation (A3) offers broader context on automation technologies, but the figures for your calculation should come from your own shop-floor records.
Implementation inputs that can change the result
Include the work needed to make the cell fit the process, not just the equipment itself. Integration with existing welding equipment, power sources and fixtures is discussed and required. Fixture changes, interfaces and workflow adjustments can affect both initial effort and how easily operators move between jobs. Requirements depend on the application, so capture them as project inputs rather than applying a generic allowance.
Training and onboarding also take time. Include operator time spent learning the workflow and teaching or refining weld paths, then consider whether that work is likely to recur as jobs change. No coding experience is needed to use the operator-led No-Code Teaching Software. This makes path refinement accessible to welders and operators, but it doesn’t remove the need to account for training and adoption.
Watch for double counting. If reduced labour time is already included as a benefit, don’t also count the same hours as extra output unless you can show both outcomes occur. Count rework reduction separately only when records support it. To test assumptions, evaluate your own parts and production goals with the Mobile Demo System, which brings a welding cell to your site for evaluation.
How do you calculate cobot welder ROI with a transparent, job-level method?
A transparent calculation lets your team see where each figure comes from and challenge assumptions before they influence an investment decision. Keep measured production data separate from estimates, use the same job definitions for both processes, and apply one assessment period consistently to benefits and inputs.
Build a baseline from repeatable welding jobs
Start with jobs that have reasonably stable fit-up, sensible torch access and fixturing that can hold the part consistently. Record the current process for each job, including cycle time, output and relevant rework. Note assumptions such as how often the job runs and which operator tasks sit outside the weld cycle. A clear baseline gives you something practical to compare with a cobot evaluation.
- Select representative jobs. Choose recurring work that reflects your production mix, rather than a single unusually straightforward part. Record why each job is included and any known constraints.
- Establish the current baseline. Use production records or consistent observations to document job frequency, current cycle time, accepted output and relevant quality or rework results. Mark measured figures as observed.
- Estimate the cobot scenario. Use evaluation observations where available. Estimate the expected change in cycle time, output and rework, while recording assumptions about loading, teaching, changeovers and utilisation. Mark these figures as estimated.
- Total benefits and inputs. Over your chosen assessment period, add only benefits that can be linked to the selected jobs. Include one-off investment inputs and recurring costs or operating inputs that fall within that same period.
- Compare like with like. Calculate the result for each job, then combine the jobs using their actual production frequency. Keep the current-process and cobot scenarios aligned to the same period and definitions.
Compare scenarios without overstating the result
Use symbols first, then substitute your own supported figures. Let B be total measurable benefits during the assessment period, I the total investment and operating inputs during that period, and C the one-off investment inputs. The basic comparison is:
- Net benefit over the period = B − I
- ROI over the period = (B − I) ÷ I × 100
- Simple payback = C ÷ net benefit per period, where that net benefit is positive and reasonably consistent.
Payback is a simplified measure. It indicates how long recurring net benefits may take to offset the one-off investment, but it doesn’t show benefits after that point or account for uncertainty in utilisation, production demand or implementation. If net benefit varies by period, use a cumulative schedule rather than assuming a steady rate.
Keep a record of each input’s source and confidence level. A measured cycle time is different from an estimate based on a planned workflow, and neither makes the result certain. The cobot welder return on investment is an estimate based on the jobs, period and assumptions you state, not a guaranteed outcome.
How can you test whether the ROI case holds up in production?
A single ROI figure can hide how much the result depends on assumptions. Stress-test the case before relying on it: compare conservative, expected and optimistic scenarios, then change one key variable at a time. This shows whether the business case still makes sense when production is less predictable than the best-case estimate.
Keep the job mix and assessment period consistent across each scenario. Change only the assumption you’re testing, then record how the estimated result moves. For example, first reduce expected utilisation while leaving repeatability, changeover effort and rework unchanged. Reset to the expected case before testing the next variable. This makes it easier to identify which unknown deserves attention.
| Scenario | Assumptions to test | What to learn |
|---|---|---|
| Conservative | Lower utilisation, less repeatable jobs, more changeover effort or no assumed rework improvement. | Does the case remain workable if production conditions are challenging? |
| Expected | Use the most supportable estimates from current schedules, job records and observed workflows. | What result best reflects the production plan you can reasonably anticipate? |
| Optimistic | Use stronger utilisation or repeatability only where production evidence supports it. | What upside might be possible, and what conditions would need to hold? |
Check job fit, workflow and operator readiness
Prioritise parts with repeatable fit-up, sensible torch access and stable fixturing. Then look for related jobs that could use similar fixtures, process knowledge or weld strategies. Don’t assume every job can be automated or that a cobot will be occupied whenever it’s available. Ask operators to take part in teaching, refining and running weld paths, and observe how those tasks fit around loading, inspection and other work.
A Mobile Demo System visit can bring a welding cell to your site to evaluate representative parts and production goals. Treat it as an evaluation, not a permanent installation. Use the demonstration to observe job handling, teaching and changeovers, then compare what you learn with the assumptions in your model.
Make the assumptions visible to decision-makers
For each major input, note its source, who owns it and how confident the team is in it. Label production records as measured and untested figures as estimates. Keep financial effects separate from operational benefits that still need observation, such as workflow flexibility or operator acceptance. Integration with existing welding equipment, power sources and fixtures is discussed and required, so capture the relevant requirements as part of the assessment.
The cobot welder return on investment case is stronger when its key assumptions have been observed, not just entered into a spreadsheet. Arrange an on-site evaluation of your parts and production goals to test the scenario against real workshop conditions.
How TME Systems helps turn a cobot welder ROI case into a practical next step
A spreadsheet can organise your assumptions, but observing your own parts and workflow can help show where those assumptions hold up and where they need adjustment. TME Systems helps Australian fabricators adopt no-code collaborative robot welding through operator-led teaching, onboarding and welding system integration. The focus is practical: evaluate the work, understand the implementation requirements and involve operators in assessing how the process could fit production.
Evaluate your own parts and production goals
Bring representative parts and outline the jobs you’re assessing, how often they run and what you want to improve. The Mobile Demo System brings a welding cell to your site for evaluation. It isn’t a permanent installation, but it gives your team a chance to observe the process with actual parts and discuss production goals in context.
Use the evaluation to look at factors that affect your assumptions, including:
- Fit-up and consistency: how reliably parts are positioned and presented for welding.
- Torch access: whether the weld path appears practical for the part and process.
- Fixtures: how existing or proposed fixtures support repeatable placement and job changes.
- Teachability: how operators can teach and refine a weld path for the work being assessed.
Record what you observe and compare it with the assumptions in your ROI model. A demonstration can inform a project-specific assessment, but results from an evaluation aren’t a guarantee of future production performance. Actual outcomes depend on the application, workflow and adoption in your workshop.
Plan for operator-led adoption and integration
No coding experience is needed to use the operator-led No-Code Teaching Software. Welders and operators can teach and refine weld paths, bringing their process knowledge into the evaluation. Include them in discussions about loading, teaching, running jobs and handling changeovers. Their feedback can help identify training needs and workflow adjustments that a calculation alone might miss.
Integration is part of the practical assessment, not a detail to leave outside the ROI calculation. Integration with existing welding equipment, power sources and fixtures is discussed and required. The assessment also needs to account for how the cell fits the production process and the jobs being evaluated. Operator training and onboarding help teams understand how the workflow fits into adoption planning.
Use those observations to refine the inputs in your business case. Distinguish measured results from estimates, and update assumptions about integration, training and job changeovers. This makes the next decision more grounded without treating a demonstration or calculation as a promise.
If you’re weighing a cobot welder return on investment, discuss your parts, production goals and an on-site demonstration as a practical way to explore the assumptions with your team.
Turn your ROI estimate into a practical next step
A business case doesn’t need to answer every question before you move forward. It should show what you know, what you’re assuming and which uncertainties are worth testing next. Use that distinction to guide a measured decision: refine the production data, involve the people who’ll work with the process, and focus your evaluation on the jobs most likely to shape the result.
The cobot welder return on investment is most useful as a working tool, not a promise. As production conditions change, revisit the assumptions and compare them with what’s actually happening on the floor. This keeps the decision connected to your workload and gives your team a clearer basis for deciding whether to proceed, adjust the scope or wait for better evidence.
If you’re ready to explore that next step, discuss your parts, production goals and a mobile demonstration with TME Systems. A practical conversation can help you move from a spreadsheet estimate towards an evaluation grounded in your workshop’s work.
Frequently Asked Questions
Is coding experience required for using the software?
No, the software is designed for welders and operators regardless of robot programming experience. Operators can draw on their welding knowledge when teaching a path and refining it for a part. This puts the people who understand the job in a position to contribute to teaching and path adjustments. The team can then consider how those tasks fit into its normal production workflow.
Can the software be integrated with existing welding equipment?
Yes, TME Systems can discuss integration with a wide range of welding equipment, fixtures, and production processes. The existing power source, wire feed, torch, communication method and weld settings can all affect arc stability and repeatability, so reviewing them early helps surface interface requirements. The setup needs to suit the welding application.
What kind of support do you offer for new users?
Demonstration, onboarding, training, and support to help teams move confidently into collaborative welding. For new users, becoming familiar with how the cell is taught and operated can help teams build that knowledge into day-to-day work. Involving the welders and operators who will use the system can surface questions about teaching, running jobs and refining weld paths as the team adopts the process.
Is collaborative robot welding safe for workers?
Designed around controlled interaction with operators; final safety requirements depend on the application, tooling, process, and site risk assessment. The word “collaborative” alone doesn’t determine the safety requirements. Consider the workpiece, torch and tooling, welding process, operator tasks and site layout together. The assessment needs to reflect the intended application and the way people will work around the cell.
What parts are good candidates for robotic welding?
Parts with repeatable fit-up, sensible torch access, stable fixturing, and enough repeat work to justify teaching and proving the weld path. For instance, consider an assembly that can be located consistently in a fixture and has welds the torch can reach without awkward repositioning. Part families may also be worth assessing if they share useful features. Variable fit-up or difficult access may call for closer evaluation before inclusion in a business case.
Can a cobot help with high-mix low-volume welding?
Yes, provided the right part families are chosen; no-code teaching can make changeovers more practical when jobs are similar enough to reuse fixtures, process knowledge, and weld strategies. A useful starting point is to group parts by shared setup features, rather than assume every unique part is an equally strong candidate. Compare how much teaching and fixture adjustment each group needs to assess whether a varied job mix fits your workflow.
Does robotic welding support MIG and TIG processes?
Yes, when the robot, power source, torch package, and process requirements are correctly matched. Process support depends on the complete welding setup, not just the robot. For assessment, identify the process used for the target job and consider the power source, wire feed where relevant, torch and required weld settings as a connected system. Reviewing those interfaces early helps clarify whether the proposed cell suits the intended work.