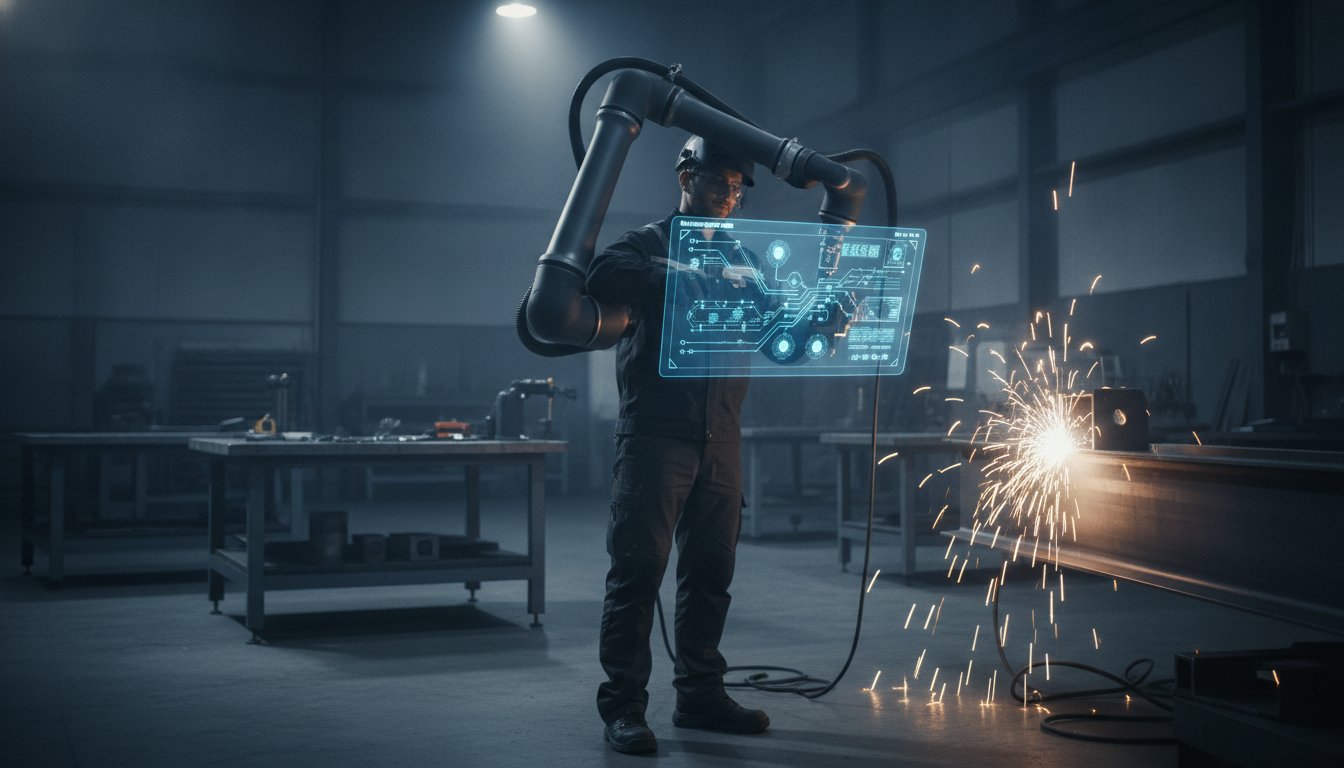
What if the solution to your workshop’s skills shortage isn't finding a rare programmer, but turning your best manual welder into a robotics expert in under ten minutes? Most Australian fabricators feel the same pinch; you have plenty of small-batch work coming in, but traditional automation often feels too slow to justify for just a few units. You might be worried about the technical complexity of no-code robot welding software or the fear of "bricking" expensive gear with a single line of bad code.
We understand that pressure, and we're here to show you that automation doesn't have to be intimidating. This technology allows your existing team to teach a robot by hand, bypassing the need for complex programming and making automation viable for even the smallest custom runs. In this guide, we'll explore how to achieve faster throughput and consistent quality while keeping your workshop compliant with the new 1 mg/m³ welding fume limits arriving in December 2026.
Key Takeaways
- Move beyond complex syntax and learn how visual interfaces allow your most experienced tradespeople to lead your automation efforts.
- Simplify your workflow by defining weld paths through physical guidance rather than typing coordinates into a computer.
- See how no-code robot welding software slashes setup times from hours to minutes, making high-mix, low-volume jobs finally profitable.
- Identify the specific "low-hanging fruit" jobs in your workshop that are perfect for immediate, stress-free automation.
- Learn why hands-on onboarding is the key to ensuring your new tools integrate perfectly with your existing MIG or TIG power sources.
What is No-Code Robot Welding Software?
At its core, no-code robot welding software is a platform that allows a fabricator to define weld paths through visual interfaces or physical movement rather than typing lines of text. Think of it as a digital apprentice that learns by watching and following your lead. Instead of the traditional reliance on G-code or complex syntax, these systems use intuitive, icon-based "teaching" methods. This shift means that the person best suited to run the robot is the person who already knows how to weld, not a computer scientist hidden in a back office.
For many Australian workshops, this technology is the primary catalyst for finally adopting robotics. High-mix, low-volume work has always been the backbone of local manufacturing; however, it was often too expensive to automate because the programming time outweighed the production gains. By simplifying the interface, this software bridges the gap between manual craftsmanship and industrial efficiency. It is a direct evolution of Offline programming (OLP), designed to make the transition from a CAD drawing to a finished weld as seamless as possible.
The End of the 'Expert Programmer' Requirement
In the past, bringing a robot into a workshop meant sending staff away for weeks of specialised training or hiring a dedicated software specialist. Those days are over. The rise of the "Citizen Programmer" means your existing team can take charge of the equipment. By removing the need for a specialist salary, you significantly reduce the total cost of ownership. It empowers your staff to use advanced tools without the fear of "breaking" the system, as the software handles the complex background calculations automatically.
Visual vs. Physical Teaching Interfaces
Most modern systems offer two ways to interact. First, there are touchscreen "pendant" interfaces that use drag-and-drop logic. You simply select a weld type, set your parameters, and the software organises the sequence. Second, and perhaps most popular on the shop floor, is lead-through teaching. This allows a welder to physically move the robot arm to specific points. The software records these positions instantly. This method is incredibly effective because it mimics the natural movement and muscle memory of a manual welder, making the machine feel like a natural extension of the tradesperson's own hands.
How No-Code Teaching Software Works on the Workshop Floor
Transitioning from manual welding to automation shouldn't feel like you're learning a new trade. Unlike complex 3D simulations that can feel detached from the physical reality of the bench, no-code robot welding software is designed to work exactly where you do: on the shop floor. The process follows a logical sequence that mirrors how a tradesperson thinks about a project.
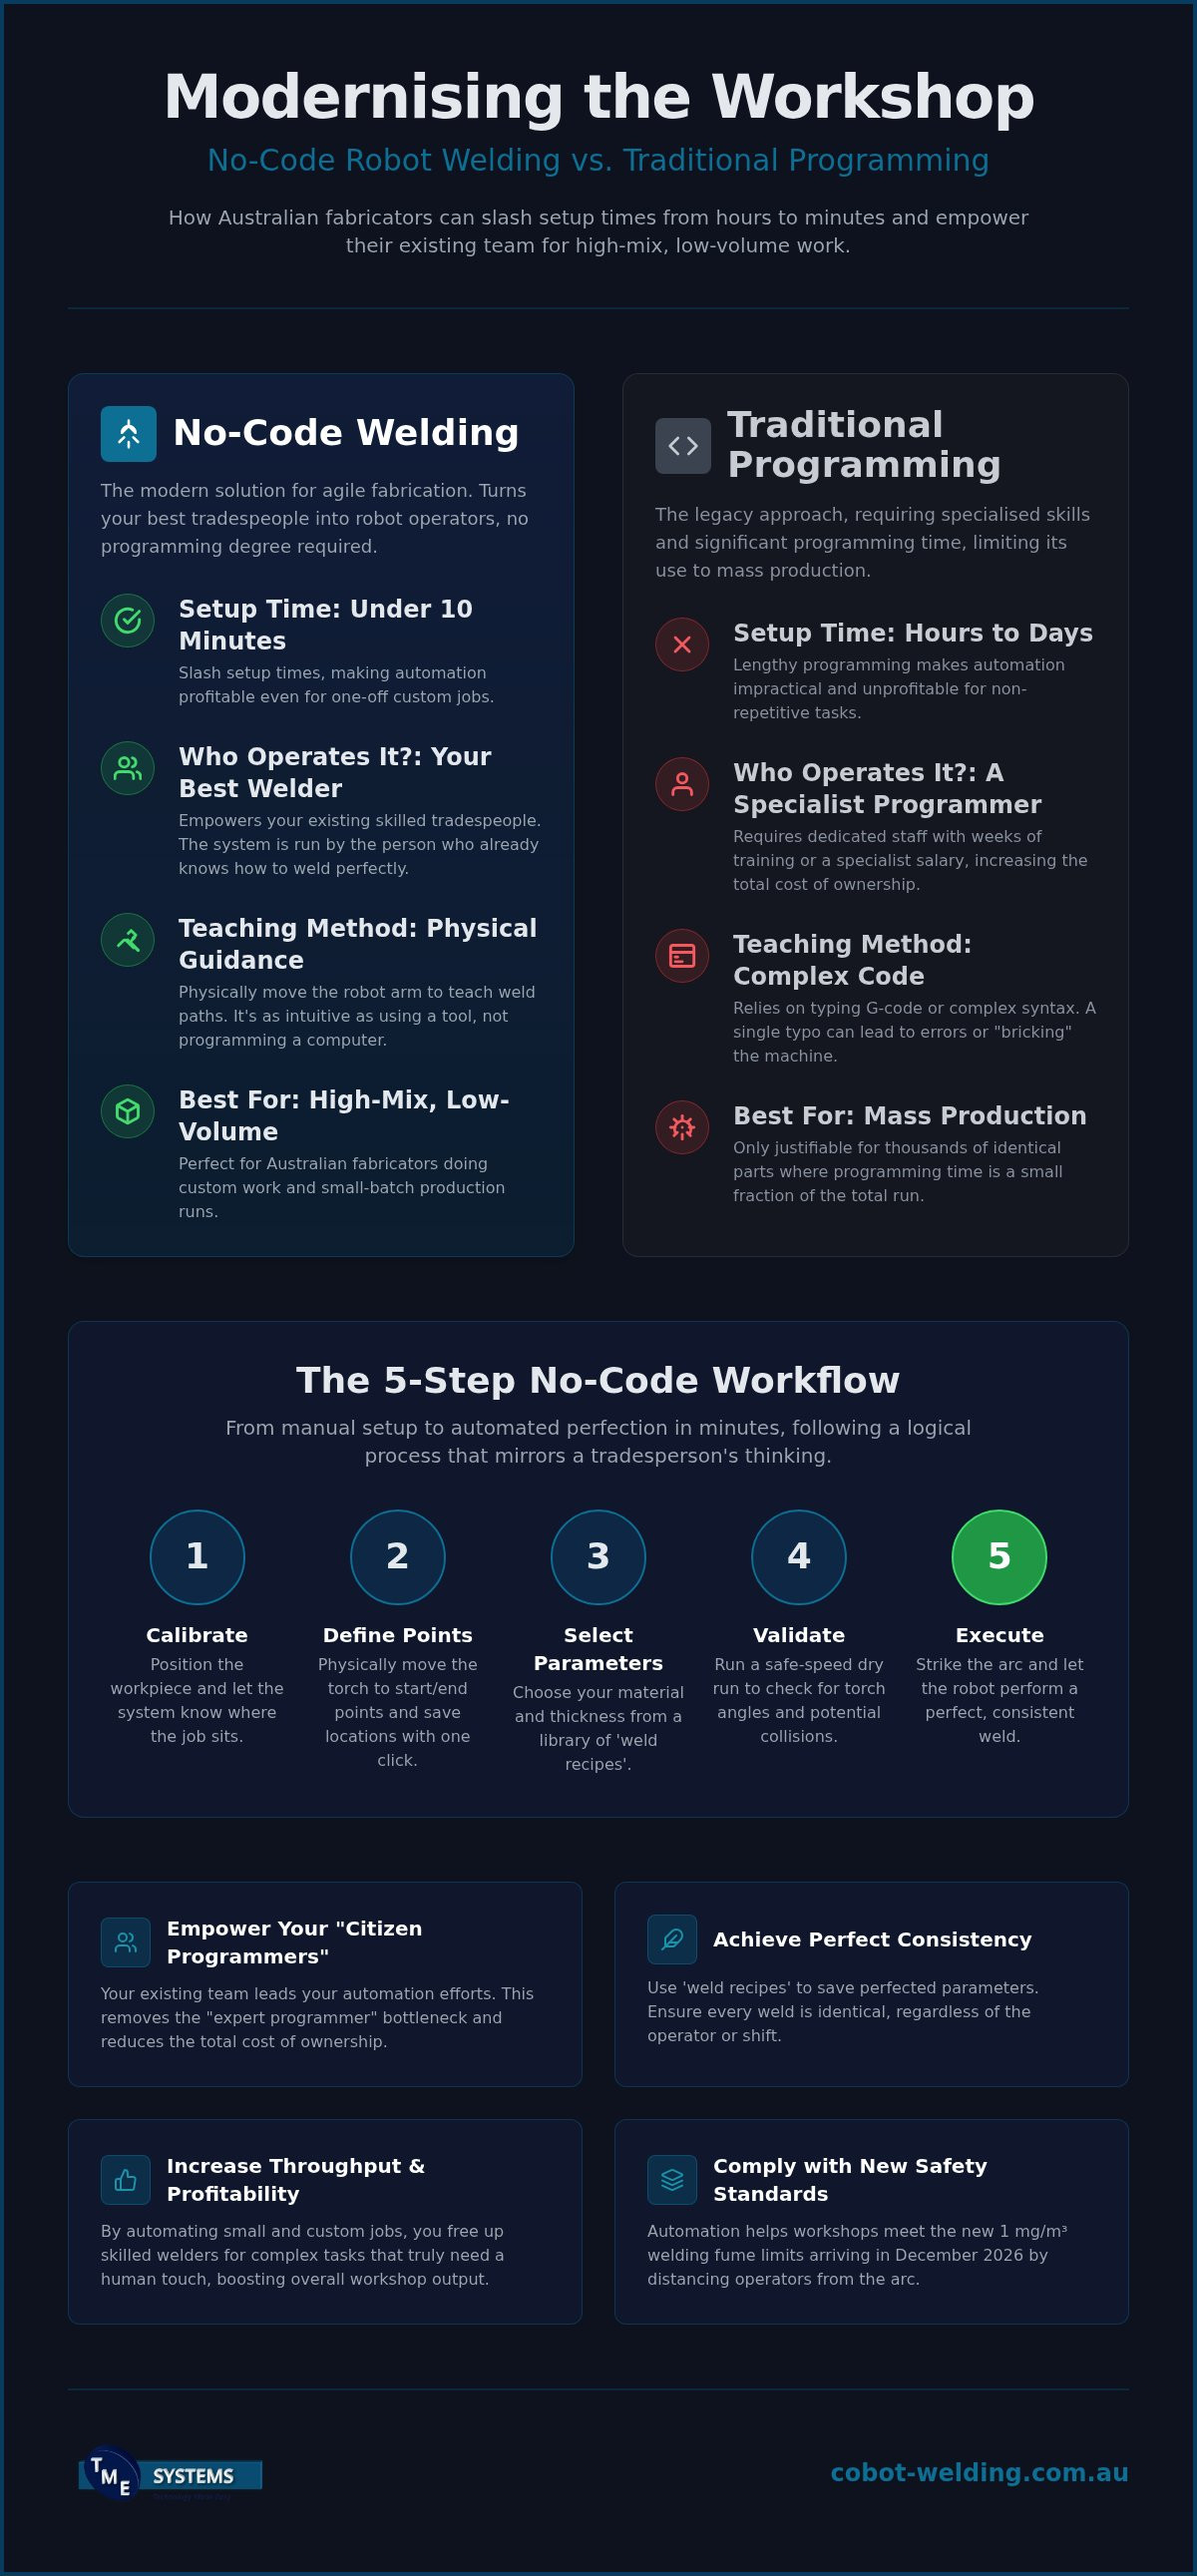
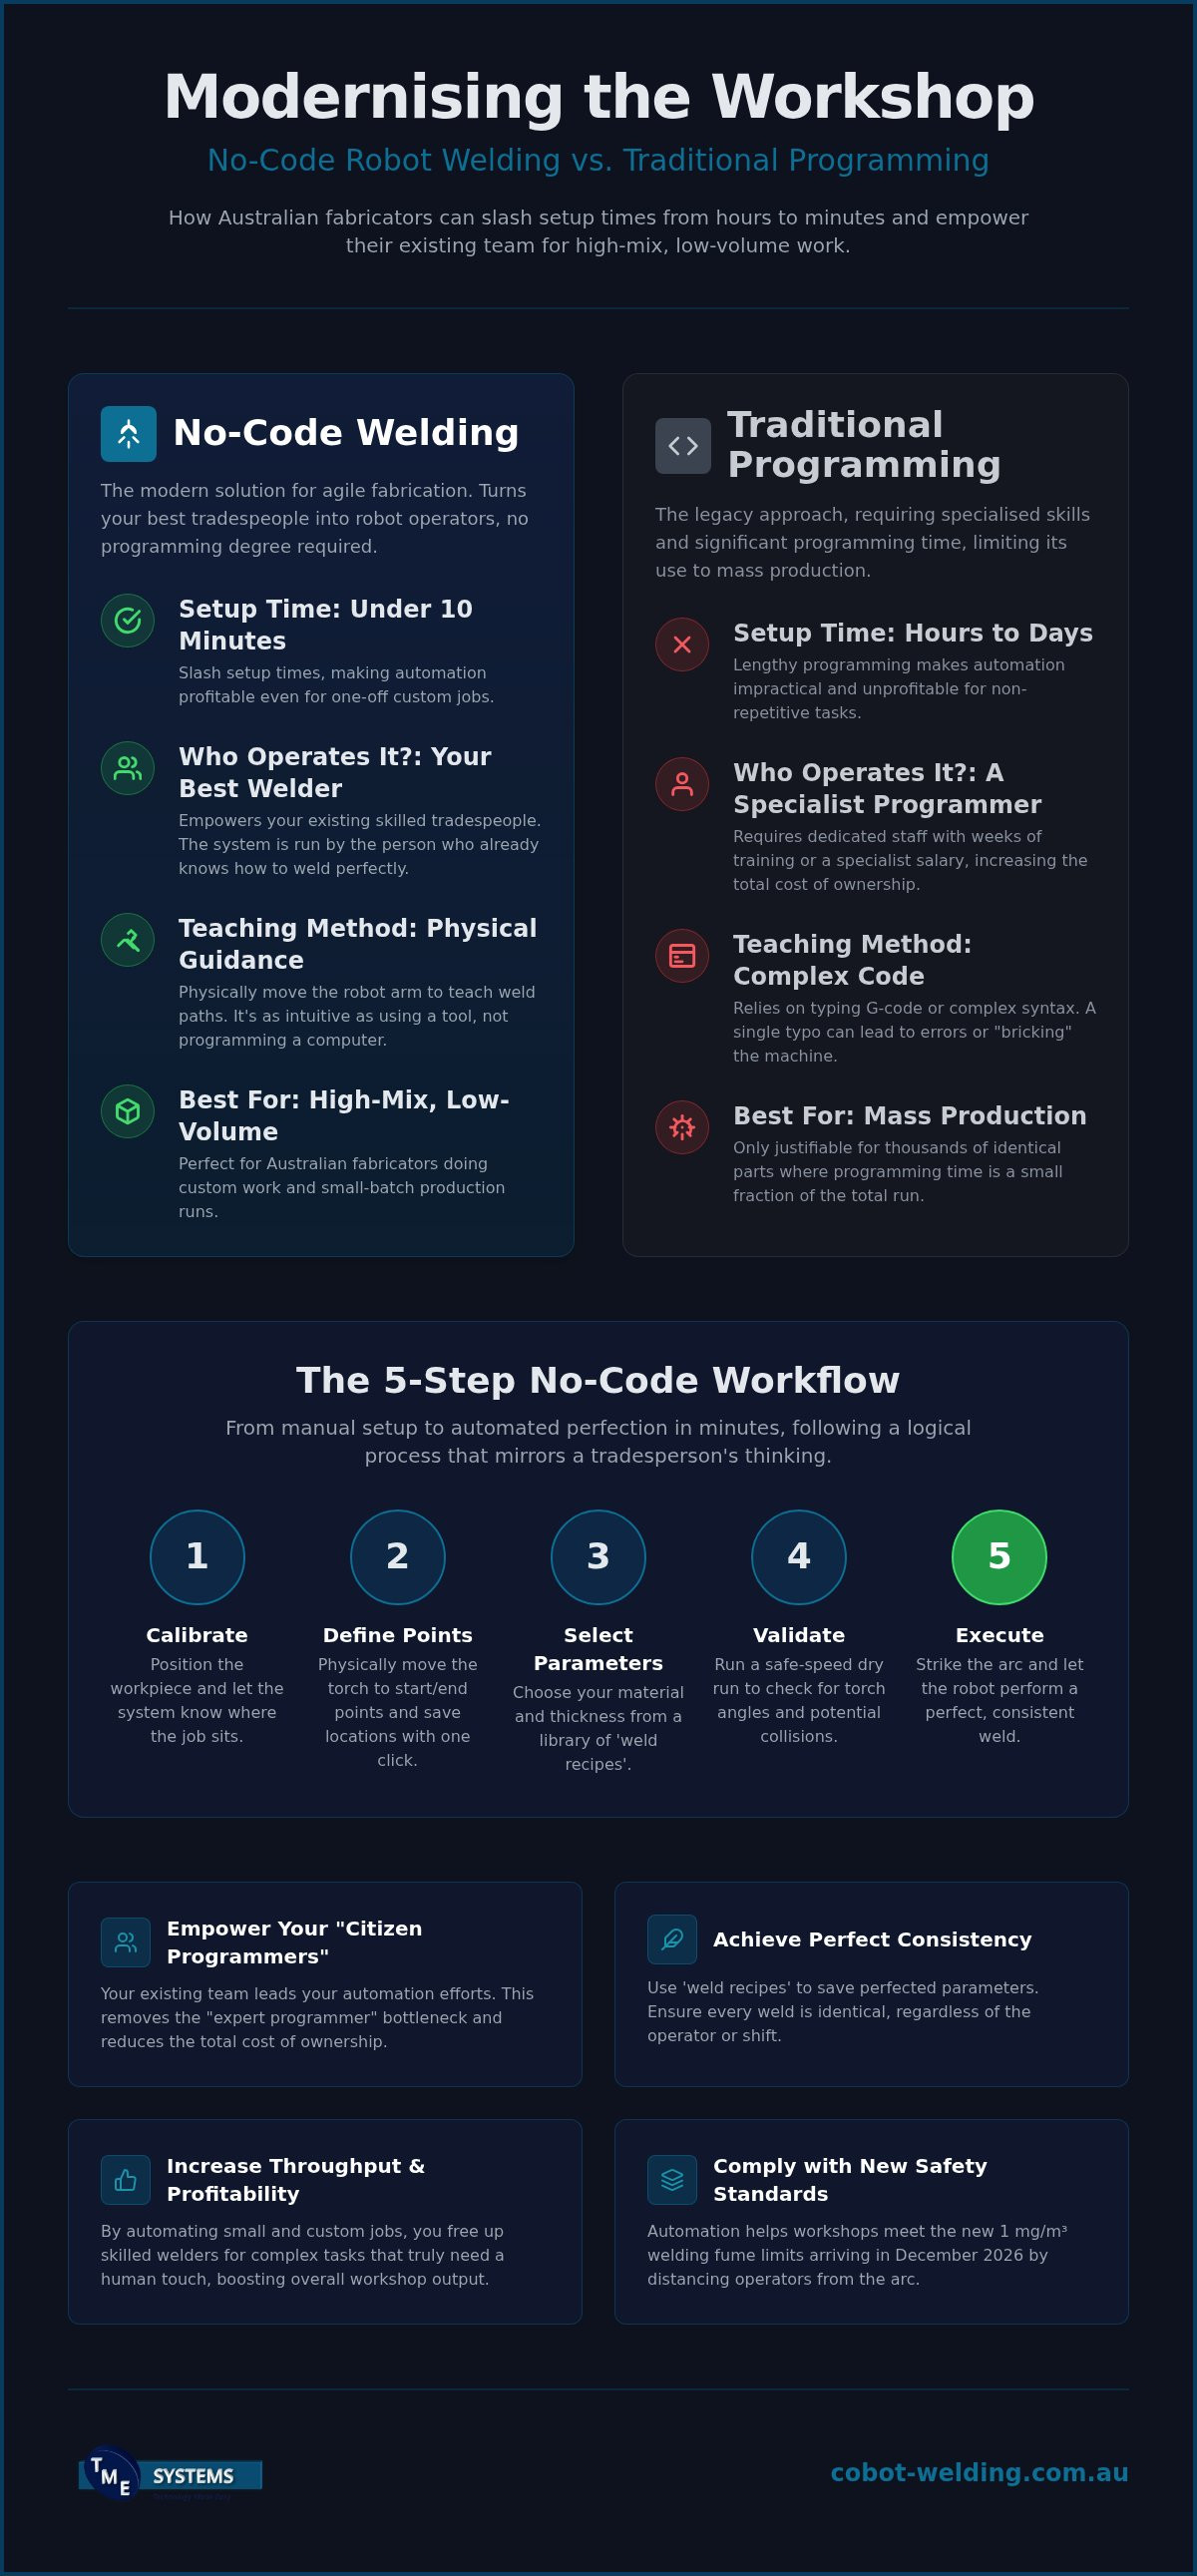
- Calibration: You start by ensuring the workpiece is correctly positioned within the robot's work envelope. This isn't about complex maths; it's about making sure the machine knows where the job sits on the table.
- Defining Points: Instead of typing coordinates, you simply move the torch to the "weld start" and "weld end" positions. A quick button press saves the location.
- Selecting Parameters: You don't need to calculate wire speed or voltage from scratch. You select your material and thickness from a pre-set library.
- Validation: Before striking an arc, you run a dry-run simulation. The robot follows the path at a safe speed, allowing you to check for potential collisions or torch angles.
- Execution: Once you're satisfied, the robot begins the weld. Most systems allow you to fine-tune the puddle in real-time through the interface if you notice the heat sinking differently into the metal.
If you're curious about how this looks in practice, you can see our mobile demo system in action to understand how these steps come together on a real part.
Lead-Through Teaching: The Most Intuitive Method
The standout feature for most Aussie fabricators is "free-drive" or lead-through teaching. This allows you to physically grab the robot arm and guide the torch along the desired path. It’s particularly effective for recording complex curves or multi-pass welds that would be a nightmare to program manually. Because you are using your own hands to set the path, the result is "spot on" for experienced tradespeople who already have the muscle memory for a perfect bead. It turns the robot into a tool you use, rather than a computer you have to manage.
Parameter Libraries and 'Weld Recipes'
Consistency is the biggest hurdle when moving between different shifts or operators. Modern no-code robot welding software solves this by using "weld recipes." Once you’ve perfected a setting for 5mm aluminium or 3mm stainless steel, you save it to the library. These recipes store everything from gas pre-flow to crater fill settings. This means that whether it's Monday morning or Friday afternoon, the quality of the weld remains identical, regardless of who is setting up the machine for that batch.
No-Code vs. Traditional Programming: A Comparison for Fabricators
For decades, industrial robots were the domain of massive assembly lines and high-volume automotive plants. If you wanted to program a new part, you needed a specialised technician, a laptop, and several hours of downtime. For the typical Australian fabricator running small batches, that math simply didn't add up. no-code robot welding software changes this equation by prioritising speed over syntax. Instead of spending half a shift writing code, your team can have a new part ready to weld in the time it takes to have a smoko.
The difference in approach is stark when you look at the operational impact on your workshop:
- Setup Time: Traditional systems often require 4 to 8 hours for a new part program; no-code systems usually take 10 to 15 minutes.
- Operator Skill: Traditional setups require a software specialist; no-code allows your existing manual welders to lead the process.
- Adjustments: Tweaking a weld path in code requires searching through lines of G-code. With no-code, you simply move the arm or drag a point on the screen.
- Total Cost: By removing the need for a dedicated programmer's salary, the total cost of ownership drops significantly, making the investment pay for itself much faster.
High-Mix, Low-Volume: The Sweet Spot for No-Code
Traditional robotics only made sense if you were running 10,000 identical units. The time spent programming was an investment you recouped over months of production. Australian job shops don't usually have that luxury. You might have 10 brackets today and 5 custom frames tomorrow. no-code robot welding software makes these small runs viable for automation. It allows you to maximise your arc time by reducing changeover delays. When the setup takes 10 minutes, even a run of 5 units becomes more profitable when done by a robot than by hand.
Reducing the Risk of Costly Downtime
One of the biggest fears in automation is "fat-fingering" a line of code and watching a thousand-dollar torch smash into a jig. Traditional systems are prone to these human errors because the operator is looking at text, not the physical part. Modern no-code welding path teaching removes this risk through visual error-checking. You see exactly where the robot will travel before the arc ever strikes. This dry-run capability protects your equipment and gives your staff the confidence to use these tools without worrying about a catastrophic mistake.
Implementing No-Code Software in Your Australian Workshop
Bringing new technology onto the shop floor doesn't have to be a headache. The most successful implementations start by identifying the "low-hanging fruit" in your current production. These are usually the repetitive, boring jobs like long straight fillet welds or simple base plates that eat up your tradespeople's time. By applying no-code robot welding software to these specific tasks first, you get an immediate boost in throughput without overcomplicating your entire workflow from day one.
Successful integration is the bridge between a robot that merely moves and a robot that actually welds. The software must communicate perfectly with your MIG or TIG power source to manage wire feed speeds, voltage, and gas pre-flow. While the user interface is designed for simplicity, the system must still meet Australian safety standards, specifically ISO 10218-1 and ISO 10218-2. These regulations ensure that your collaborative setup is legally compliant and safe for your team to work alongside without the need for traditional, space-consuming safety cages.
Training is often the biggest surprise for workshop owners. You don't need to send your staff away for a week-long course. Because the interface is so intuitive, a half-day onboarding session is typically enough to get an experienced welder comfortable with the system. They already understand the "weld science"; they just need to learn how to show the robot the path. If you're ready to see how this fits into your specific setup, you can arrange a hands-on demo to test the software on your own parts.
Choosing the Right Hardware-Software Combo
The software is the brain, but it’s only as effective as the collaborative robot welding cells they control. You need a setup that is rugged enough for the heat and grit of a local workshop. Touchscreens should be industrial-grade, and the hardware must be resilient. Having access to Australian-based technical help is also a massive advantage, ensuring that if you do have a question, you're talking to someone who understands the local manufacturing environment.
Upskilling Your Best Welders into 'Cobot Operators'
Upskilling is about respect for the trade. It's vital to frame the robot as a high-end tool rather than a replacement for a person. It takes the "grunt work" out of the day, such as those repetitive multi-metre seams that lead to physical fatigue and inconsistent results. When your team sees the robot as a way to handle the boring stuff while they focus on complex tacking and fit-up, you create a culture of innovation that keeps your best people engaged and productive.
The TME Systems Pty Ltd Approach: Seamless Software Integration
We don't believe in a one-size-fits-all approach to automation. Every Australian workshop has its own rhythm, and the right no-code robot welding software must be selected to match your specific power sources and the physical layout of your floor. The role of TME Systems Pty Ltd is to act as a practical mentor, ensuring the technology serves your tradespeople rather than creating more work for them. We focus on selecting interfaces that are truly intuitive, where a welder can pick up the pendant and feel confident within minutes.
A key part of our process is the mobile welding robot demonstration. We bring the system to your site so you can see exactly how the software handles your actual parts. This on-site proof of concept removes the guesswork. It allows your team to get hands-on with the lead-through teaching before any investment is made, proving that the "no-code" promise holds up in a real-world environment. It's about seeing the results on your own bench, not in a sterile showroom.
Support doesn't end once the equipment is bolted down. TME Systems Pty Ltd provides comprehensive operator onboarding to ensure your team isn't just using the tool, but mastering it. We don't just drop off a box and leave you to figure it out. We stay in the loop to help with software updates and to provide technical guidance as you move from your first "low-hanging fruit" jobs to more complex production runs. This ongoing partnership ensures your team remains confident as the technology evolves.
From Integration to Production
Our approach to cobot welding integration is about more than just hardware. We customise the software interfaces to reflect the terminology your team already uses on the floor. Whether you're working with mild steel, aluminium, or stainless, we help you build that initial library of "weld recipes" to ensure your very first no-code robot welding software project is a success. This builds the internal momentum needed for a smooth transition across the entire workshop.
Future-Proofing Your Business for 2027 and Beyond
The manufacturing landscape is shifting quickly. By 2027, the ability to pivot production lines in hours rather than days will be a baseline requirement for staying competitive in Australia. Starting with a single cell and a scalable software strategy allows you to grow as your order book does. This isn't about replacing your staff; it's about giving them the most advanced tools available to stay ahead of the curve. If you're ready to see how this technology adapts to your workshop, get in touch to organise a hands-on session.
Ready to Transform Your Workshop Floor?
The transition to automation no longer requires a total overhaul of your workshop's culture or staff. As we've explored, the right tools allow your best tradespeople to lead the charge, turning years of manual experience into precise digital routines. By adopting no-code robot welding software, you are effectively removing the technical roadblocks that once made robotics a luxury only available to the biggest players in the industry.
TME Systems Pty Ltd stands as your partner in this evolution. As expert Australian integration specialists, we provide practical, workshop-ready training programs and maintain a mobile demo unit available nationally to ensure you see the results for yourself before committing. It's about giving your team the equipment they need to stay competitive and productive in a rapidly changing market.
Book a mobile welding robot demonstration to see no-code software in action on your floor and take the first step toward a more efficient, future-proof workshop. We look forward to helping you move your production forward.
Frequently Asked Questions
Do I need to know any programming languages to use no-code welding software?
No, you don't need to know G-code, Python, or any other programming language. The software uses visual icons and lead-through teaching to record movements. This means your tradespeople can focus on the weld quality instead of worrying about syntax or brackets. It’s designed to be used by anyone who understands how to hold a torch, making it a powerful tool for your existing workshop team.
How long does it take to teach a robot a new weld path?
Teaching a new path usually takes between five and fifteen minutes for a standard part. For simple straight welds, you can define the start and end points in seconds. This speed is a major benefit of no-code robot welding software, as it allows you to get the arc striking on a new job while a traditional programmer would still be opening their laptop or configuring coordinates.
Can no-code software handle complex, curved weld seams?
Yes, the software is specifically designed to handle complex geometries through lead-through teaching. By physically guiding the robot arm along a curved path, the software records the exact trajectory in real-time. This is much more intuitive than trying to calculate complex circular interpolations in a traditional coding environment, making it perfect for custom architectural work or automotive fabrication where curves are common.
Is no-code software compatible with my existing MIG or TIG welder?
In most cases, yes, the software can be integrated with your existing industrial power source. We specialise in welding system integration to ensure the software communicates correctly with your current MIG or TIG setup. This allows you to control parameters like voltage and wire speed directly through the robot's interface without needing to buy an entirely new welding plant for your workshop.
What happens if the robot makes a mistake during a no-code program?
You can stop the robot instantly and adjust the path on the fly. Because the interface is visual, you can see exactly which point in the sequence needs refining. You don't have to scroll through hundreds of lines of code to find the error; you simply move the robot to the correct spot and update that specific position in the software before restarting the run.
Is this software suitable for small batch runs (under 10 parts)?
Absolutely, this is where the technology really shines for Australian workshops. Because the setup time is so low, it's often faster to teach the robot a run of five or ten parts than it is to weld them all manually. This allows you to maintain high quality and consistency even on the bespoke jobs that come through your door, ensuring your small batches are just as profitable as long runs.
What kind of computer or hardware is required to run the software?
The software typically runs on a dedicated industrial tablet or the robot's own teach pendant. You don't need a high-end office PC or a server room to manage the system. The hardware is designed specifically for the workshop floor. This means it can handle the dust, heat, and electrical noise common in a fabrication environment without failing, keeping your production line moving reliably.
Can my existing manual welders learn to use this software quickly?
Yes, most manual welders pick up the basics in a single morning session. Since the software uses the logic of welding rather than the logic of computer science, it feels very natural to a tradesperson. Our training programs focus on empowering your existing staff to use no-code robot welding software as a high-performance tool that complements their craftsmanship rather than replacing it.