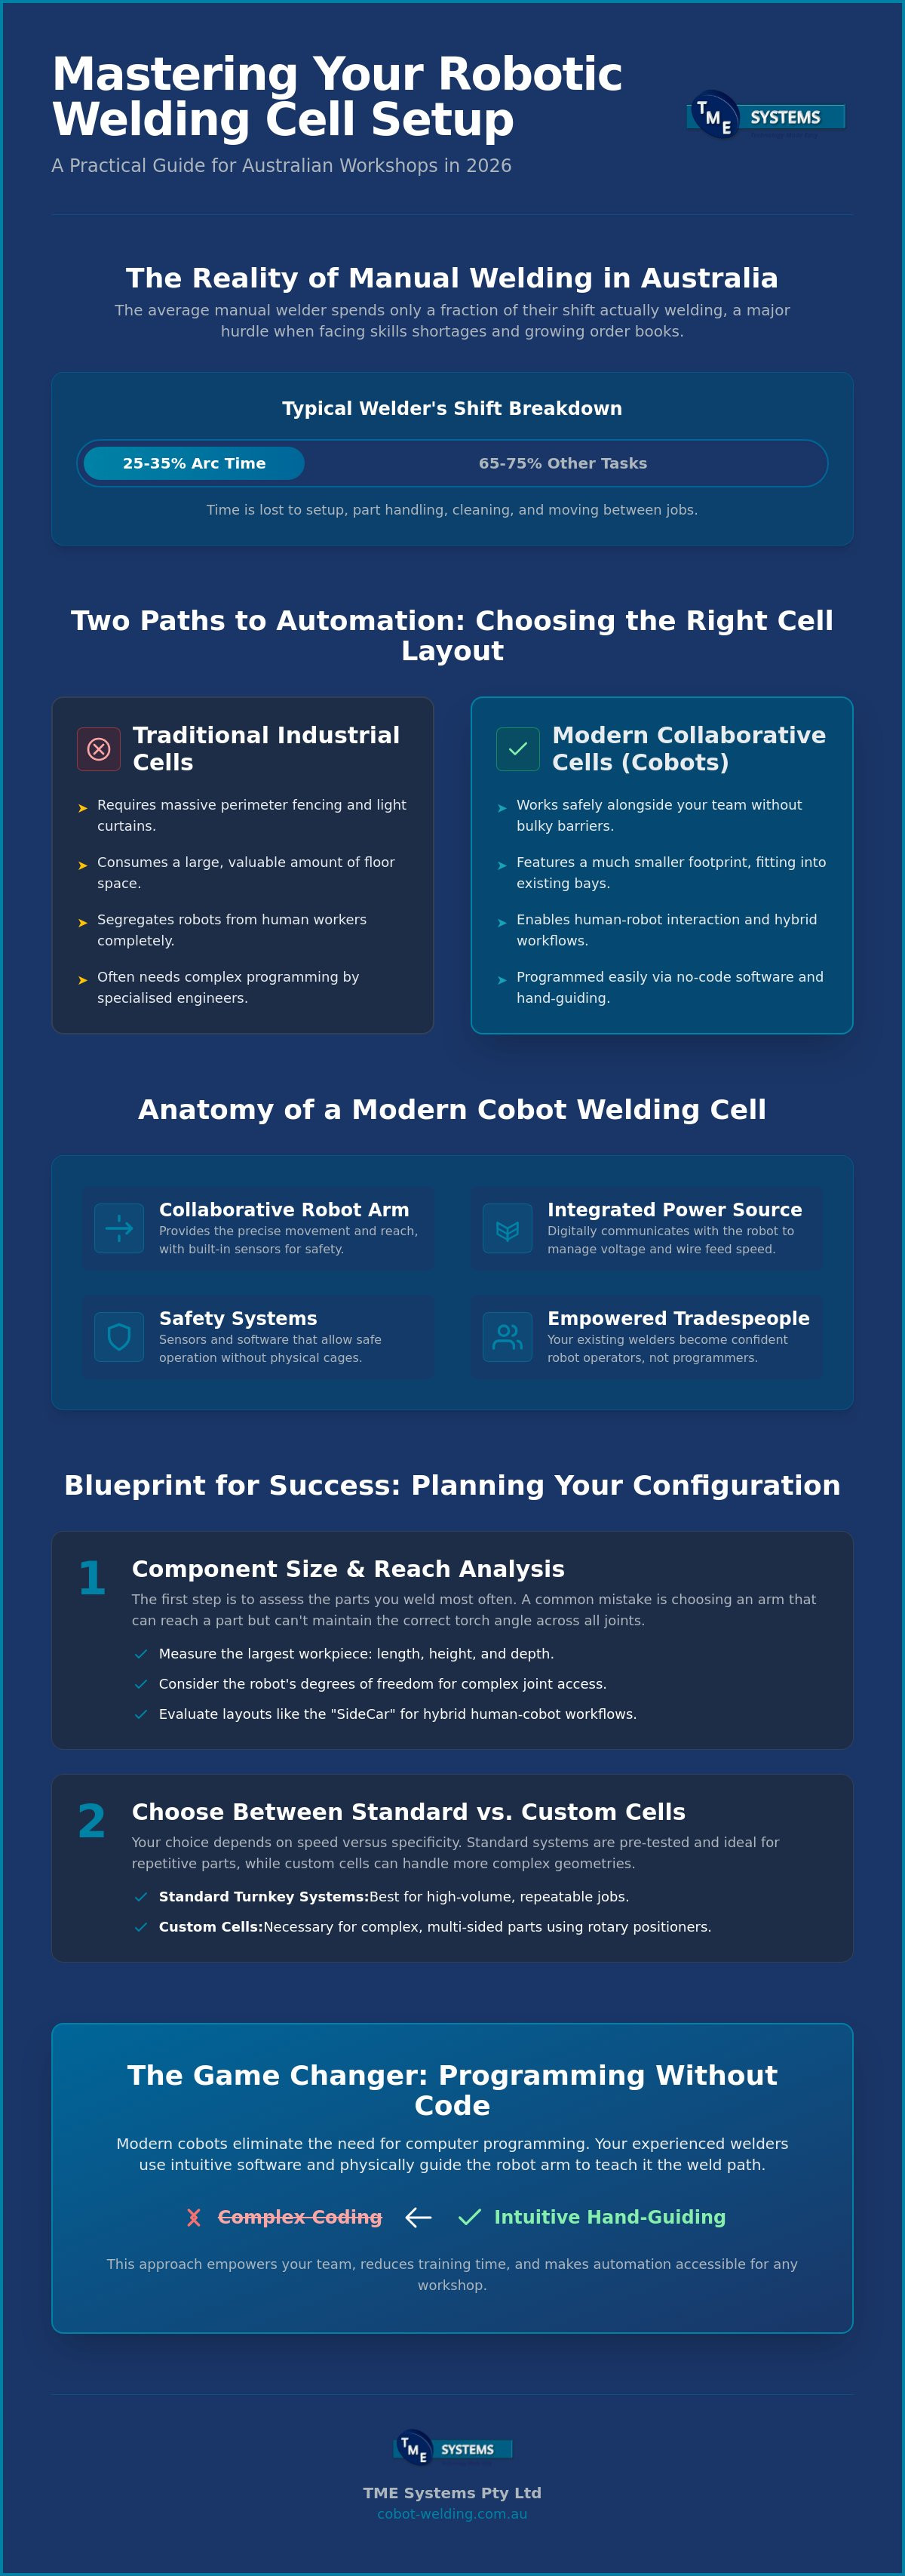
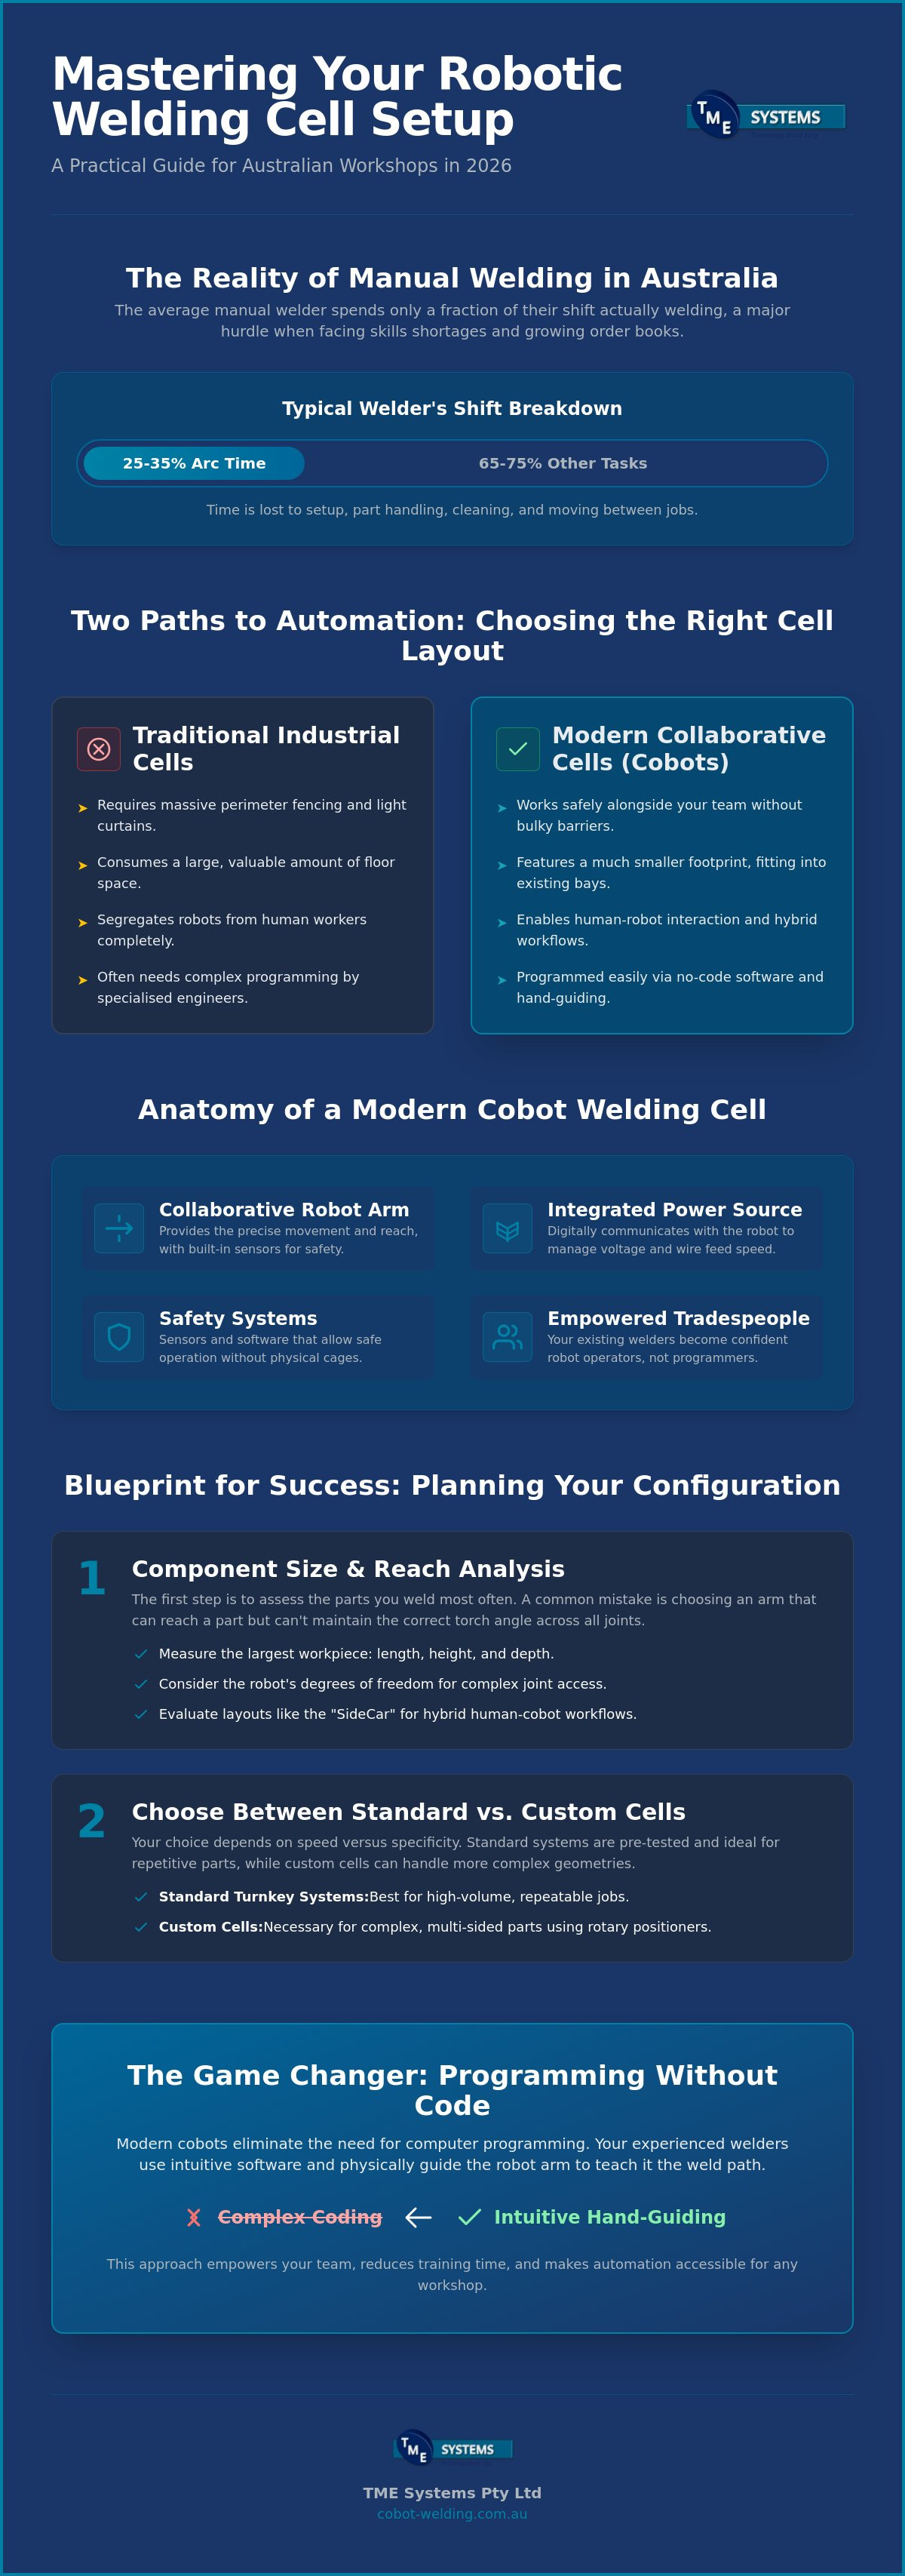
Did you know that the average manual welder in an Australian workshop spends only about 25% to 35% of their shift actually striking an arc? It's a frustrating reality when you're facing a persistent skills shortage and trying to keep up with a growing order book. Most fabricators know they need to improve throughput, but many worry that traditional automation is either too expensive or far too complex for their current team to handle.
The good news is that a modern robotic welding cell setup is no longer just for the automotive giants. By choosing a collaborative approach, you can empower your experienced tradespeople to manage high-output systems without needing a degree in computer programming. This guide will help you master the essentials of configuring and installing a cobot welding cell to boost your workshop’s productivity in 2026.
We'll walk through the practical steps of organising your workspace, meeting the latest AS/NZS safety standards, and integrating no-code software to ensure your transition to automation is both safe and seamless.
Key Takeaways
- Understand the shift from traditional industrial cages to collaborative, open-access cells that fit seamlessly into a busy workshop floor.
- Learn how to plan your robotic welding cell setup by assessing your specific component sizes and choosing between standard or custom configurations.
- Identify the essential Australian safety standards and physical layout requirements needed to keep your team safe and productive.
- Discover how no-code teaching software empowers your existing welders to program the robot arm without any previous coding experience.
- Recognise the importance of on-site training to successfully transition your tradespeople into confident operators of modern welding technology.
What is a Robotic Welding Cell Setup?
When you hear the term robotic welding cell setup, it's easy to picture a complex, high-tech fortress that only a software engineer could understand. In reality, a modern cell is a practical, integrated environment where a robot, a welding power source, and safety systems work together as a single unit. Robot welding has evolved from being an exclusive tool for massive assembly lines into a versatile asset for local job shops. It's an ecosystem. While the arm provides the movement, the power source, welding torch, and specialised table work in unison to deliver the final bead.
Getting your robotic welding cell setup right from day one is the essential foundation for improving welding productivity with cobots. If the components aren't properly aligned or the communication between the robot and the welder is laggy, you won't see the throughput gains you're looking for. A well-configured cell ensures that your existing staff can step up to the machine, load a part, and produce a high-quality weld every single time without constant troubleshooting.
Collaborative vs. Industrial Cell Layouts
The biggest shift in recent years is the move away from heavy industrial cages. Traditional robots require massive perimeter fencing and light curtains to keep people safe, which eats up valuable floor space in typical Australian workshops. Collaborative cells, or cobots, change this dynamic. They are designed with sensors that allow them to work safely alongside your team without bulky barriers. This smaller footprint means you can often tuck a welding cell into an existing bay rather than reorganising your entire shop floor. The ability to use hand-guiding, where a welder physically moves the robot arm to teach it a path, makes these setups far more approachable for tradespeople who don't have a background in coding.
The Role of the Integrated Power Source
A robot arm is only as good as the welder it's holding. In a professional setup, the power source and the robot controller must speak the same language. Modern digital communication protocols allow the robot to adjust parameters like wire feed speed, voltage, and arc start timing on the fly. This level of integration means the robot isn't just dragging a torch; it's actively managing the weld pool to compensate for different joint geometries. The power source integrates with the cobot arm through a dedicated communication interface that synchronises wire feed speed and voltage with the robot's travel path. This ensures that whether you're running a long fillet or a short tack, the heat input remains consistent and the quality stays high.
Planning Your Configuration: Standard vs. Custom Cells
Choosing the right robotic welding cell setup depends entirely on what hits your shop floor every day. For many Australian fabricators, the debate between a standard turnkey system and a custom-built cell is a matter of speed versus specificity. Standardised turnkey robotic welding units are often the most practical choice because they arrive pre-tested and ready to go. They work brilliantly for high-volume, repetitive parts where a fixed table is sufficient. However, if you're dealing with complex, multi-sided geometries, you might need to consider a rotary positioner that allows the robot to reach every joint in a single sequence.
Planning your robotic welding cell setup also requires a look at future-proofing. While you might be focused on MIG welding today, your workload might shift to TIG or even plasma cutting in two years. Selecting a controller and arm that can adapt to different processes ensures your investment doesn't become obsolete. It's about finding a balance between what you need to weld this week and where you want your workshop to be in 2026.
Step 1: Component Size and Reach Analysis
You need to measure your largest workpiece, but don't just look at the length. Consider the height and the depth of the weld joints. A common mistake is choosing an arm that reaches the part but lacks the degrees of freedom to maintain the correct torch angle. Many local shops are finding success with the "SideCar" layout. This configuration allows a welder to work on one side of a partitioned table while the cobot handles a repetitive job on the other. This hybrid approach maintains Safe Cobot Welding practices while doubling the output of a single bay. If you're unsure which reach is right for your parts, our mobile demo system can help you visualise the setup in your own bay.
Step 2: Choosing the Right Workholding
Repeatability is the secret to successful automation. If your parts aren't in the exact same spot every time, the robot will miss the seam. Modular welding tables are essential here. They allow you to quickly organise and lock in standardised jigs for different jobs. This flexibility is vital for job shops that handle small batches. Instead of building expensive, permanent fixtures for every project, you can use a kit of clamps and stops to create a repeatable environment in minutes. This keeps your downtime low and your arc-on time high, ensuring the robot is always earning its keep.
The Physical Setup: Installation and Safety Requirements
The physical floor plan of your robotic welding cell setup determines how much real-world value you actually get out of the machine. It is a mistake to treat the cell as an isolated island. Instead, you should position it to optimise the flow of parts from the prep area to the finished pallet. If an operator has to walk twenty metres to fetch every component, you're wasting the speed of the robot on poor logistics. Accessibility is also vital. Ensure there is enough space around the table for your team to perform routine maintenance, change wire spools, and clean the torch without feeling cramped.
Integrating the system into your existing workshop infrastructure is usually straightforward. Most collaborative cells are designed to run on standard factory power and gas supplies. However, you must ensure your gas lines are filtered and the pressure is consistent to prevent porosity in the welds. Your robotic welding cell setup should be a seamless extension of your current bays, sharing the same utilities while delivering significantly higher output.
Australian Standards and Risk Assessment
Safety in an Australian workshop isn't just about common sense; it's about compliance. Your setup must adhere to the AS/NZS 4024 series for machinery safety. For collaborative robots specifically, AS 4024.3303:2017 is the benchmark you need to meet. Before the first arc strike, you must conduct a task-based risk assessment. This process evaluates the robot's movement, the risk of arc flash to passersby, and the potential for pinch points. While cobots are designed to stop upon contact, the welding torch itself remains a hazard. You might still need to implement emergency stops or localised screening to protect staff in high-traffic areas.
Fume Extraction and Environmental Control
Managing air quality is becoming a major regulatory focus. From December 1, 2026, Australia will replace old standards with stricter Workplace Exposure Limits (WEL) for welding fumes. This makes your choice of extraction critical. On-gun fume extraction is often the most efficient for cobot setups because it captures contaminants directly at the source. If your parts are large or the joints are awkward, you might require overhead hoods or a specialised extraction arm. Beyond fumes, you must also protect the robot’s controller and sensors from grinding dust and spatter. Keeping the electronics clean and the workspace well-lit ensures the robot remains accurate and your operators stay safe during part loading.
Software Integration: Programming Without the Code
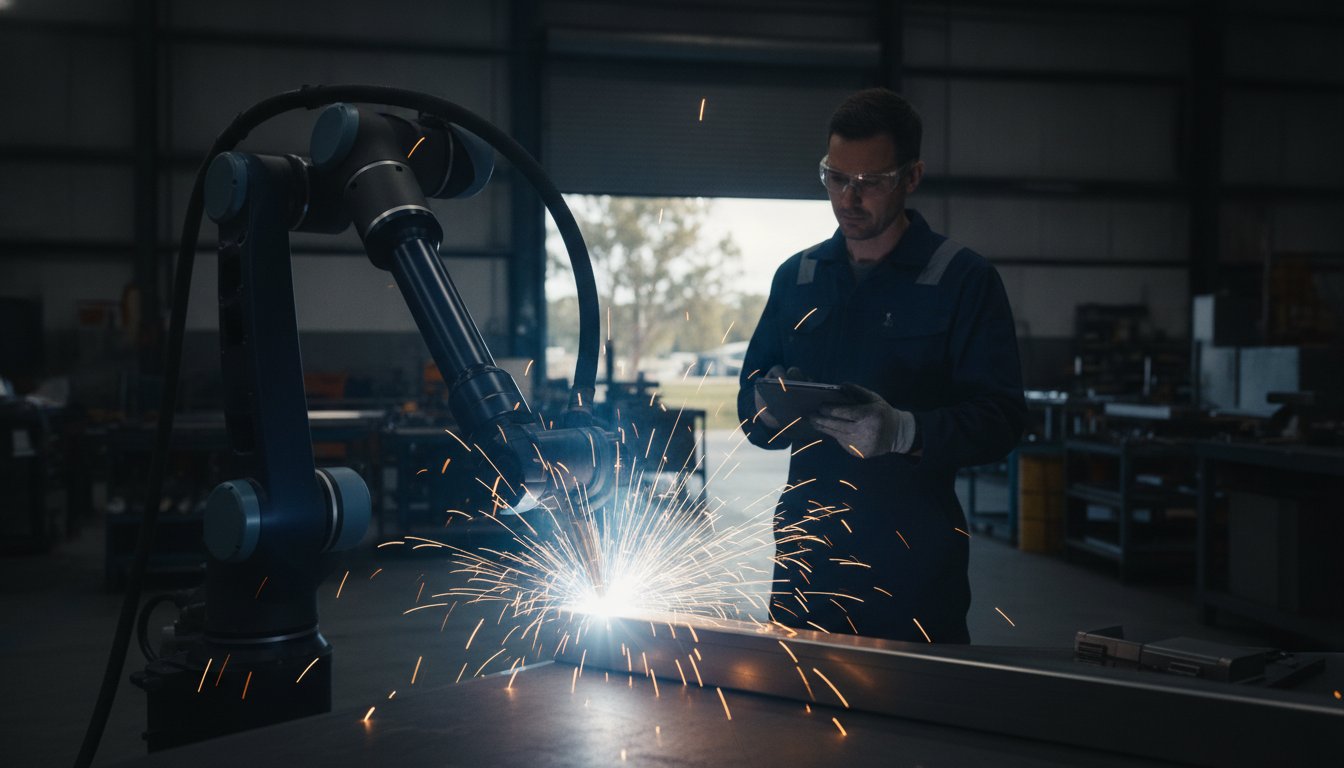
The most common fear for Australian fabricators moving into automation is the requirement for complex coding. In the past, changing a weld path meant calling in an external engineer or spending days buried in a technical manual. Modern no-code robot welding software has completely changed this dynamic. It shifts the control back to the people who actually understand the metal. Instead of staring at a screen full of proprietary script, your welder simply grabs the torch and shows the robot exactly where to go. This transition from "programming" to "teaching" is what makes a modern robotic welding cell setup so accessible for smaller workshops.
Calibrating the Tool Centre Point (TCP) is a critical part of the robotic welding cell setup process. This ensures the robot knows exactly where the tip of the wire is in 3D space, even if the torch gets a slight knock or the neck is replaced. Once the TCP is set, you can define your weld parameters, such as voltage and wire speed, directly through a tablet interface. These digital controls allow for a level of precision that is hard to maintain manually over an eight-hour shift, ensuring every part is identical to the last.
Intuitive Path Teaching
The "lead-through" method is the heart of no-code integration. By pressing a button on the robot arm, the operator releases the brakes and physically guides the torch along the desired seam. The software records these points and creates a smooth, repeatable path. No-code software translates physical movement into robot commands by recording spatial coordinates in real-time as the operator moves the arm. This allows you to fine-tune start and stop points to ensure clean weld craters and proper penetration at the beginning of the bead. It's a hands-on process that feels natural to any experienced tradesperson.
Parameter Management and Libraries
One of the biggest advantages of digital integration is the ability to build a library of "weld recipes." Once you find the perfect settings for 6mm mild steel or 3mm aluminium, you can save them for future use. This material library ensures consistency even if different operators are using the cell on different shifts. You can also adjust parameters on-the-fly without stopping the production run, allowing for minor tweaks if you notice variations in the fit-up. If you want to see how this technology can work on your own parts, our no-code teaching software and turnkey cells are designed to get you up and running in days rather than months.
Optimising Production: Training and Ongoing Support
A successful robotic welding cell setup doesn't end once the last bolt is tightened. The real work begins when your tradespeople start using the machine as a daily tool. Transitioning your experienced welders into confident robot operators is the most effective way to ensure long-term ROI. These workers already understand the weld pool, the heat input, and the material behaviour; they simply need the right guidance to translate those skills into a digital environment. By positioning the robot as a sophisticated power tool rather than a replacement, you maintain the morale and craftsmanship that define your workshop.
This is where on-site cobot welder training becomes invaluable. Learning on your own shop floor, using your own jigs and parts, removes the intimidation factor. It allows your team to troubleshoot real-world scenarios in a familiar environment. Beyond the initial training, you must establish a robust maintenance schedule to keep the system running at peak performance. This includes routine checks of the robot joints, cleaning the torch sensors, and replacing consumables like contact tips and liners before they cause wire feed issues. Localised technical support serves as your safety net, providing a direct line to experts who can minimise workshop downtime if a technical hitch arises.
Operator Onboarding Strategies
We advocate for a human-in-the-loop philosophy. The cobot handles the repetitive, physically demanding runs, while the welder provides the oversight and quality control. When introducing a new robotic welding cell setup, identify the staff members who are frustrated by mundane tasks and eager to learn new technology. These are your best candidates for lead operators. Once they see how the robot takes the strain out of high-volume work, they can focus their energy on more complex, high-value fabrication tasks. Start with one cell and a few simple parts. As your team gains confidence, you can scale to multiple units or more intricate configurations without overwhelming your existing workforce.
The TME Systems Pty Ltd Support Model
Every workshop has its own unique rhythm and challenges. A mobile welding robot demonstration is often the best first step to validate your setup plan. It proves the concept on your own parts before you commit to a full installation, ensuring the reach and the weld quality meet your standards. Our support model includes national coverage, remote diagnostics, and regular software updates to keep your system efficient. We partner with you for the long term to ensure the technology actually works for your business. Ready to see a cell in action? Book a mobile demonstration for your workshop today.
Taking the Next Step in Workshop Automation
Moving your workshop toward automation doesn't have to be a leap into the unknown. By focusing on a logical robotic welding cell setup, you're giving your team the tools they need to stay competitive in a demanding market. We have explored how no-code software removes the programming hurdle and why a collaborative layout makes the best use of your existing floor space. It's about supporting your tradespeople, not replacing them.
When you choose a system that's designed for the reality of Australian manufacturing, you're investing in more than just hardware. Our turnkey units are built for rapid deployment and come backed by national support. With no-code software integration and on-site operator training included, you can ensure your team is confident from the very first arc strike. Your workshop already has the skill; we provide the technology to help it scale.
Ready to see how this fits into your specific production line? Request a custom robotic welding cell configuration for your workshop and start refining your output for 2026. Taking the first step today will set your business up for years of consistent, high-quality production.
Frequently Asked Questions
Do I need a specialised programmer to set up a robotic welding cell?
No, you don't need a specialised programmer to manage a modern robotic welding cell setup. Our no-code teaching software allows your experienced welders to guide the arm physically to record paths. This approach keeps the process in the hands of the tradespeople who understand the metal best rather than requiring an external engineer.
How much floor space does a typical collaborative welding cell require?
A typical collaborative cell is designed to fit within the footprint of a standard manual welding bay. Because these systems don't require bulky safety cages, you can often install them in a space as small as 2.4 by 2.4 metres. This makes them ideal for Australian workshops where floor space is at a premium and needs to be used efficiently.
Is a robotic welding cell safe to use without a cage?
Yes, cobots are designed to operate safely alongside humans without traditional fencing. They use force-limiting sensors to stop instantly if they make contact with an object or person. You must still provide localised shielding to protect nearby staff from arc flash and ensure your fume extraction meets the latest workplace standards.
What is the average time it takes to set up a turnkey welding cell?
A turnkey robotic welding cell setup can usually be up and running within a few days of arriving at your workshop. Since these units are pre-integrated and tested before delivery, the process involves physical positioning, connecting utilities, and a short period of operator onboarding to get your first parts into production.
Can I use my existing MIG or TIG welder in a robotic setup?
It is possible to integrate some existing power sources, but it depends on their digital communication protocols. For a seamless setup, we generally recommend an integrated power source that allows the robot to control weld parameters in real-time. This ensures the robot can adjust wire speed and voltage on the fly for the best results.
What Australian safety standards apply to robotic welding cells?
Robotic cells in Australia must comply with the AS/NZS 4024 series on machinery safety. For collaborative applications, AS 4024.3303:2017 is the primary standard you need to follow. You are also required to conduct a thorough risk assessment to ensure the entire application is safe for your specific workshop environment.
How many parts do I need to weld to justify the setup of a robotic cell?
You don't need thousands of identical parts to justify the investment. Because no-code software makes the teaching process so fast, many fabricators find that batches as small as ten or twenty pieces are now profitable to automate. It is about the total hours of arc-on time you gain across your entire product range.
What happens if the robot hits an obstruction during the setup process?
If the robot arm hits an obstruction, its built-in sensors detect the resistance and trigger an immediate safety stop. This prevents damage to the equipment and protects the operator from injury. Once the obstruction is cleared, the system can be reset and restarted with minimal disruption to your production run.