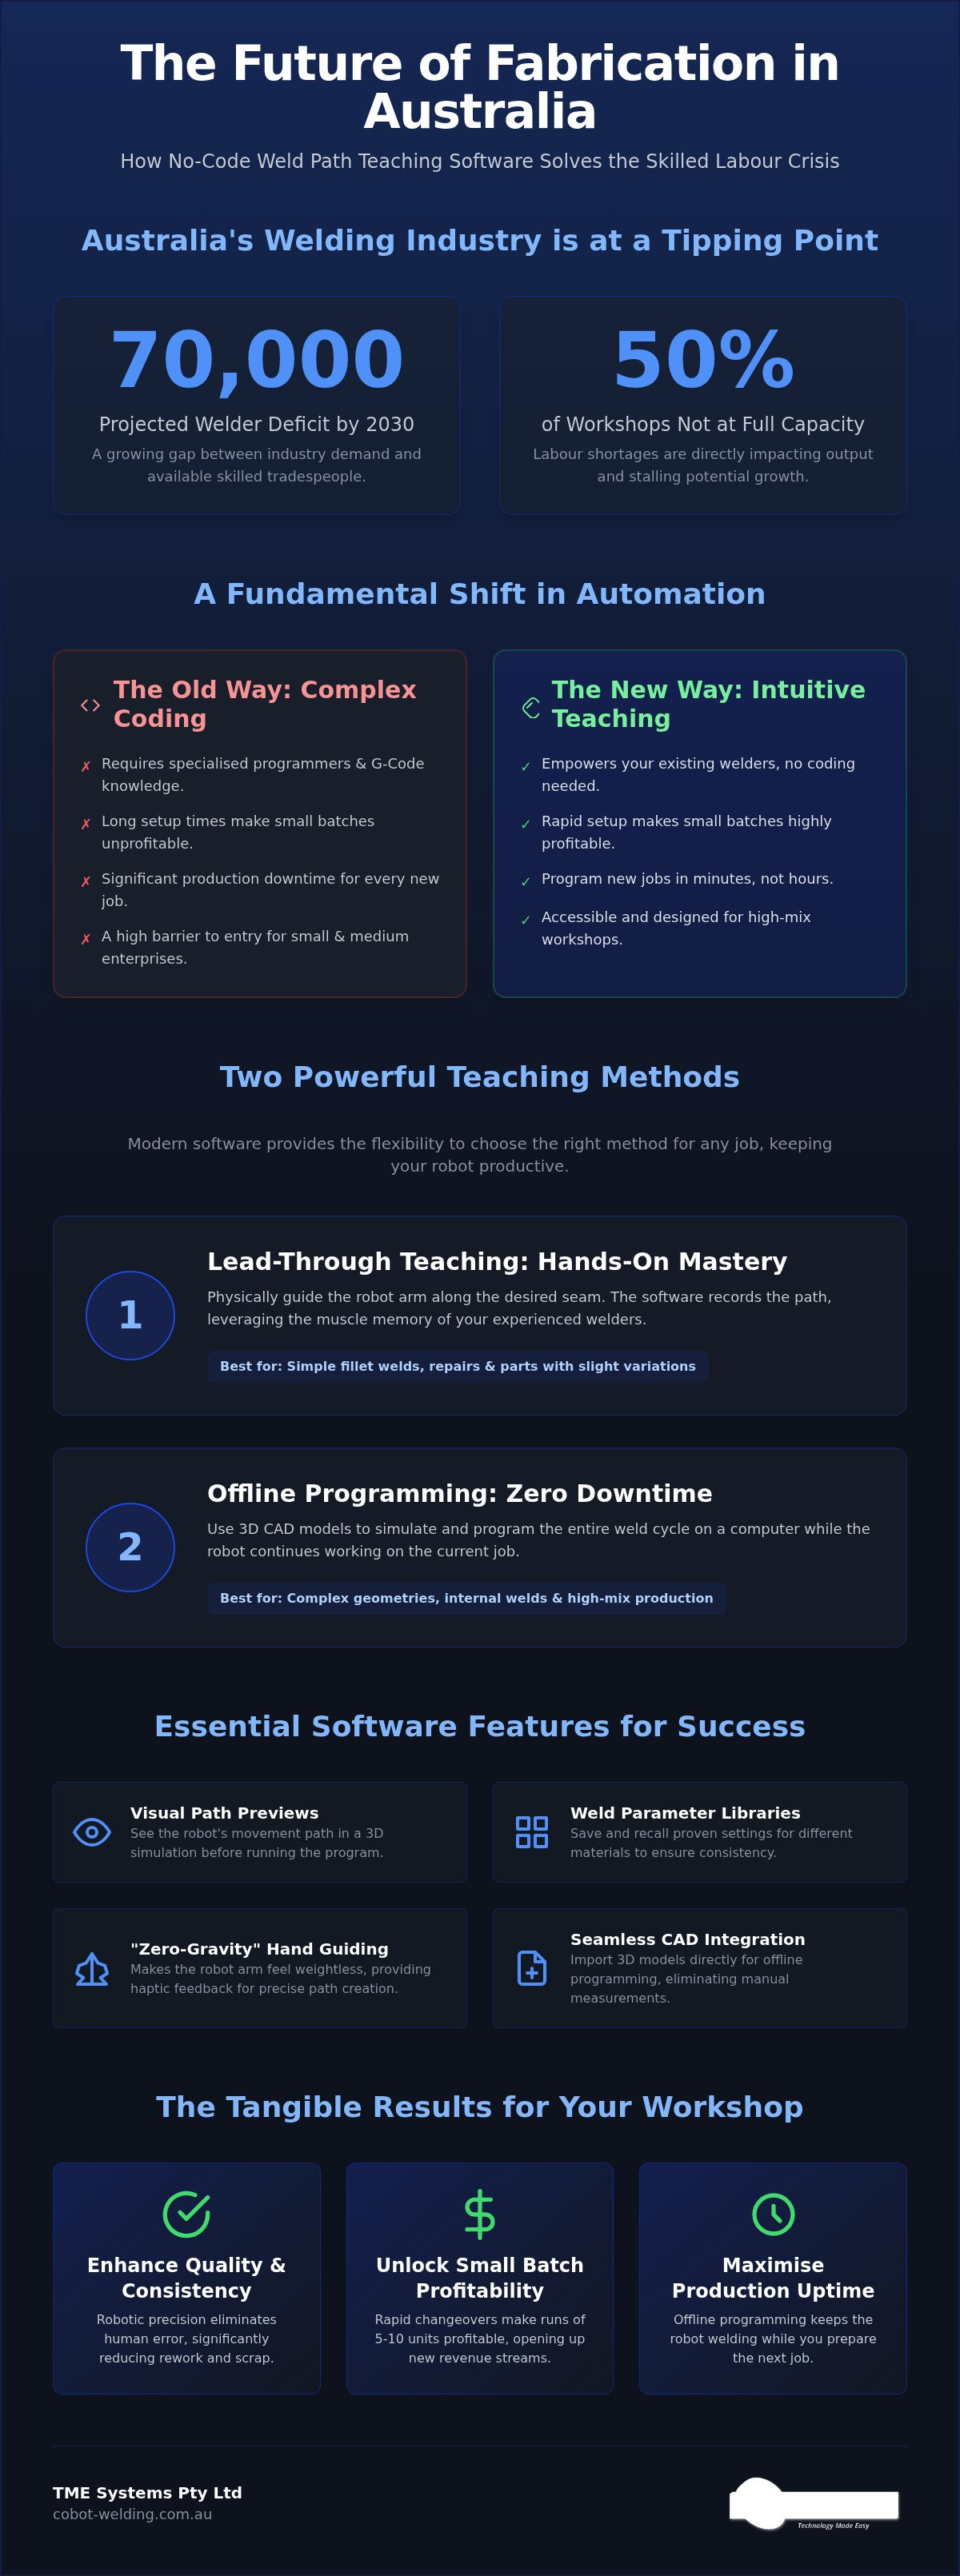
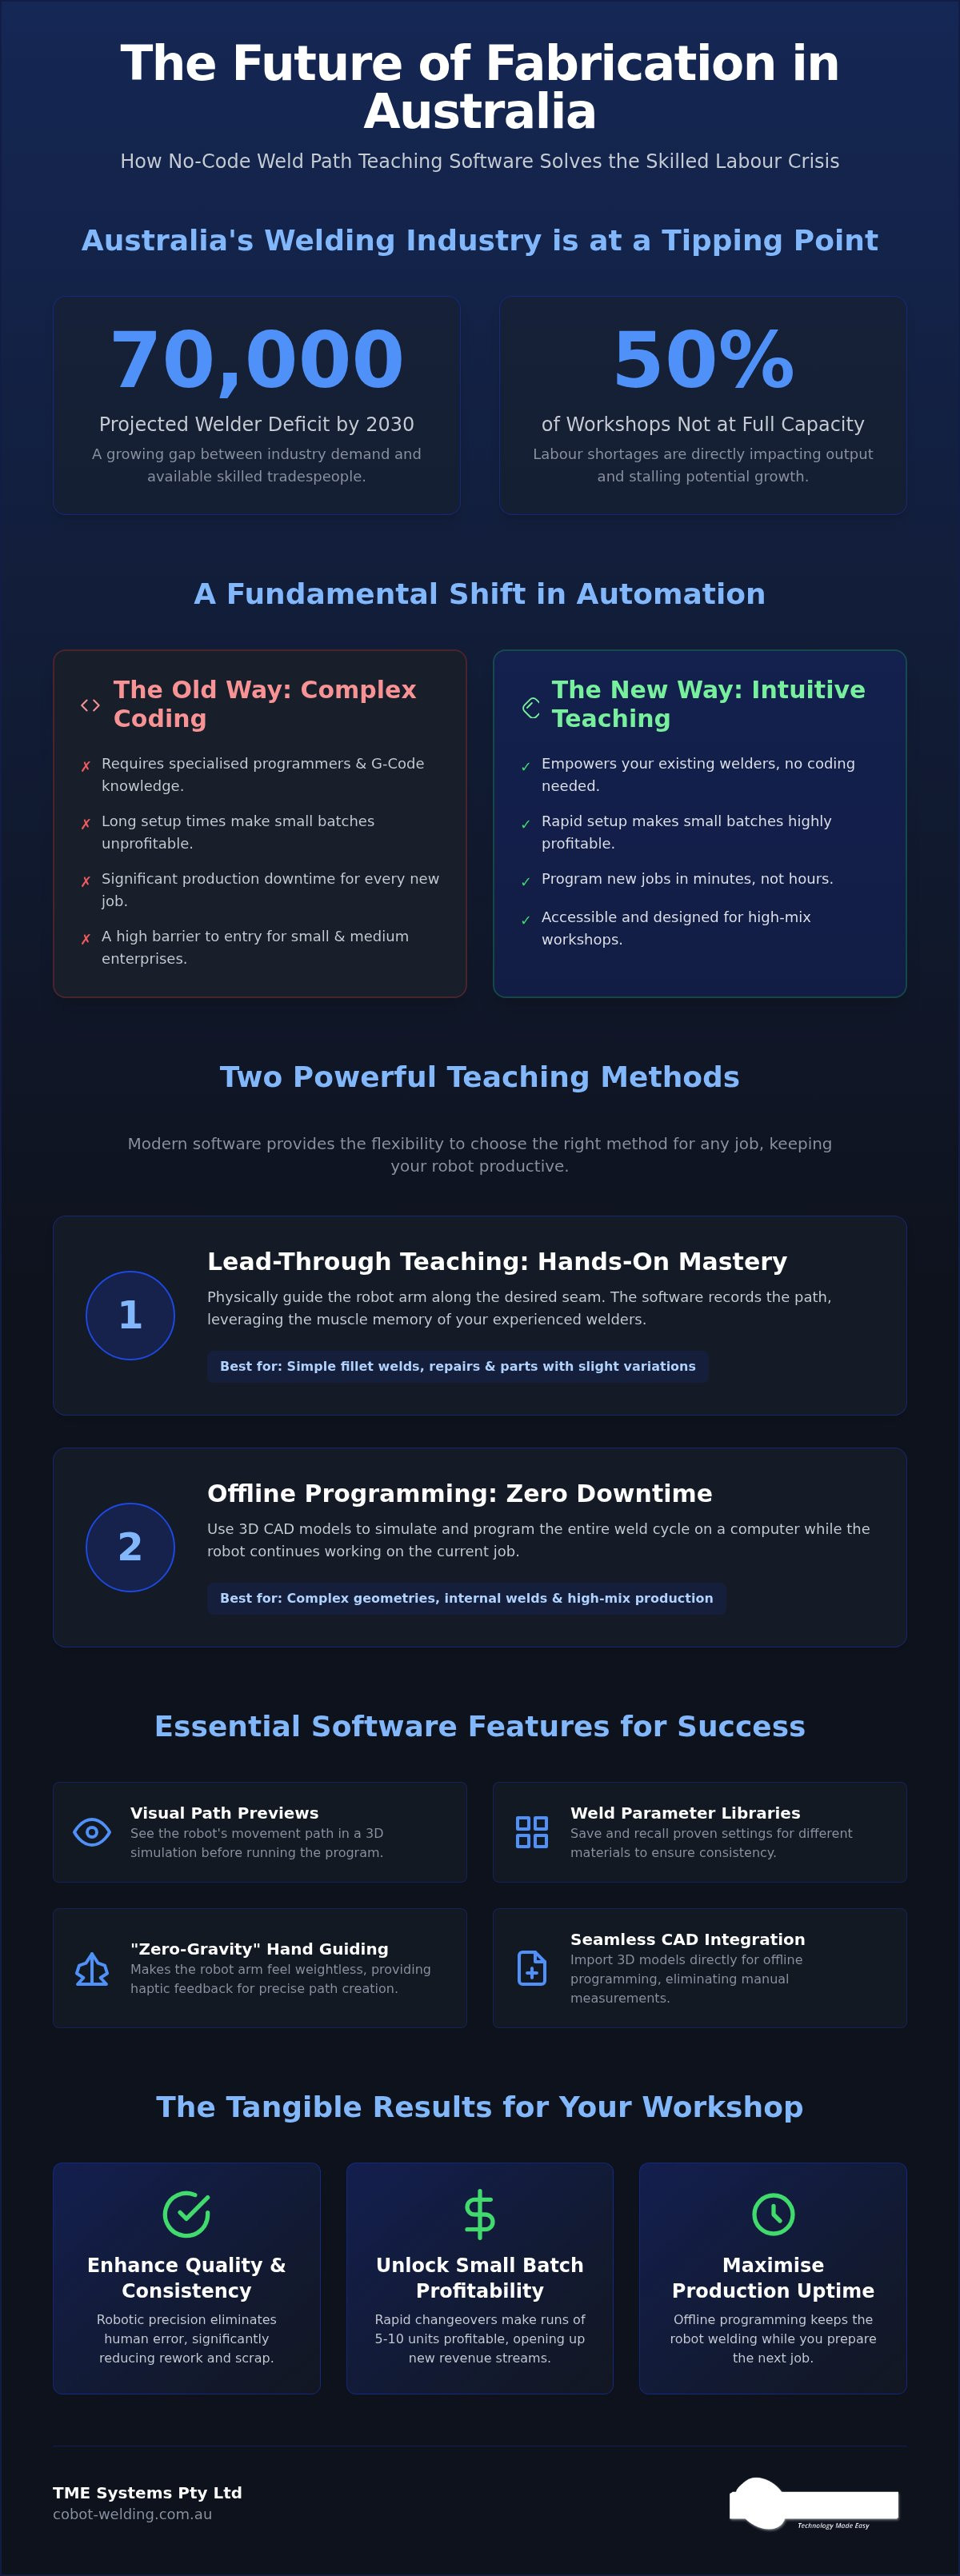
With half of Australian workshops currently struggling to run at full capacity, the projected deficit of 70,000 welders by 2030 isn't just a headline. It's a daily reality for local fabricators. You've likely felt the pressure of trying to maintain output while skilled tradespeople become harder to find and more expensive to retain. It's frustrating to watch potential growth stall because you simply can't find the hands to do the work.
We understand that traditional automation often feels out of reach for high-mix, low-volume shops. The high cost of specialised programmers and the downtime required to set up new jobs can make robots seem like more trouble than they're worth. However, modern weld path teaching software is changing that equation by putting the power back into the hands of your experienced staff.
In this guide, you'll discover how no-code tools allow your team to teach complex paths to robots through simple hand-guiding and intuitive interfaces. We'll look at how this technology reduces rework through consistent paths and keeps your production lines moving, even when labour gaps appear. It's about turning your existing tradespeople into automation experts without needing a computer science degree.
Key Takeaways
- Learn how modern weld path teaching software removes the need for complex coding by allowing your team to physically guide or simulate robotic movements.
- Understand the differences between lead-through teaching and offline simulation to determine which method best suits your high-mix production needs.
- Discover the essential software features, such as visual path previews and parameter libraries, that ensure consistent weld quality across every batch.
- Find out why your existing manual welders are the ideal candidates to operate robotic cells and how to organise your floor for a smooth transition.
- Explore how local integration and on-site training help your workshop overcome skilled labour gaps and maintain steady production output.
What is Weld Path Teaching Software and How Does it Work?
At its simplest level, weld path teaching software is a digital interface that translates physical movements or CAD data into precise robotic instructions. It removes the need for manual coding, allowing a tradesperson to define a weld path without ever touching a line of text. Instead of a computer scientist dictating the arc, your experienced welder becomes the one "teaching" the machine how to perform.
This represents a major shift in how the Australian fabrication industry approaches automation. For years, Robot welding was synonymous with complex programming pendants and expensive external consultants. For many small-to-medium enterprises (SMEs), this traditional approach is becoming obsolete. The time and cost required to program a single part often outweighed the benefits of using a robot in the first place. Modern teaching software acts as a bridge, combining a welder’s deep understanding of heat and metal with a robot’s tireless precision.
The Evolution from G-Code to No-Code
Traditional industrial robots rely on specific languages that look more like computer programming than metalwork. Learning these proprietary codes takes months of dedicated training. In contrast, no-code interfaces use visual blocks, icons, and 3D simulations to represent the welding process. By using weld path teaching software, you're essentially bypassing the steep learning curve of G-code in favour of a visual, logic-based system. You don't need to understand syntax to set a travel speed or an approach angle; you simply select the parameter from a menu. This transition has a massive impact on setup times. Workshops handling diverse job types can now move from a drawing to a finished weld in a fraction of the time it once took to write a single script.
Why Teaching Beats Coding for Small Batches
In the context of Australian manufacturing, a "small batch" often means a run of just 5 to 10 units. Using traditional coding for such a short run is rarely profitable because the setup time eats the margin. Rapid path teaching changes this by making the changeover process almost as fast as setting up a manual jig. By physically guiding the arm or using a 3D model, an operator can prepare a new job in minutes rather than hours. Batch flexibility is the key to achieving a rapid return on investment in a modern workshop. This speed ensures that even the smallest jobs benefit from the consistency and quality of robotic output.
Lead-Through vs. Offline Path Teaching: Choosing Your Method
Choosing the right way to program your robot isn't about picking a single winner. It's about matching the tool to the specific job on your bench. In most modern Australian workshops, the best results come from understanding when to use hands-on lead-through teaching and when to move to a virtual environment. Modern weld path teaching software provides the flexibility to switch between these methods, ensuring your robot stays productive regardless of part complexity.
The Lead-Through Method: Hands-On Mastery
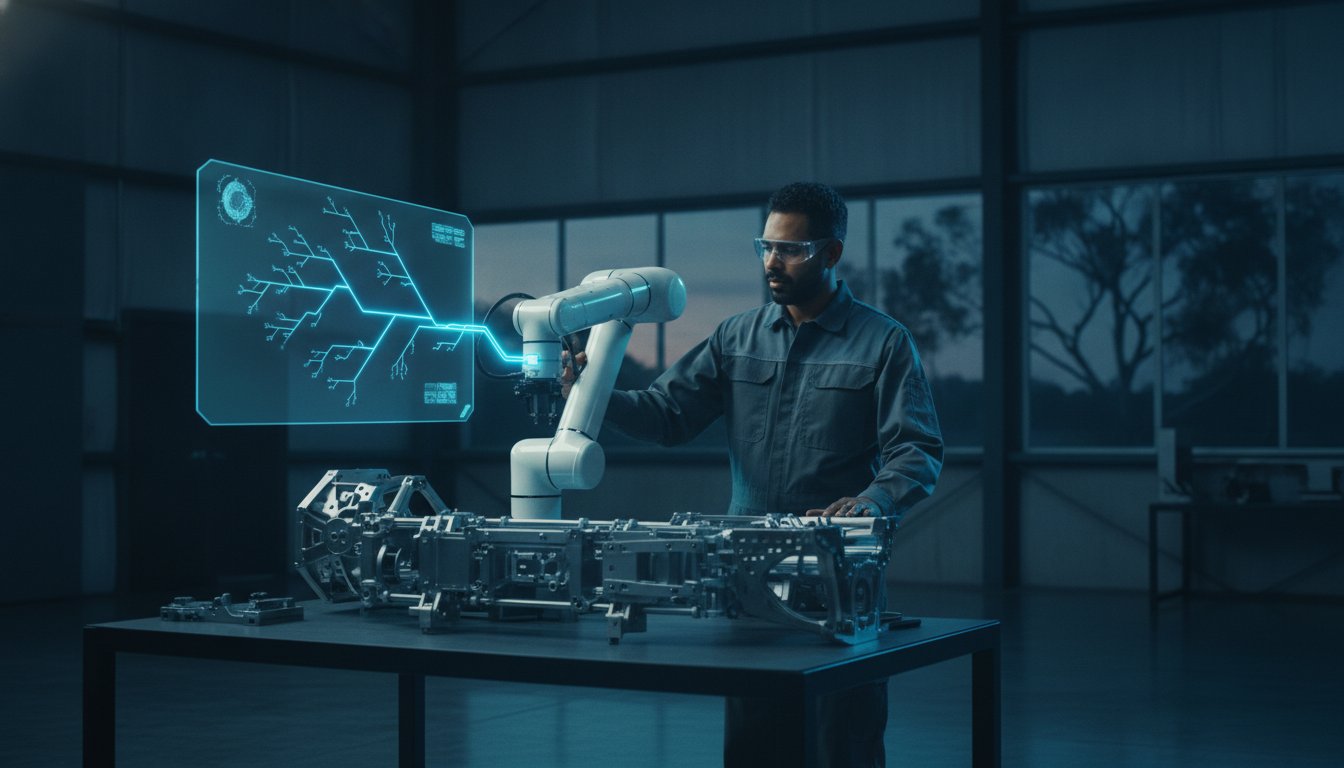
Lead-through teaching is the most intuitive entry point for experienced manual welders. It involves physically guiding the robot arm along the desired seam to record waypoints. High-quality software utilises "zero-gravity" or "active drive" modes, where the robot's motors assist the operator's movement to make the arm feel weightless. This provides essential haptic feedback, allowing the welder to feel the torch angle and nozzle distance just as they would during a manual pass. The American Welding Society highlights that this direct interaction is a core component of successful robotic adoption, as it leverages the existing muscle memory of your best tradespeople. It's the perfect choice for simple fillet welds or repairing parts where the physical work-piece might vary slightly from the original drawing.
Offline Teaching: Programming Without Downtime
Offline programming (OLP) takes the teaching process off the workshop floor and onto a computer. By using 3D CAD models of your parts and jigs, you can simulate the entire welding cycle in a virtual cell. This is a game-changer for high-mix production. Your robot can continue welding the current batch while an operator sits at a desk to "teach" the next job. This method is particularly effective for complex geometries, such as intersection curves or internal welds where physical access for lead-through teaching might be cramped. OLP software automatically calculates the smoothest path, reducing the risk of collisions and ensuring the torch maintains a consistent travel speed throughout the entire weld.
The real power of modern weld path teaching software lies in the hybrid approach. You might use offline tools to generate the bulk of a complex path, then use lead-through teaching to "touch up" specific points once the part is actually on the jig. This combination ensures maximum precision while accounting for real-world manufacturing tolerances. If you're unsure which method fits your current workflow, seeing a collaborative robot welding cell in action can help you decide. Ultimately, the right method is the one that keeps your arc on for the longest period each shift, turning setup time into productive welding time.
Key Features to Look for in Intuitive Robot Teaching Software
Selecting the right weld path teaching software is about finding a tool that thinks like a welder. If the interface is cluttered with computer science jargon, your team will hesitate to use it. You need a system that prioritises the reality of the workshop floor, where safety and precision are non-negotiable. Key features like visual path previews allow operators to see the intended weld bead on a screen before they ever strike an arc. This visual confirmation reduces wasted materials and provides a layer of reassurance for new users who are still building confidence with the system.
Safety is another critical pillar. Modern software includes automatic collision detection and the ability to set safety boundaries. These virtual fences prevent the robot from hitting jigs or overextending its reach, protecting your investment and your staff. By integrating these safeguards, the software lowers the risk of human error during the teaching phase. You want an interface that uses welding terminology, like travel angle and gas flow, rather than abstract coordinates or code strings. This makes the technology feel like a natural extension of the tools your team already uses daily.
Parameter Management and Libraries
The ability to save and recall weld recipes is essential for maintaining consistency across different shifts. A robust library stores specific settings like voltage, wire feed speed, and travel angle for various materials and thicknesses. This ensures that a job welded on a Monday morning by one operator looks identical to the same job finished on a Friday afternoon by another. Linking these parameters to specific paths helps your workshop meet strict quality standards without constant manual oversight. Ongoing research into Robotic Welding Process Optimization shows that these digital libraries are fundamental to reducing defects and improving overall throughput in automated cells. It's about capturing the expertise of your best welders and making it repeatable.
Real-Time Path Adjustment
No part is ever perfectly identical to the CAD model. Clamping errors or variations in part fit-up are common hurdles in any fabrication shop. Effective weld path teaching software allows for real-time adjustments, enabling operators to nudge a path slightly without having to re-teach the entire sequence from scratch. This saves significant time during the initial setup of a batch. To account for physical shifts in the workpiece, the software uses touch-sensing to identify the exact location of the joint by using the wire or nozzle to contact the part surface. This level of adaptability ensures that the robot remains accurate even when real-world conditions aren't perfect. It's this practical flexibility that makes no-code automation a viable solution for the unpredictable nature of high-mix manufacturing.
How to Organise Your Workshop for Software Implementation
Implementing new technology requires more than just unboxing a robot and turning it on. To get the most out of your weld path teaching software, you need to look at how your workshop floor is organised. It starts with your people. Your most skilled manual welders are actually the best candidates to lead this transition. They already understand travel speeds, torch angles, and how the pool reacts to heat. By putting them in charge, you ensure the robot's output matches the high standards of your handcrafted work.
Upskilling Your Current Team
The shift from manual welder to cobot operator shouldn't be a source of anxiety. In fact, it's a career step up that removes the most repetitive, physically taxing parts of the job. Because the software is designed for tradespeople rather than programmers, the learning curve is measured in days, not months. Most operators feel confident setting up their own paths after just a few sessions. For those looking for a structured approach, on-site cobot welder training provides a practical way to bridge the gap. This hands-on support helps your team see the robot as a tool that empowers them, rather than something that replaces them.
Workflow and Job Preparation
To maximise efficiency, your physical environment needs to mirror the speed of your digital tools. Standardising your jigs and fixtures is a simple but effective way to make path teaching faster. When every part sits in the exact same position, your digital library becomes a powerful asset. You can store paths for repeat customers and recurring jobs, pulling them up in seconds when a new batch arrives. This is where welding system integration plays a vital role. A specialist can help set up your cell so that the software, the robot, and your power source all talk to each other seamlessly from day one.
If you're moving toward offline teaching, "clean" CAD data is essential. Ensure your drawings are up to date and represent the actual part geometry accurately. This prevents the need for constant "touch-ups" on the floor. Finally, start tracking "time-to-teach" as a key performance indicator. By measuring how long it takes to go from a bare jig to the first arc, you can identify where your team might need more support or where your fixtures could be improved. Ready to see how this fits into your workshop? You can explore our no-code teaching solutions to get started.
Why TME Systems Leads in No-Code Teaching Solutions
At TME Systems Pty Ltd, we focus on making automation accessible for every Australian fabricator. We know that technology is only useful if it works in the real world, next to your grinders and jigs. That's why our approach to weld path teaching software isn't just about the digital interface. It's about ensuring the software actually improves your daily throughput. Many of our local clients have seen their production output double by moving repetitive work to a cobot cell. This isn't just theory; it's a practical result of giving tradespeople better tools to do their jobs.
We believe that seeing is believing. You don't have to guess how this will fit into your shed or work with your specific parts. You can book a mobile welding robot demonstration to see the software in action on your own floor. This on-site proof of concept allows your team to touch the arm and record a path before you commit to a full installation. It's the best way to demystify the process and build confidence among your staff.
Local Support for Australian Fabricators
The biggest risk with new technology is being left without support when a problem arises. We act as a national partner, providing the integration and training needed to keep your floor moving. We don't just drop off a box. Our team customises the weld path teaching software interface to match your existing power sources and equipment. This creates a seamless connection between the robot and your welding gear. If you run into a snag or need an update, our local technical support is just a phone call away. This ongoing partnership ensures your transition to no-code automation stays smooth and profitable over the long term.
Future-Proofing Your Workshop for 2027 and Beyond
With the industry facing a massive deficit of 70,000 welders by 2030, the pressure to produce more with fewer hands will only increase. Scalable robotic solutions are no longer a luxury; they're a survival strategy for local manufacturers. By adopting no-code tools now, you're building a workshop that is resilient against labour shortages and rising costs. You can learn more about how to improve welding productivity with cobots in our detailed guide.
The goal is to empower your staff to do more. When you combine human skill with robotic consistency, your shop becomes more competitive and more profitable. Contact TME Systems Pty Ltd today to refine your automation strategy and see how we can support your growth through practical, hands-on innovation.
Securing Your Workshop's Future with No-Code Automation
Modern fabrication is changing, but your most valuable asset remains the skill of your tradespeople. By adopting weld path teaching software, you're not replacing that experience; you're amplifying it. We've seen how removing the barrier of complex coding allows local shops to tackle high-mix, low-volume jobs with the same efficiency as mass production. It's about giving your team the practical tools they need to stay competitive in a challenging labour market.
Transitioning to robotic welding doesn't have to be intimidating when you have a trusted local partner. TME Systems provides turnkey MIG and TIG solutions backed by Australian-owned and operated support. We specialise in no-code integration, ensuring the technology adapts to your specific workshop workflow rather than the other way around. If you're ready to see the difference for yourself, you can Book a Mobile Demo to See No-Code Teaching in Action on your own workshop floor. Taking that first step toward automation is a sensible way to future-proof your business while supporting your staff. Innovation is well within your reach.
Frequently Asked Questions
Do I need to know how to code to use weld path teaching software?
You don't need any coding knowledge to operate modern weld path teaching software. These systems are built specifically for tradespeople, using visual icons and lead-through methods instead of text-based programming. By physically moving the robot arm or selecting pre-set blocks on a screen, you can define complex paths in minutes. This removes the need for specialised programmers and keeps the control on your workshop floor.
How long does it take to teach a robot a new weld path?
Teaching a simple path can take as little as five to ten minutes from start to finish. For more intricate parts with multiple seams, you might spend thirty minutes to an hour refining the sequence. This is a massive improvement over traditional methods that often required hours of downtime for manual code entry. The speed of no-code tools makes it profitable to automate even the smallest batches.
Can this software handle complex TIG welding paths on aluminium?
Yes, modern software is highly capable of managing the precise torch angles and travel speeds required for TIG welding on aluminium. You can save specific recipes for high-frequency starts and crater-fill settings in the digital library. The software ensures the robot follows the exact path needed to manage heat effectively, which is critical for maintaining the structural integrity and appearance of aluminium welds.
Will my existing manual welders be able to use this software?
Your manual welders are actually the ideal candidates for using this technology. Because they already understand weld pool behaviour and torch positioning, they can teach the robot more effectively than a computer programmer could. The software is designed to be a digital extension of their existing trade skills. Most operators feel comfortable running the system after just a few days of hands-on training.
What happens if the part fit-up is slightly different every time?
The software uses touch-sensing and seam-finding features to account for minor variations in part fit-up. By touching the wire or nozzle against the workpiece at the start of a cycle, the robot can shift its entire path to match the actual position of the joint. This flexibility ensures that small clamping errors or manufacturing tolerances don't lead to missed seams or poor-quality beads.
Is offline teaching software better than lead-through programming?
Neither method is inherently better, as they both serve different production needs. Lead-through programming is excellent for fast, hands-on setup of simple parts. Offline programming is superior for complex geometries or when you want to keep the robot welding while you prepare the next job on a PC. Many Australian shops find a hybrid approach works best for their high-mix workflow.
What kind of computer hardware is required to run this software?
Most no-code systems run on standard, modern Windows-based laptops or industrial PCs. If you're using offline simulation, a decent graphics card and a mid-range processor are recommended to handle 3D CAD models smoothly. For lead-through teaching on the floor, the interface is typically provided through a ruggedised tablet or the robot's own teach pendant, requiring no additional hardware purchase.
Can I use this software with my existing welding power source?
You can typically integrate weld path teaching software with major power source brands like Fronius, Kemppi, Miller, and Lincoln Electric. Our team customises the interface to ensure the software talks directly to your existing gear. This allows the robot to control parameters like wire feed speed and voltage automatically, ensuring that your preferred welding settings are maintained throughout every cycle.