What if the most expensive mistake in your automation journey isn't the robot itself, but the clutter and compatibility issues that stall your production? Many Australian fabricators feel a genuine hesitation when looking at a bare cobot arm, worrying they'll over-capitalise on gadgets that don't play well together. It’s a common frustration. Managing a tangle of cables and sensors in a tight workshop is the last thing you need when you're trying to get through a heavy run of small-batch jobs.
We believe your technology should adapt to your workshop, not the other way around. This guide helps you identify the essential collaborative robot welding accessories that turn a standard arm into a high-performance welding partner. You will discover how the right tooling improves weld consistency and keeps your floor organised and safe. We’ll preview the must-have kit versus the optional extras, showing you how to refine your setup to support your team's existing skills without the headache of complex programming or unnecessary technical jargon.
Key Takeaways
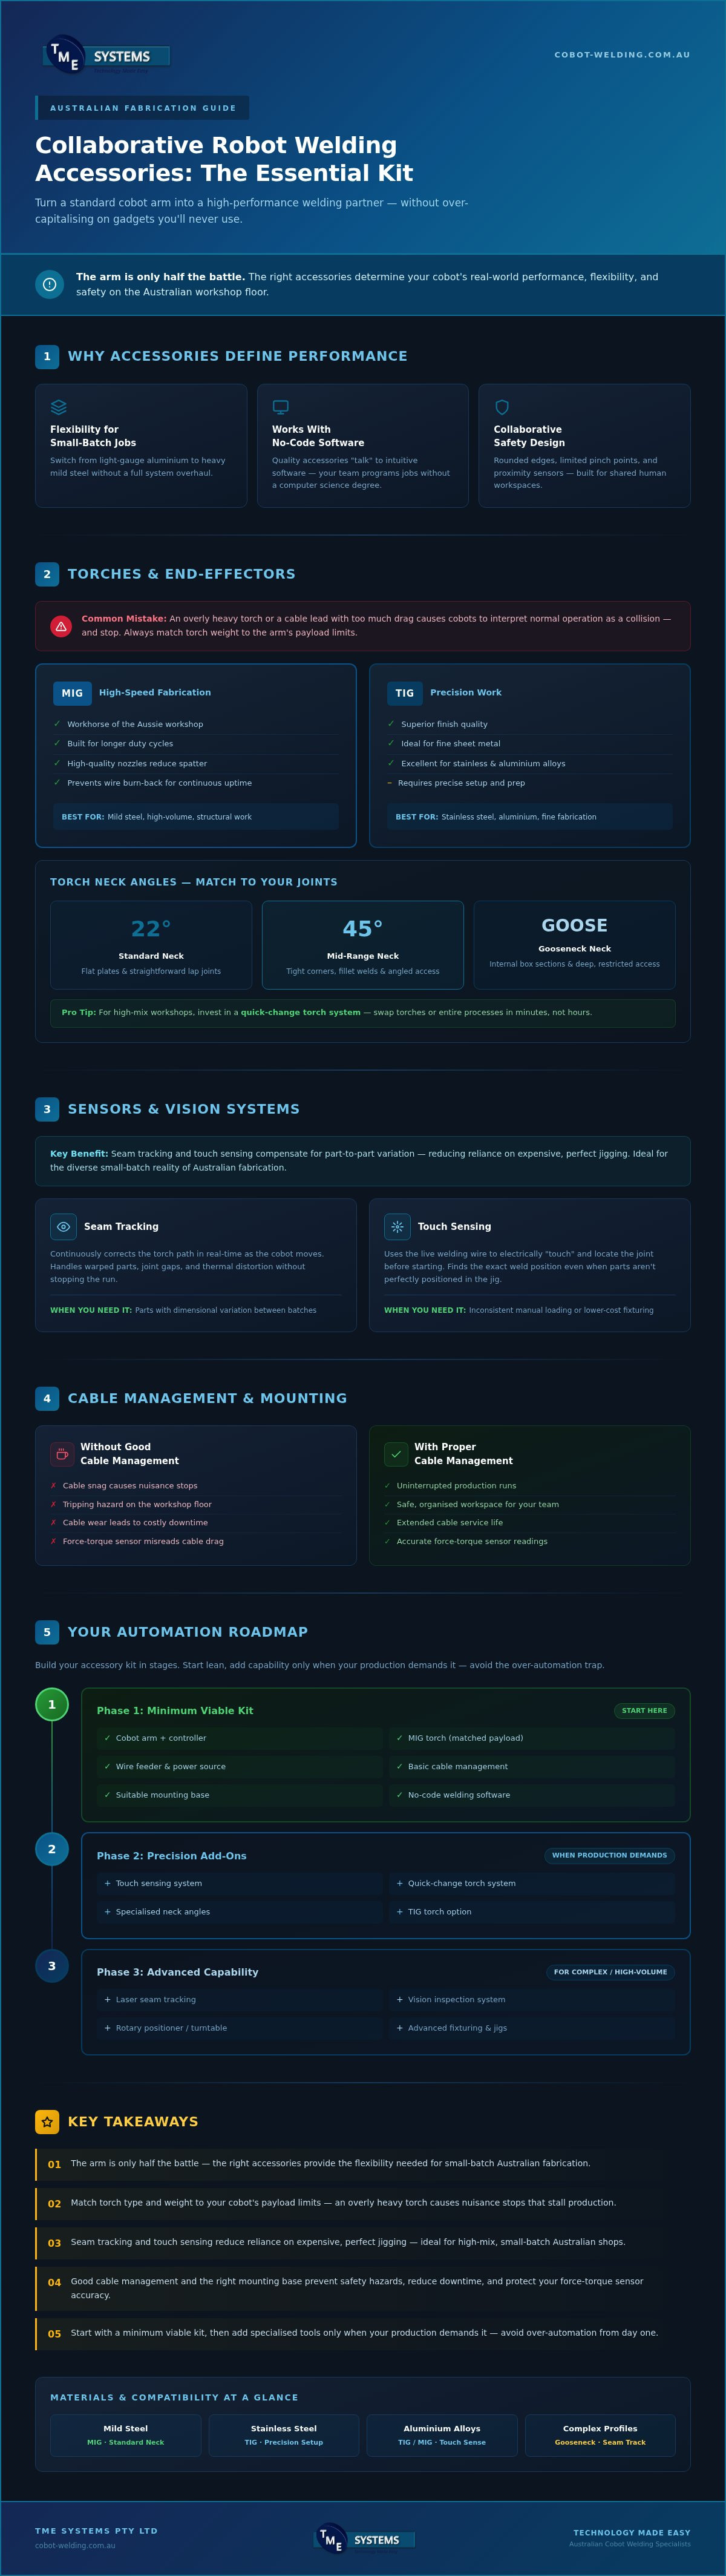
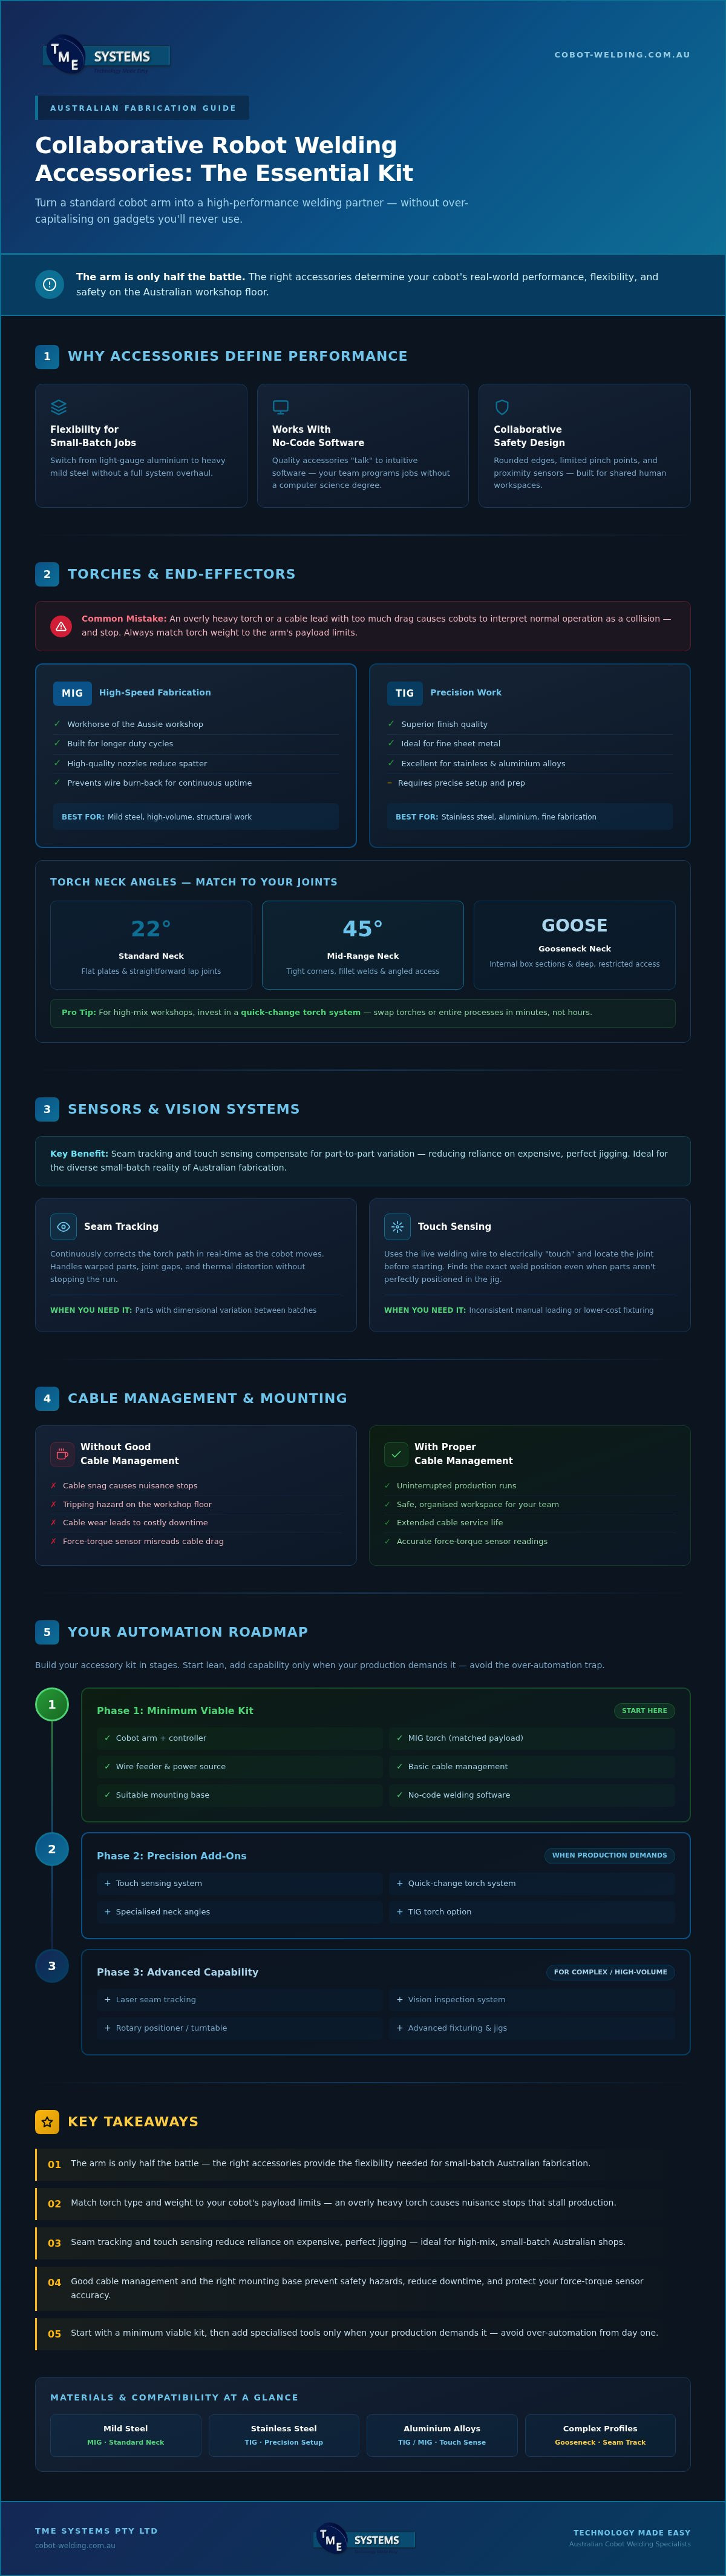
- Understand why the arm is only half the battle and how the right collaborative robot welding accessories provide the flexibility needed for small-batch Australian fabrication.
- Learn how to select the correct torch type and weight to ensure your system stays within payload limits while maintaining high-quality output.
- Discover how seam tracking and touch sensing technology can compensate for part variations, reducing the need for expensive, perfect jigging.
- Minimise safety risks and costly downtime by organising your workspace with effective cable management and the right mounting base for your shop floor.
- Create a practical roadmap for your automation journey, starting with a minimum viable kit and adding specialised tools only when your production demands it.
Beyond the Arm: Why the Right Accessories Define Your Cobot’s Performance
Buying a cobot arm is a major step, but it's only half the journey. Think of the arm as a skilled apprentice who has the reach but lacks the tools. To get real work done, you need the right collaborative robot welding accessories to handle the heat, the wire, and the specific joints of your project. Without these, even the most advanced arm is just an expensive piece of hardware sitting idle on your workshop floor.
For most Aussie fabricators, the goal isn't mass production of a single part. It’s about handling a diverse mix of small-batch jobs with high precision. The right kit enables this flexibility. It allows you to switch from a light gauge aluminium frame to a heavy mild steel bracket without a complete system overhaul. Starting with the essentials adds immediate value while avoiding the "over-automation" trap where you pay for features you’ll never actually use.
This hardware works in tandem with your no-code robot welding software. While the software makes the teaching process simple, the accessories ensure the physical execution is flawless. When the software "talks" to high-quality sensors and torches, the result is a seamless experience that empowers your existing team rather than replacing them.
The Role of Accessories in Collaborative Environments
Collaborative gear is fundamentally different from traditional industrial robot parts. In a shared workspace, safety is the priority. Accessories are designed with rounded edges, limited pinch points, and integrated sensors that respect the proximity of human operators. We favour gear that is "plug and play," meaning it integrates with intuitive software interfaces without requiring a degree in computer science. This ensures your skilled welders spend their time refining welds, not troubleshooting cable connections or complex integration bugs.
Future-Proofing Your Workshop Investment
Smart automation is about modularity. You don't need every sensor on day one. By choosing modular collaborative robot welding accessories, you can build a toolkit that grows as your production needs evolve. This approach keeps your initial investment manageable while leaving the door open for advanced seam tracking or vision systems later. We also emphasise the importance of local support. Having a partner who understands Australian fabrication standards ensures your specialised gear stays maintained and your uptime remains high, regardless of whether you're working with stainless steel or complex aluminium alloys.
End-Effectors and Torches: Choosing the Business End of Your Welder
The torch is the most critical part of your setup. It is where the electricity, gas, and wire meet the metal to create the final product. When selecting collaborative robot welding accessories, you must consider the specific needs of your projects. Are you doing heavy structural work or fine sheet metal? The choice between MIG and TIG torches isn't just about the process; it is about how that hardware interacts with the cobot arm and your software.
Weight is a major factor that often catches people out. Unlike traditional industrial robots, cobots have sensitive force-torque sensors. If a torch is too heavy or the cable lead creates too much drag, the robot might interpret this as a collision and stop. Keeping your end-effector within the payload limits ensures smooth movement and prevents nuisance trips that stall your production. It’s better to choose a torch designed for the arm's specific capacity rather than trying to adapt a heavy manual torch.
Torch neck angles also play a huge role in your success. A standard 22-degree neck might work for flat plates, but a 45-degree or specialised gooseneck is often necessary to reach into tight corners or internal box sections. For workshops handling high-mix work, quick-change systems are a lifesaver. These allow you to swap torches or entire processes in minutes. This flexibility is vital for Australian fabricators who need to pivot between different projects throughout the day without wasting hours on reconfiguration.
MIG Torches for High-Speed Fabrication
MIG is the workhorse of the Aussie workshop. Robotic MIG torches need to be more durable than manual ones because they run longer duty cycles without the breaks a human welder takes. Heat dissipation is key here. High-quality nozzles and contact tips reduce spatter and prevent the wire from "burn-back," which keeps the robot running without human intervention. Integrating a reliable wire feeder is equally important. It ensures the wire reaches the torch at a consistent speed, preventing arc instabilities that cause rework. If you are looking to get started, our collaborative robot welding cells come with integrated systems designed to handle these demands.
Specialised Tooling for TIG and Clean Finishes
When aesthetics matter, TIG is the preferred choice. Automated TIG accessories help manage the complexity of this process, especially on materials like stainless steel or aluminium. Cold wire feed attachments are particularly useful; they feed the filler wire into the weld pool at a precise rate, mimicking the steady hand of a master welder. This setup requires careful management of gas flow and tungsten life to maintain quality. Using a dedicated robotic TIG torch ensures that the tungsten remains at the correct distance from the work, providing a consistent, clean finish that requires minimal post-weld cleaning.
Sensors and Vision Systems: Giving Your Cobot Eyes for Precision
In a perfect world, every part would be identical. In a real Aussie workshop, that is rarely the case. Heat distortion, slight jigging errors, or inconsistent prep can move a weld joint just enough to ruin a part. This is where collaborative robot welding accessories like sensors and vision systems earn their keep. They give the arm the ability to "see" and "feel," ensuring the arc stays exactly where it belongs even when the material isn't perfect.
One of the most cost-effective tools is touch sensing. The cobot uses the welding wire or the nozzle to gently tap the part, confirming its exact position before the arc starts. It is a simple way to account for slight shifts in the jig; vision systems take this further, using cameras to identify the part and automatically select the correct welding programme. These tools turn a blind machine into an intelligent partner that reacts to the reality of the workbench.
Do you need high-end vision for every job? Probably not. If you are doing simple, repeatable brackets, touch sensing is usually enough to maintain quality. For long, critical seams where heat pull is an issue, seam tracking becomes essential. It is about matching the collaborative robot welding accessories to the specific task, ensuring you don't over-capitalise on gadgets that don't solve a specific bottleneck in your production flow.
Seam Tracking and Path Correction
Laser seam tracking uses a laser line to map the joint ahead of the arc, while through-the-arc tracking monitors the electrical characteristics of the arc itself to stay on path. Both methods significantly reduce scrap rates by allowing the cobot to adjust to fit-up gaps in real-time. These sensors simplify the operator's job within collaborative robot welding cells, as the machine handles the minor variations that would otherwise require manual intervention or constant reprogramming of the weld path.
Quality Inspection and Monitoring
Sensors do more than just guide the torch, they act as a digital supervisor. By logging weld data such as voltage, current, and travel speed, you create a permanent record for compliance and reporting. This is particularly valuable for industries with strict safety standards. Detecting a defect during the weld, rather than at the end of the shift, saves a massive amount of rework. It ensures that the high quality you expect on the first part is maintained across multiple shifts, regardless of who is operating the cell.
Cable Management and Mounting: Organising Your Cell for Uptime
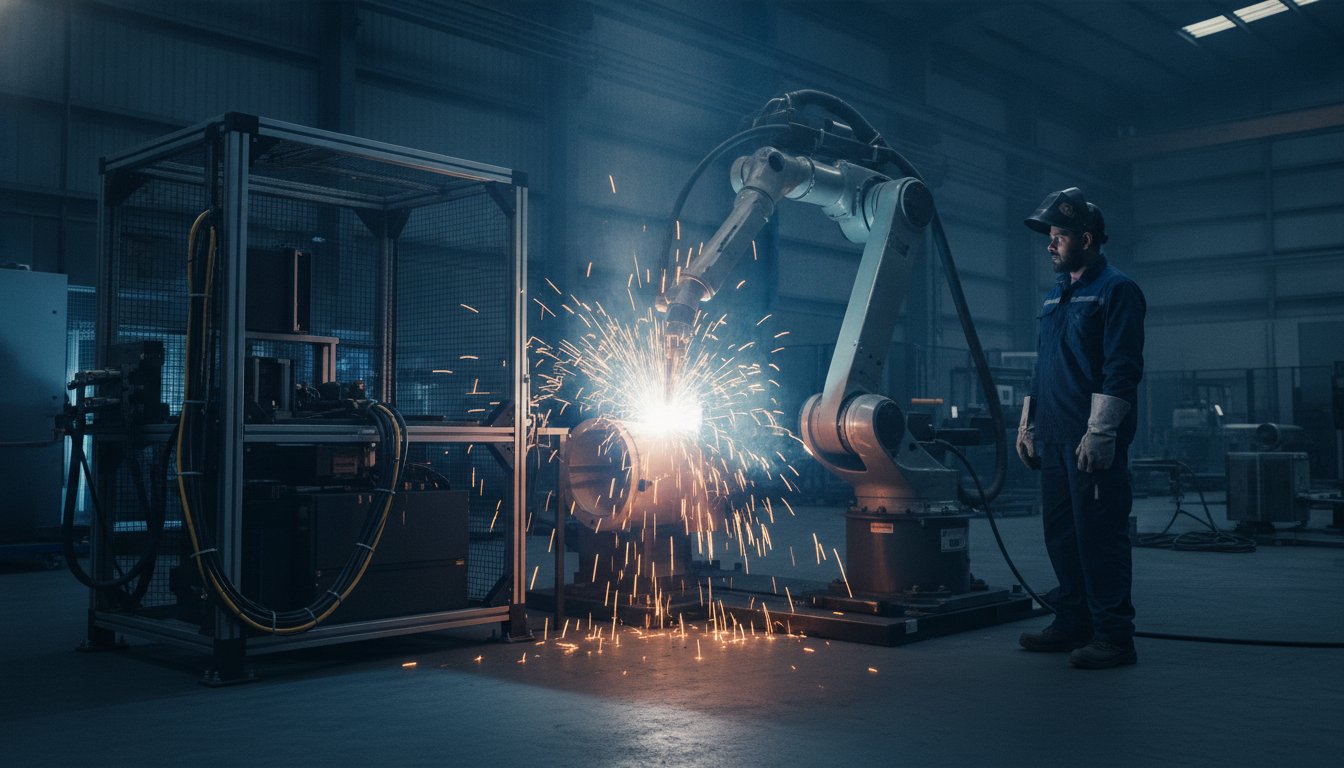
It is easy to get caught up in the technical specs of a torch or a sensor, but the physical organisation of your welding cell often determines your daily productivity. Messy cables are the primary cause of robotic downtime and safety trips. If a lead snags on a jig or gets caught under the arm during a complex move, the cobot will sense the resistance and stop. This doesn't just stall your production; it puts unnecessary strain on the internal wiring of your collaborative robot welding accessories, leading to premature failure.
Organising the workspace ensures the cobot has a full range of motion without the risk of "cable bind." This involves more than just tidy zip-ties. It requires a thoughtful layout where the power source, gas bottle, and wire feeder are positioned to support the arm's reach rather than hinder it. Protecting these expensive leads from spatter and heat is equally vital. A damaged control cable can be a costly and time-consuming part to replace, so keeping them shielded and off the floor is a priority for any professional shop.
Five Steps to Better Cable Management
Effective cable management starts with understanding the cobot's "work envelope." You need to determine the exact cable lengths required to reach every corner of your welding table without excess slack. Using high-flex robotic cabling is essential; standard manual welding leads aren't designed for the constant, repetitive twisting of an automated arm and will eventually break internally. We recommend installing retraction systems or "dress packs" that keep cables tight to the arm throughout its movement. Finally, any cables that must cross the floor should be secured with heavy-duty, high-visibility covers to prevent trip hazards and protect against workshop traffic.
Mobile vs. Permanent Mounting Solutions
Choosing between a fixed pedestal and a mobile trolley depends on your workshop's layout and the variety of your work. For many Aussie job shops where floor space is at a premium, a mobile welding cell offers incredible flexibility. It allows you to wheel the automation to the work, rather than moving heavy fabrications across the shop. However, stability is non-negotiable. A rigid base is critical for weld repeatability; even a millimetre of flex in a trolley can throw off your weld path. Look for integrated solutions that house the gas bottle and wire spool within the base to create a truly self-contained, stable unit. To see how these systems fit into your workflow, you can explore our welding system integration services for a tailored setup.
Scaling Your Automation: Building a Custom Accessory Roadmap
Starting small is the smartest way to avoid over-capitalising on technology before you are ready. We recommend beginning with a "Minimum Viable Kit" that includes the essentials: the cobot arm, a high-quality MIG torch, and a stable mounting pedestal. This basic setup allows your team to get their first welds done and master the fundamentals of the system. Once you have a handle on the basics, you can start identifying the specific bottlenecks in your production that justify the next addition of collaborative robot welding accessories.
Every workshop has different hurdles. For some, it might be the time spent on precise jigging, which makes touch sensing a high-value upgrade. For others, it might be the need to handle a wider variety of materials, requiring a TIG setup or cold wire feed. Working with cobot welding integration experts ensures you don't buy gear you don't need. They help you select the right mix of tools that fit your specific workflow and Australian fabrication standards.
Phasing Your Investment
A phased approach keeps your automation journey manageable and grounded in reality. During Year 1, focus on mastering the fundamentals with a reliable torch and mounting solution. This is the time to refine your processes and build confidence among your staff. By Year 2, you can look at adding sensors or vision systems to handle more complex geometries and tighter tolerances. This step-by-step method allows you to evaluate the performance boost of each new addition, ensuring that every dollar spent translates into better weld consistency or faster cycle times.
Expert Support and Onboarding
Hardware is only as good as the person operating it. While "off-the-shelf" gadgets might seem tempting, they rarely account for the nuances of specialised Aussie fabrication. Success comes down to how well your team integrates these tools into their daily routine. We believe in leveraging on-site cobot welder training to ensure your staff are comfortable with the new gear. This training closes the gap between the technology and the finished part, turning your collaborative robot welding accessories into true productivity multipliers rather than just more things to manage on the shop floor.
Ready to Build Your High-Performance Welding Cell?
Turning a cobot into a productive team member requires more than just a clever arm; it demands a toolkit built for the realities of the Australian workshop floor. By prioritising the right collaborative robot welding accessories, you move beyond basic automation and into a space where precision and flexibility are the norm. Whether it's choosing a torch that respects payload limits or organising your cables to prevent downtime, every small adjustment contributes to a safer and more efficient shop.
Our team provides expert integration for Australian manufacturers, ensuring your hardware works seamlessly with no-code software that simplifies accessory control. We don't just sell gadgets; we provide practical, workshop-tested solutions designed to support your existing skilled tradespeople. If you're ready to see how these tools adapt to your specific projects, book a mobile welding robot demonstration to see our gear in action. It’s the most direct way to prove the concept on your own turf and start refining your path toward smarter, more reliable fabrication.
Frequently Asked Questions
Do I need specific torches for a collaborative robot, or can I use my manual ones?
While you can technically adapt manual torches, it is highly recommended to use specialised robotic torches. These are designed for higher duty cycles and better heat dissipation than manual gear. Crucially, robotic torches have consistent geometry that your software expects. Manual torches often lack the precise mounting points and weight balance required for a cobot's sensitive force sensors, which can lead to frequent collision errors or inconsistent weld quality.
How do I prevent my cobot's cables from getting snagged during operation?
Preventing snags requires a combination of correct cable length and a dedicated retraction system. You should avoid excess slack that can loop around the arm or catch on your jigs. Using high-flex robotic cabling designed for repetitive motion is also essential. We suggest using integrated cable management solutions that keep all leads bundled and tight to the arm's profile, ensuring the cobot maintains its full range of motion without the risk of bind.
Is seam tracking worth the extra cost for a small workshop?
This depends on your part consistency and typical batch sizes. If your fabrications suffer from heat distortion or inconsistent fit-up, seam tracking is a game-changer. It allows the robot to adjust the weld path in real-time, which significantly reduces scrap rates. For small workshops handling high-value parts or complex geometries, the investment often pays for itself by removing the need for perfect, expensive jigging and reducing time-consuming manual rework.
What is a 'dress pack' and why is it important for robotic welding?
A dress pack is a specialised cable management system that bundles power, gas, and control leads into a protective sleeve. It is vital because it prevents cables from rubbing against the arm or getting caught on the workpiece. In a collaborative environment, a tidy dress pack also minimises snag hazards for the operator. It ensures that your collaborative robot welding accessories move fluidly with the arm, protecting your expensive internal wiring from premature failure.
Can I swap accessories between different brands of collaborative robots?
Compatibility varies, but many modern accessories use standardised mounting flanges and communication protocols. However, the software integration is the real hurdle. While the hardware might bolt on, you need to ensure your no-code teaching software supports the specific sensors or torches you're using. We focus on ensuring seamless integration so that your chosen kit works reliably across your specific welding cell setup without the need for complex, brand-specific reprogramming.
How do I ensure my cobot accessories meet Australian safety standards?
You must ensure your entire cell, including all accessories, complies with AS/NZS 4024.1 and the specific standards relating to robotic environments. This involves conducting a thorough risk assessment of the end-effector, such as the torch and any sharp sensors. Choosing accessories designed specifically for collaborative use, featuring rounded edges and integrated force monitoring, is a critical step in maintaining a safe and compliant Australian workshop floor for your team.
What is the most important accessory for a beginner in robotic welding?
A high-quality, lightweight robotic MIG torch is the most critical starting point. Beginners often struggle with payload limits, so a torch that doesn't trigger false collision stops is essential for a smooth learning curve. Pairing this with intuitive no-code teaching software allows you to focus on weld quality rather than fighting the machine. Once you've mastered basic beads, you can then look at adding simple sensors like touch sensing to handle minor part variations.
How much weight can a typical welding cobot accessory kit add to the arm?
A standard kit, including the torch, dress pack, and mounting bracket, typically adds between 2kg and 5kg to the arm. It is vital to stay within the cobot's rated payload to avoid sluggish movement or safety trips. When selecting collaborative robot welding accessories, always check the combined weight of the end-effector and cables. Overloading the arm can lead to inconsistent weld paths and will increase the wear on the robot's joints over time.