

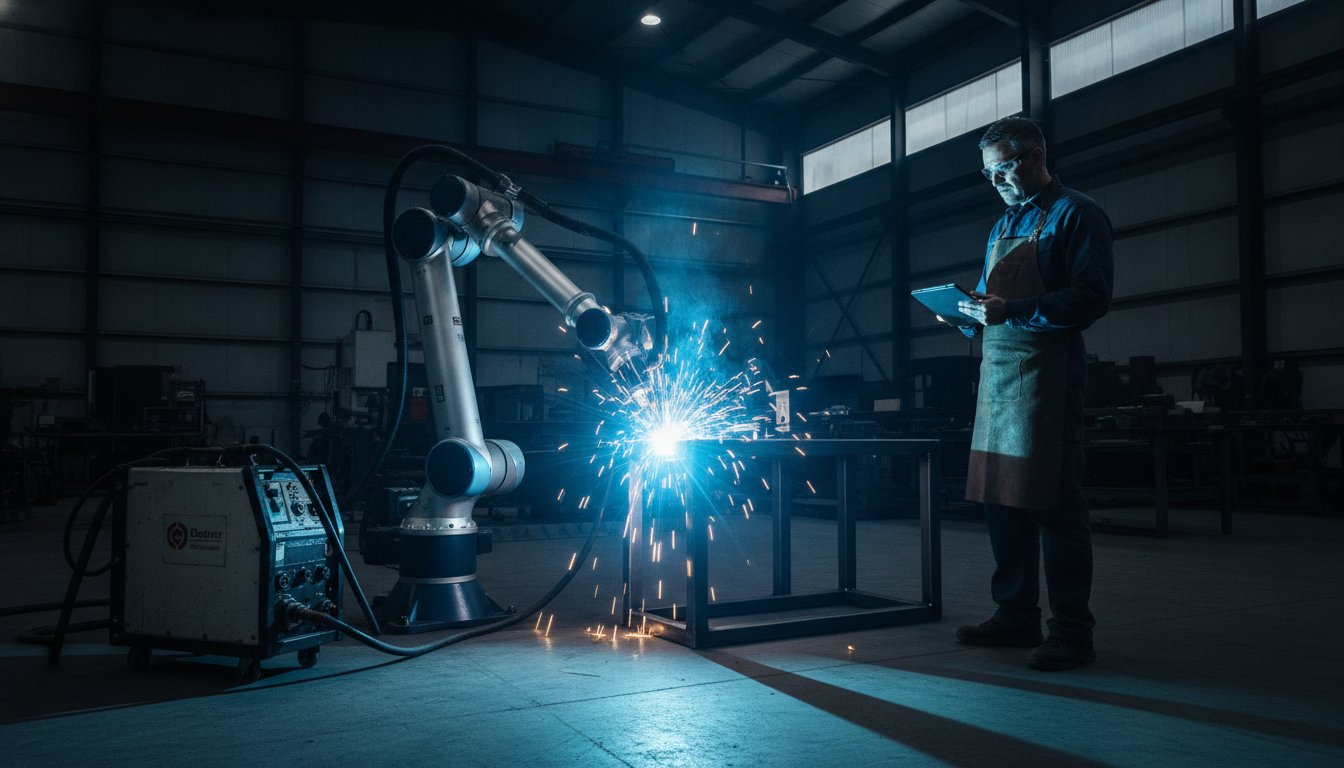
With 81% of Australian manufacturers currently unable to find enough skilled welders, the pressure to automate has never been higher. You've likely looked at high-end robotic systems and wondered if there's a more sensible way to scale. It's frustrating to feel like you're priced out of progress just because you want to keep using the reliable gear already sitting on your workshop floor.
The good news is that you don't need to scrap your current setup to stay competitive. Integrating cobot welders with existing equipment allows you to breathe new life into your workshop while keeping your capital expenditure under control. By using no-code software, you can upskill your current team to manage robotic cells without the fear of complex programming or lengthy downtime.
In this guide, we'll walk through the practical steps of connecting collaborative robots to your legacy power sources. You'll learn how to increase throughput and maintain high weld quality across small batches, all while keeping your most experienced tradespeople at the centre of the process.
Key Takeaways
- Discover why retrofitting your current power source is the most cost-effective way for Australian SMEs to adopt automation without a total workshop overhaul.
- Understand the "handshake" process, where simple I/O signals allow a robotic arm to trigger your welder and wire feeder for seamless operation.
- Learn how to assess your gear for "remote control" capability and why duty cycles become a critical factor when a robot takes over the torch.
- Follow a practical, step-by-step framework for integrating cobot welders with existing equipment, starting with a thorough risk assessment of your welding bay.
- See how no-code teaching software empowers your experienced fabricators to become robot-ready operators, keeping your local expertise at the centre of production.
The Case for Integrating Cobots with Your Existing Welding Gear
Many Australian fabricators believe that automation requires a complete workshop overhaul and a massive capital outlay. That isn't the case. If you have a reliable MIG or TIG power source on your floor, you're already halfway to a more efficient production line. Integrating cobot welders with existing equipment is about augmenting your current capabilities rather than replacing them. It's a pragmatic approach that respects the investment you've already made in your gear.
At its core, this integration involves mounting a collaborative robot (cobot) to your welding bench and teaching it to operate your existing torch and wire feeder. Unlike traditional industrial robots that require safety cages and complex PLC logic, a cobot is designed to work safely alongside your team. For a local job shop, this means you can automate the repetitive, long-seam welds that usually tie up your most skilled staff, allowing them to focus on the complex, high-value projects that require a human touch.
Retrofitting is often the most cost-effective entry point for Australian SMEs. You avoid the "all-or-nothing" trap of purchasing a brand-new turnkey system, which can often exceed A$150,000 once you factor in the power source, cooling units, and proprietary software. By keeping your current welder, you maintain the familiar weld parameters and consumables your team already trusts, which significantly reduces the learning curve during setup.
Maximising Your Current Capital Investment
Before you consider scrapping your current gear, evaluate the remaining life-cycle of your power sources. If your units are still performing well, there's no reason to send them to the scrap heap. Integrating cobot welders with existing equipment extends the life of your capital assets while providing a modern productivity boost. TME Systems Pty Ltd focuses on this "equipment-first" philosophy, helping you avoid unnecessary debt while still achieving the precision and consistency of a robotic cell.
Solving the Skills Gap Without Starting from Scratch
The goal isn't to replace your tradespeople, but to empower them. By using no-code robot welding software, your experienced welders can become robot supervisors in a matter of hours. They don't need to learn C++ or complex logic; they simply guide the robot arm to the start and end points of a weld. This shift reduces physical strain and keeps your best staff engaged, as they're now managing a fleet of robotic cells rather than hunching over a bench all day doing repetitive tasks.
How Cobots Communicate with Traditional Power Sources
Understanding how a robot "talks" to a welder is the first step in demystifying workshop automation. This communication is often called the "handshake". It is a simple exchange of signals where the robot tells the welder when to start the arc and when to feed the wire. When you are integrating cobot welders with existing equipment, this handshake ensures that the robotic arm and the power source work as a single, cohesive unit. While this might sound like a task for a software engineer, it actually relies on basic Input/Output (I/O) signals that have been industry standard for decades.
When integrating cobot welders with existing equipment, the main challenge is often the difference between modern digital controllers and older analogue power sources. A digital interface is like a high-speed data cable, while an analogue one relies on varying voltage levels to control parameters like wire speed. You don't need to replace your old machine just because it doesn't have a modern communication port; you simply need the right bridge to translate those signals effectively.
The Digital-to-Analogue Interface
To bridge the gap between different generations of technology, we use interface kits that act as a translator. These kits ensure that when the cobot reaches the start of a joint, the welder responds instantly. Signal synchronisation is vital here. If the wire feeder starts a fraction of a second too late, you will end up with a poor arc start or a "cold" weld. Following NIST best practices for integrating cobots into small workcells, we always recommend running "dry run" simulations. This allows the arm to follow the path without striking an arc, ensuring the timing and positioning are spot on before you consume any gas or wire.
The Role of No-Code Software in Hardware Integration
Modern collaborative robot welding cells have moved away from the clunky, "pendant-heavy" programming of the past. Instead of typing lines of code to set your volts or travel speed, you use intuitive teaching software. This software takes your manual welding knowledge and converts it into machine commands the power source understands. If the weld looks a bit hot during a run, you can make real-time adjustments to the wire speed or travel pace directly through the interface. It makes the transition to automation feel like a natural extension of your existing skills. If you are curious about how this would look on your shop floor, you can request a mobile demo system to see the integration in action.
Is Your Current Welder Cobot-Ready? Compatibility Factors
Before you commit to an automation project, you need to know if your current power source is up to the task. Not every machine is built to take external commands, but you don't necessarily need the latest digital model to get started. When you're integrating cobot welders with existing equipment, the first thing to check is the machine's "remote control" capability. Essentially, can your welder receive a start and stop signal from something other than your finger on the trigger?
A reliable wire delivery system is just as important as the power source itself. While a human welder can compensate for a slight bird-nest or a stuttering wire feed, a robot can't. You'll need to ensure your wire feeder is in top condition and that your workshop has a stable mounting point for the cobot arm. Whether you choose a fixed heavy-duty table or a mobile cart, the base must be rigid enough to handle the rapid movements of the arm without vibrating, as even a millimetre of flex can ruin a precision weld.
Interface Ports and Connectivity Requirements
The easiest way to check compatibility is to look for a multi-pin remote connector, often a 14-pin socket, on the front or rear of your unit. This port allows for a clean "handshake" between the robot and the welder. If your machine only has a simple two-wire trigger switch, integration is still possible, but it may require an external interface box to manage the signals. You also need to consider electrical interference. High-frequency starts, common in older TIG units, can create electromagnetic interference (EMI) that messes with the cobot's electronics. Ensuring a solid common ground between the robot and the welder is a non-negotiable step to prevent these communication glitches.
Stability and Duty Cycle Considerations
In many Australian shops, manual welders spend only 25% to 35% of their day actually striking an arc. Robots don't take tea breaks or stop to stretch their backs, which means your equipment will be working much harder. You need to verify if your welder can handle duty cycles of 80% to 100% without overheating. If your current machine is rated for light trade use, you might need to upgrade your torches and liners to water-cooled versions to handle the increased "arc-on" time. It's also worth checking your gas supply and cooling systems; if you're moving from occasional manual runs to continuous robotic production, your current setup might need a higher-capacity regulator to keep up.
Step-by-Step: Integrating a Cobot into Your Existing Workflow
Moving from manual welding to an automated workflow is a methodical process. Integrating cobot welders with existing equipment requires a clear plan to ensure the transition is smooth, safe, and doesn't disrupt your daily output. By following a structured approach, you can turn a standard welding bay into a high-performance robotic cell in a matter of days. It's about building a system that works for your team, not forcing your team to work for the system.
- Step 1: Conduct a thorough risk assessment. Look at your specific welding bay. You need to account for arc flash, fumes, and how the robot arm moves within the space.
- Step 2: Install the mounting system. Decide between a fixed heavy-duty table for high-precision runs or a mobile cart that allows you to move the cobot between different welding stations.
- Step 3: Establish the hardware interface. Connect the robot controller to your power source's I/O ports to enable the digital "handshake" for arc starts and wire feeding.
- Step 4: Configure the no-code software. Input your trusted weld procedures into the interface, including travel speeds and weave patterns that match your current quality standards.
- Step 5: Staff onboarding and safety validation. Train your fabricators to lead the new technology and perform a final check to ensure all safety triggers are functioning correctly.
Physical Layout and Workspace Optimisation
Designing a cell that allows for both robotic and manual use is a smart move for job shops. You don't want the robot to block access to the bench when a quick manual tack-weld is needed. Cable management is another critical factor; you must ensure the torch lead and gas lines don't snag or pull during complex robot movements. Integrating on-site cobot welder training into the setup phase ensures your staff understands the new physical boundaries and can operate the cell efficiently from the first shift.
Australian Safety Compliance (AS/NZS 4024.1)
While cobots are designed for direct human interaction, they still fall under Australian machinery safety standards. Under AS/NZS 4024.1, you must ensure that the entire application is safe, not just the robot arm itself. This means implementing E-stops that kill power to both the robot and the welding unit simultaneously. Because of these specific local regulations, partnering with a local welding system integration specialist is vital to ensure your workshop remains compliant and your workers stay protected.
If you want to see how this setup looks in a real-world environment, you can request a mobile demo system to test your current equipment with a collaborative robot on your own shop floor.
Partnering with Australian Integration Specialists
Partnering with local specialists ensures that you aren't left stranded when a technical question arises on a Friday afternoon. While global manufacturers offer massive support networks, they often lack the "boots on the ground" presence required in regional Australia. TME Systems Pty Ltd approaches the process of integrating cobot welders with existing equipment as a long-term partnership rather than a one-off transaction. We understand that every workshop has its own rhythm and specific challenges. Our role is to act as a practical mentor, helping you navigate the transition without the stress of going it alone.
Seeing is believing on a busy workshop floor. A mobile welding robot demonstration allows you to test the technology on your actual parts using your own power sources. This proof of concept removes the guesswork and shows exactly how the digital handshake works with your specific gear. Because our software is developed with the operator in mind, it's designed to be intuitive for the Australian fabricator. This ensures that technical support is always in your time zone and understands the local manufacturing reality.
From Proof of Concept to Full Production
We often suggest starting small by automating your most repetitive, high-volume part first. This "quick win" builds confidence within your team and demonstrates the immediate impact of improving welding productivity with cobots. As your staff see the physical strain of long-seam welds disappear, the workshop culture begins to shift from apprehension to innovation. Once the first cell is running smoothly, scaling up by adding more units becomes a logical and manageable step for your business growth.
Your Next Steps Toward Automation
The transition to a robotic workshop doesn't happen overnight, but it does start with a single conversation. TME Systems Pty Ltd can help you audit your current gear to see which units are ready for a retrofit and which might need a minor upgrade. By developing a custom integration plan, we ensure the setup fits your specific budget and production goals. If you're ready to see how your current gear performs with a robotic partner, book a mobile demo today.
Future-Proofing Your Workshop with Smart Integration
Integrating cobot welders with existing equipment isn't just a cost-saving measure; it's a strategic way to bridge the skills gap while respecting your current workshop setup. You've already invested in reliable power sources and a skilled team. Automation should support those assets, not replace them. By choosing a retrofit approach, you can maintain high weld quality and increase throughput without the disruption of a total overhaul.
Success in automation comes down to having the right partner by your side. TME Systems Pty Ltd is an Australian-owned specialist providing the no-code software and on-site training your team needs to become robot-ready. We're here to provide national support and ensure your transition is steady, practical, and successful.
Ready to see how your current gear handles a robotic partner? Book a Mobile Demo to see a Cobot integrate with your gear. We'll bring the technology directly to your workshop floor so you can see the results for yourself. It's time to work smarter with the tools you already trust.
Frequently Asked Questions
Can I integrate a cobot with a 10-year-old MIG welder?
Yes, most reliable MIG welders from the last decade can be integrated if they have a remote trigger or multi-pin connector. Integrating cobot welders with existing equipment often involves using a simple interface kit to bridge the communication gap. If your machine can be triggered by a foot pedal or a remote pendant, it's likely a good candidate for automation.
Do I need a specialised programmer to set up the integration?
No, you don't need a computer scientist on your payroll to manage this technology. Modern no-code software allows your existing fabricators to teach the robot by simply moving the arm and selecting points on a screen. This approach turns your best welders into robot supervisors without requiring them to learn complex coding languages or deep logic.
What happens if the cobot hits an obstacle during a weld?
The cobot will stop instantly if it senses an unexpected impact or resistance. These machines are built with sensitive force-torque sensors designed specifically for safe human-robot interaction. While the robot stops, your safety system should also be configured to kill the arc and wire feed simultaneously to prevent any damage to the workpiece, the torch, or the operator.
How much workshop space do I need for a cobot welding cell?
You don't need a massive footprint; a typical cell takes up roughly the same space as a standard manual welding bench. Because cobots don't always require bulky safety cages, they can be tucked into existing bays without disrupting the floor plan. Many Australian shops use mobile carts, allowing the unit to be moved around as production needs change.
Will integrating a cobot void the warranty on my existing welder?
Generally, integrating cobot welders with existing equipment won't void your warranty if you're using the manufacturer's intended remote ports. These connections are designed for external control. However, we always recommend checking your specific warranty terms or speaking with your equipment supplier before making any hardware modifications to the internal circuitry of the power source.
Can one cobot be moved between different welding power sources?
Yes, cobots are highly portable and can be shared between different machines if the interfaces are set up correctly. By using a mobile mounting system, you can wheel the robot from a MIG station to a TIG station in minutes. You simply need to swap the torch and select the pre-saved program for that specific machine and part within the software.
What Australian safety standards apply to integrated cobot welders?
The primary standard is AS 4024.3303:2017, which covers the safety requirements for collaborative industrial robot systems. While the cobot itself is safe, you must also consider the risks of the welding process, such as arc flash and fumes. A thorough risk assessment of the entire cell is a legal requirement for Australian workshops to ensure compliance.
How long does the typical integration and training process take?
The physical setup and initial training usually take between two to four days. Most fabricators are comfortable using the no-code interface within the first few hours of hands-on training. We focus on getting your first part into production quickly so you can see an immediate return on your investment while upskilling your team on the job.