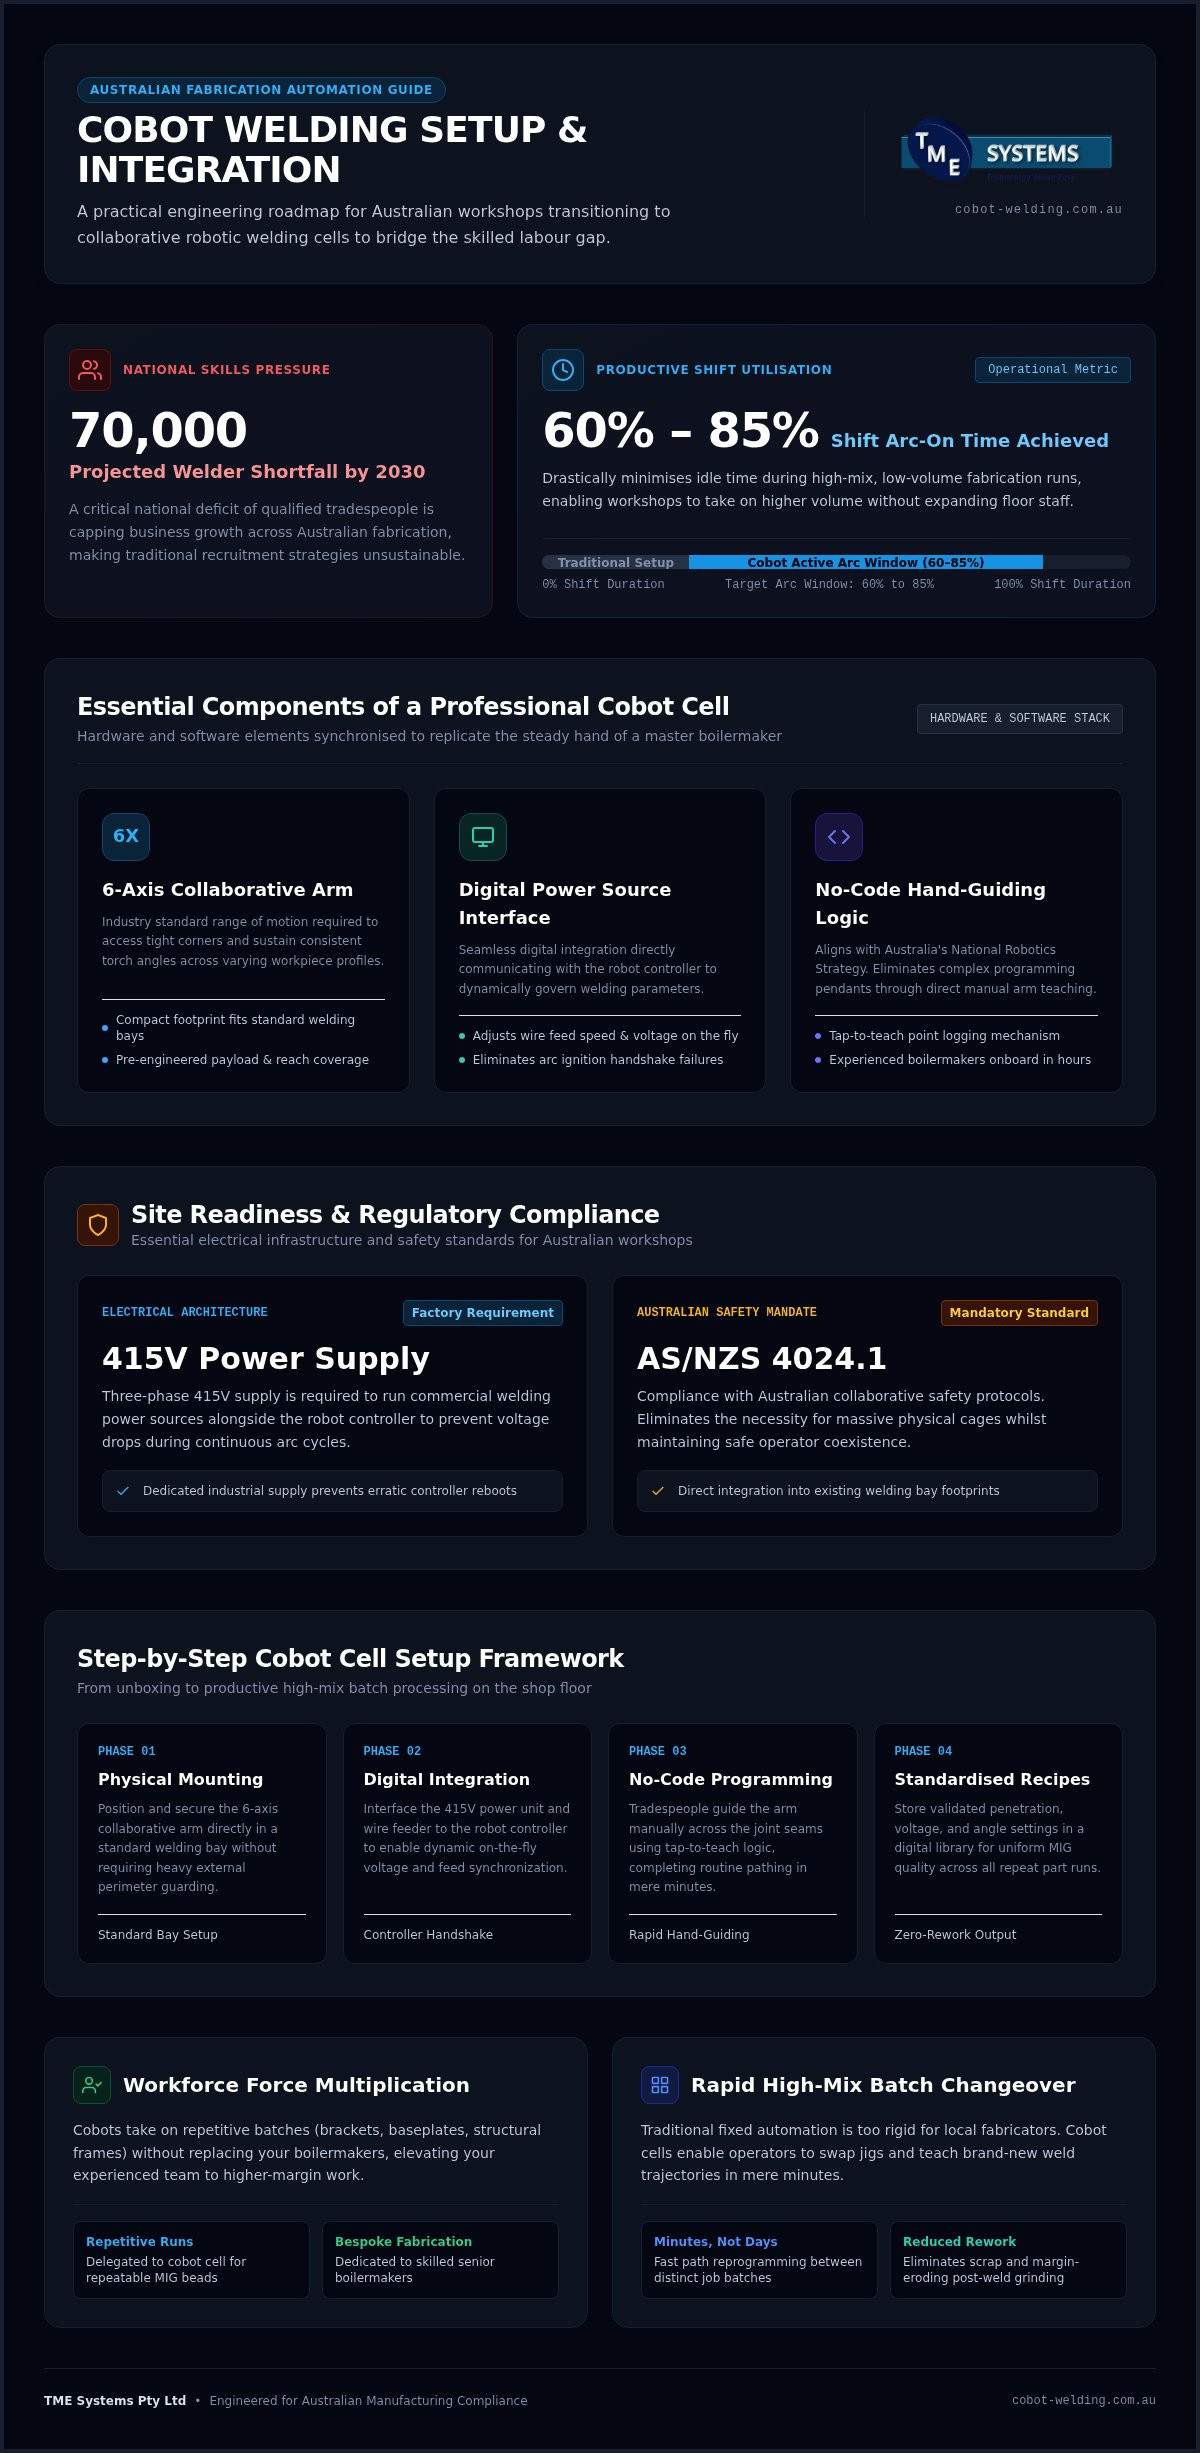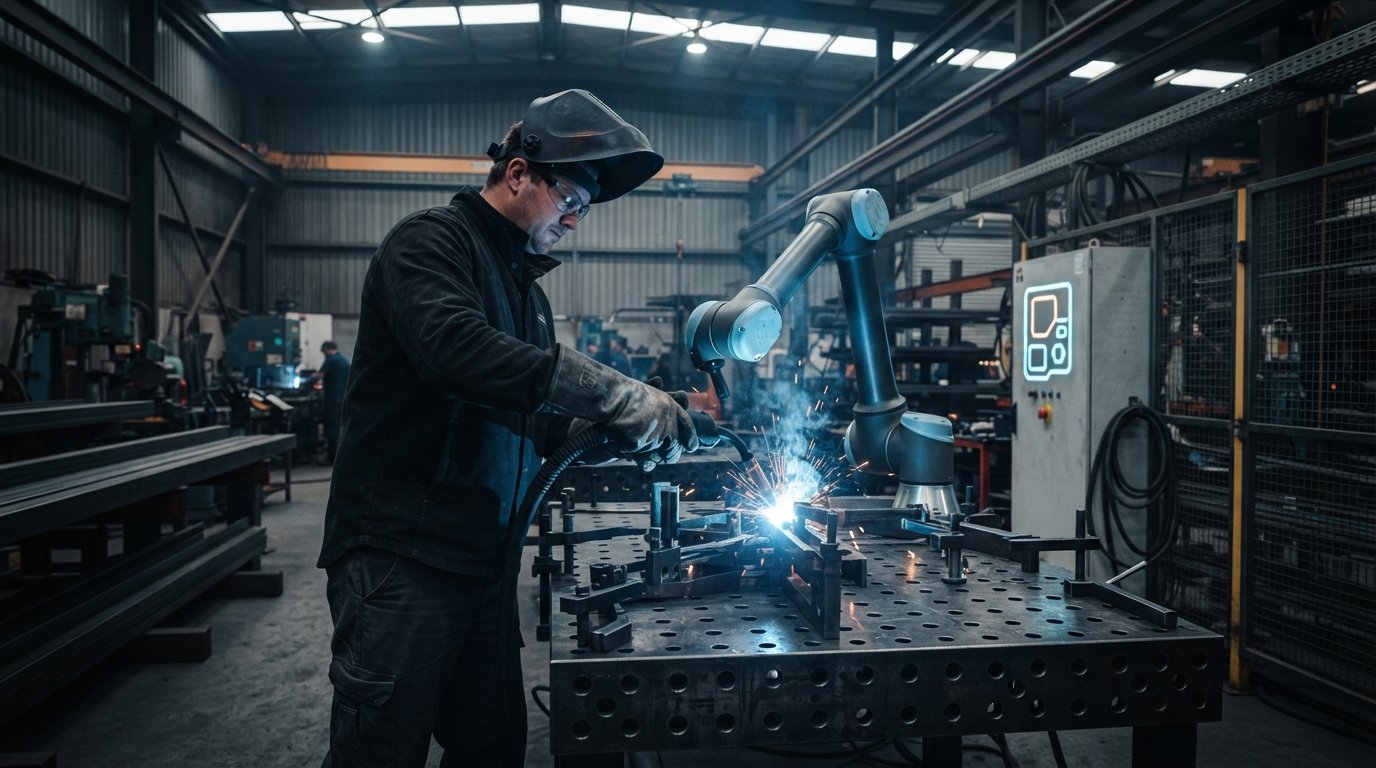
Australia is facing a projected national shortfall of 70,000 qualified welders by 2030, and for many local fabricators, the struggle to find skilled labour is already capping business growth. You likely feel the pressure of this gap every time a repetitive batch comes through the door, tying up your best tradespeople on work that doesn't fully utilise their expertise. This cobot welding setup guide offers a pragmatic way to bridge that gap, turning your existing workshop into a high-output collaborative environment without the need for a degree in robotics.
We'll walk you through a straightforward, step-by-step framework for unboxing, integrating, and safety-proofing your system so your current staff can deliver consistent, high-quality welds from day one. You'll gain a clear roadmap for site readiness, including 415V power requirements and compliance with Australian safety standards like AS/NZS 4024.1. We'll also explain how no-code teaching software allows your team to programme paths through simple hand-guiding. By the end of this article, you'll have the confidence to transition your workshop to automation, knowing that your skilled operators remain at the centre of the process.
Key Takeaways
- Discover how collaborative robots can bridge the national skilled labour gap by empowering your current workforce to handle repetitive, high-mix production.
- Follow a practical cobot welding setup guide that covers everything from physical mounting to interfacing your power source with the robot controller.
- Learn the specific site requirements for Australian workshops, including 415V power supply needs and essential safety compliance under AS/NZS 4024.1.
- See how no-code teaching software removes the hurdle of complex programming, allowing your experienced tradespeople to become robot operators in just a few hours.
- Understand how to build a library of standardised weld recipes to ensure consistent penetration and quality across every batch your shop produces.
Why Australian Fabricators are Shifting to Cobot Welding in 2026
The Australian fabrication sector is at a crossroads. With a projected national shortfall of 70,000 qualified welders by 2030, the traditional model of hiring your way out of a backlog is no longer a viable strategy. Local job shops are pivoting toward collaborative robots (cobots) because they address the reality of the workshop floor: high-mix, low-volume production that requires constant adjustment. Unlike massive industrial robots that require expensive safety cages and specialised programmers, these flexible cells fit directly into a standard welding bay. This shift isn't just about speed. It's about consistency. A cobot delivers the same MIG bead every time, which significantly reduces the rework costs that often eat into the margins of high-pressure projects.
The Skills Gap and Productive Capacity
Finding qualified boilermakers is currently the number one hurdle for local business growth. When you follow a cobot welding setup guide and integrate a system, you aren't replacing your team. You're freeing them up. Your senior welders can focus on complex, bespoke fabrication and critical structural work while the robot handles the repetitive runs of brackets, plates, or frames. A cobot acts as a force multiplier, allowing a small, dedicated team to maintain the output of a much larger shop without the constant stress of recruitment. It's about making the most of the talent you already have on the floor.
The ROI of Batch Flexibility
Australian manufacturing relies on the ability to switch between different jobs quickly. Traditional automation was often too rigid for this, but modern no-code software makes small-run automation profitable for the first time. You don't need a computer scientist to change the programme; you just need a welder who knows the part. You can change over a jig and teach a new path in minutes. This flexibility is the most direct way to improve welding productivity with cobots. By reducing idle time and keeping the arc on for 60% to 85% of a shift, your workshop can take on more work and meet tighter deadlines with total confidence.
Essential Components of a Professional Cobot Welding Cell
A professional cell is more than just an arm bolted to a table; it's a synchronised system where hardware and software work in unison to replicate the steady hand of a master tradesperson. When you start your cobot welding setup guide, the first decision is the collaborative arm itself. You need to choose a reach and payload that covers your largest workpieces while remaining compact enough for your floor space. A 6-axis arm is the industry standard, providing the range of motion required to access tight corners and maintain the correct torch angle throughout a weld.
The Hardware Stack
The core of the system is the welding power source, and any effective cobot welding setup guide will tell you that digital integration is non-negotiable. For a professional result, you need a digital unit that supports seamless communication with the robot controller. This allows the system to adjust wire feed speeds and voltage on the fly, ensuring penetration is consistent even on complex geometries. While some shops attempt a DIY approach, investing in a purpose-built collaborative robot welding cell ensures that the torch, wire feeder, and arm are pre-configured to work together. This eliminates the "handshake" issues that often plague retrofitted systems, where the robot might move but the arc fails to ignite at the correct time.
The Software Interface
The real breakthrough in 2026 isn't the robot's movement; it's the no-code teaching software that acts as the system's brain. This interface translates a welder's physical movements into a precise digital path without requiring a single line of code. This shift aligns with the Australian Government's National Robotics Strategy, which aims to make automation accessible to smaller manufacturers who don't have dedicated robotics engineers. Instead of wrestling with a complex teach pendant to input coordinates, your staff uses tap-to-teach logic to set points by simply moving the arm to the desired position and pressing a button. This approach respects the expertise of your tradespeople, turning them into supervisors of technology rather than students of computer science.
Stability is the final piece of the puzzle. A professional workstation or mobile base must be perfectly level and rigid to prevent vibration from affecting weld quality. If the base moves even a millimetre during a long run, your bead placement will suffer. Many shops prefer a mobile system that can be wheeled between bays, allowing the cobot to follow the workflow rather than forcing the workshop to organise around the machine. If you're unsure which configuration fits your floor, you can always book a mobile demo to see these components in action on your own site.
Site Readiness: Preparing Your Workshop for Automation
Site readiness is the foundation of a successful transition from manual to automated welding. While the physical footprint of a collaborative system is small, the preparation required for utilities and safety is specific. A core part of any cobot welding setup guide is ensuring your infrastructure can handle the increased arc-on time. While a manual welder might stop and start, a cobot keeps running; this places a higher demand on your gas supply, electrical circuits, and fume extraction systems. You need to prepare your bay to support this continuous output before the unit arrives on your floor.
Utilities and Infrastructure
You must first verify your power supply and compressed air capacity. Most professional welding units in Australia require a 3-phase 415V AC supply on a dedicated circuit, while the cobot controller itself typically runs on standard 230V single-phase power. It is also vital to have clean, dry compressed air at 6 to 7 bar (85 to 100 psi) for pneumatic accessories like torch reamers or air-blast cleaners. Consider these infrastructure points during your planning:
- Grounding: High-frequency arc interference can disrupt a robot's sensitive electronics. Ensure you have a dedicated, clean earth to prevent signal noise.
- Wire and Gas: Robots are less forgiving of poor-quality consumables. Using bulk wire packs and organising a stable shielding gas manifold prevents frequent stops for changeovers.
- Work Surface: Your welding table must be perfectly level and rigid. Any vibration or movement in the base will compromise the accuracy of the programmed weld path.
Australian Safety Standards
Compliance is often the biggest concern for local fabricators, but it's manageable when you follow the right framework. Adhering to the Safe Work Australia Model Code of Practice: Welding processes is the first step in managing hazards like UV radiation and toxic fumes. It is important to remember that while the robot arm is collaborative, the welding arc is not. You must conduct a thorough risk assessment under AS/NZS 4024.1 to determine if your specific application requires secondary safeguards.
Depending on your workshop layout, you may still need UV-rated arc curtains, safety light curtains, or area laser scanners to protect staff from optical radiation and spatter. Because every workshop floor is different, many fabricators choose to work with welding system integration specialists to ensure their cell meets all local WHS regulations. This professional oversight gives you the confidence that your setup is not only productive but fully compliant with Australian law.
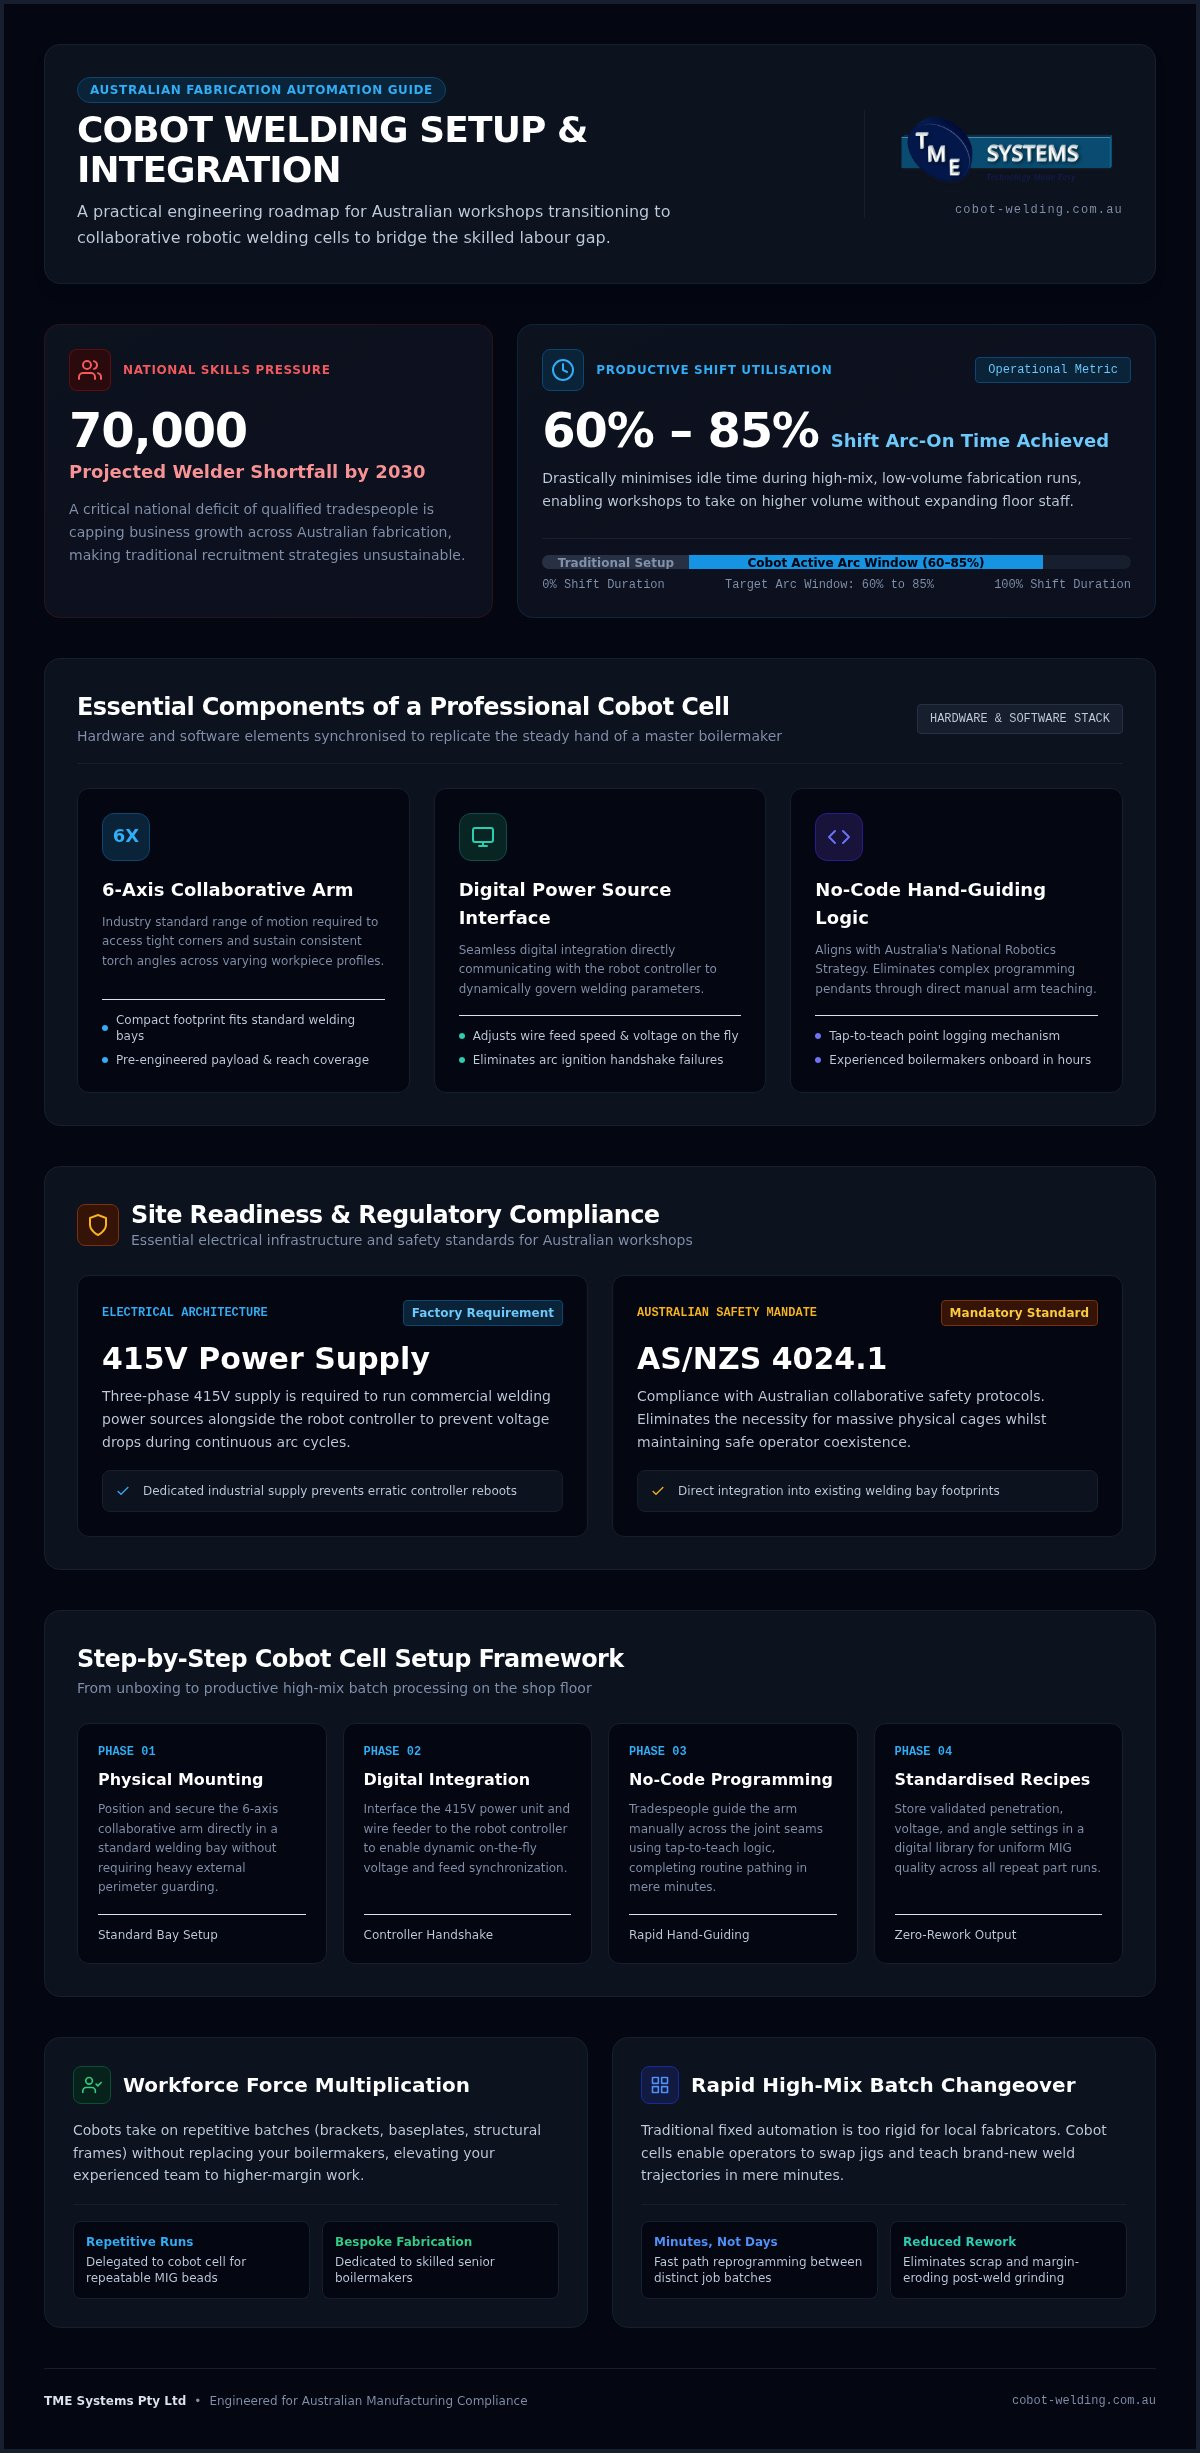
The Step-by-Step Cobot Welding Setup Guide
Once your site is ready, the physical transition begins. This cobot welding setup guide moves you from a crate on the floor to a functional production tool in a matter of hours. The process starts with unboxing and mounting the arm to your workstation or mobile base. You must ensure the centre of gravity is stable, especially for high-speed moves where a slight wobble can ruin a bead. Bolt the arm securely and verify that all cabling is routed to prevent snagging during the robot's full range of motion. A tidy setup isn't just about aesthetics; it's about preventing downtime caused by damaged leads.
Physical Integration and Calibration
After the arm is secured, you'll interface the welding power source with the cobot controller. For turnkey systems, this is typically a straightforward plug-and-play connection. Next, you must calibrate the Tool Centre Point (TCP). This step is vital because it tells the robot exactly where the tip of the wire is in 3D space. Without millimetre-perfect TCP calibration, your programmed paths won't align with the actual joint. You'll use the teaching interface on the arm to set these coordinates, ensuring the torch rotates precisely around the wire tip rather than the robot's wrist assembly.
Programming Your First Job
The advantage of no-code software is the simple "Move, Save, Weld" workflow. You don't need to type commands; you physically lead the robot through the weld path. Move the torch to the start point and save it. Move it along the joint to set intermediate points, then finally set the end point. Within the software interface, you'll select your weld parameters, such as voltage and wire feed speed, which the robot will trigger automatically. It's best practice to run a dry cycle first. This allows the robot to follow the path with the arc off, so you can check for potential collisions with jigs or fixtures before you strike an arc.
When you're happy with the path, it's time for the first live weld. Strike the arc and observe the bead profile. You might need to refine the travel speed or adjust the torch angle slightly to get the penetration exactly right. Once these small adjustments are made, save the programme to your library for future use. This ensures that every subsequent part is identical to the first. If you want to ensure your team hits the ground running with these steps, you can request a setup consultation to walk through the process with an expert.
Beyond the Setup: Optimising Workflows and Staff Onboarding
Completing the physical installation is a major milestone, but the real return on investment begins with how you integrate the system into your daily shop floor culture. The long-term success of your cobot welding setup guide depends on moving beyond the initial unboxing and into a phase of continuous refinement. One of the first tasks for your team is building a digital library of weld recipes. By standardising voltage, wire speed, and travel rates for your most common materials and thicknesses, you ensure that every part meets your quality standards regardless of who is supervising the cell. This process turns your workshop's collective expertise into a permanent, scalable asset.
Staff Training and Culture
The transition from manual operator to robot programmer is a significant career step for your team. It is essential to frame the cobot as a high-end tool that assists the welder rather than a machine that replaces them. Automation handles the physically demanding, repetitive runs that often lead to operator fatigue and strain, which in turn improves overall morale. Your staff can then focus their talent on the complex fabrication work that requires a human eye and years of experience. Investing in on-site cobot welder training is the most effective way to build this confidence, ensuring your tradespeople feel total ownership over the technology from day one.
Continuous Improvement
Maintenance for a collaborative cell is straightforward but must be disciplined. You should establish a daily routine for cleaning the torch, inspecting the wire feeder, and checking for software updates to keep the system running at peak performance. As your team becomes more proficient, you can use the software’s built-in analytics to track arc-on time and part counts. This data is invaluable for identifying bottlenecks in your jigging or material handling processes. Many Australian fabricators find that once the first cell is fully optimised, the path to scaling up to a multi-cobot fleet becomes clear, as the increased capacity often funds the next stage of expansion.
Ready to see it in action? Book a mobile welding robot demonstration today to see how this workflow fits your specific production needs on your own workshop floor.
Future-Proofing Your Workshop with Collaborative Automation
Transitioning from manual welding to a collaborative setup is a practical solution to the persistent skilled labour shortage in Australia. Following this cobot welding setup guide clarifies that the process isn't about complex programming; it's about giving your tradespeople better tools to do what they do best. From ensuring site readiness with 415V power to mastering no-code teaching software, the path to automation is structured and attainable.
We provide full Australian integration support and include intuitive no-code teaching software to ensure your staff are productive from day one. If you're still weighing up how a cell fits your floor, our mobile on-site demonstrations offer a risk-free way to see the results for yourself. Explore Turnkey Cobot Welding Solutions for Your Workshop. The technology is ready to work alongside your team. It's time to reclaim your workshop's capacity and focus on the high-value fabrication that grows your business.
Frequently Asked Questions
Do I need to know how to code to set up a welding cobot?
No traditional coding is required when you use modern no-code teaching software. This technology allows your existing tradespeople to programme the robot by simply leading the arm through the desired path. You set the start, end, and intermediate points using a tablet interface that speaks the language of welding rather than computer science. This approach ensures that a cobot welding setup guide remains accessible to any workshop regardless of their previous experience with automation.
How long does a typical cobot welding setup take for a small workshop?
A typical setup for a turnkey collaborative cell in a small workshop takes between one and two days. This timeframe includes the physical mounting of the arm, the connection of the digital power source, and the initial calibration of the tool centre point. Most fabricators can begin running their first production batches by the end of the second day, especially when they take advantage of structured operator training and onboarding to streamline the transition.
What are the power requirements for a collaborative welding cell in Australia?
Most professional cells in Australia require two types of power supply. The welding power source generally needs a 415V 3-phase AC supply on a dedicated circuit to handle the high duty cycles of automated production. Meanwhile, the cobot controller typically runs on a standard 230V single-phase outlet. It's vital to have a clean earthing system in place to prevent high-frequency arc interference from disrupting the robot's sensitive electronic components.
Can I use my existing MIG welder with a new cobot arm?
You can often integrate an existing MIG welder, but it must have a digital interface that allows the cobot to control parameters like voltage and wire feed speed on the fly. While retrofitting is possible through professional welding system integration, many shops find that a turnkey cell provides better results. A purpose-built system ensures that the hardware and software are pre-configured to communicate perfectly, eliminating the troubleshooting often required with older, analogue equipment.
Is a cobot welder safe to use without a safety cage?
While the robot arm itself is collaborative and stops on contact, the welding arc generates hazards that require protection. You don't necessarily need a full industrial cage, but you must protect workers from UV radiation, spatter, and fumes. According to the cobot welding setup guide for Australian workshops, this often involves using UV-rated arc curtains, safety light curtains, or area laser scanners. A formal risk assessment will determine the exact requirements for your bay.
What Australian standards apply to robotic welding setups?
Several Australian standards apply to these setups, primarily AS/NZS 4024.1 for machinery safety and AS/NZS ISO 10218 for industrial robot safety. You must also consider ISO/TS 15066, which specifically covers collaborative robots and specifies power and force limiting thresholds. Additionally, your setup must comply with AS 1674 for fire precautions and electrical safety in welding, ensuring the entire cell meets national work health and safety obligations and protects your staff.
How do I teach a new weld path using no-code software?
Teaching a path is a physical process rather than a digital one. You put the robot into "teach mode" and hand-guide the torch along the joint you intend to weld. You save individual points on the no-code software interface to define the start, the direction of travel, and the finish. The software then calculates the most efficient path between these points, allowing you to run a dry cycle to check for collisions before striking the arc.
Can a cobot handle TIG welding as well as MIG?
Collaborative robots are highly capable of handling both MIG and TIG welding processes. MIG is the most common choice for high-mix, low-volume automation due to its speed and versatility across different material thicknesses. However, TIG can be integrated for precision work on thinner materials like stainless steel or aluminium. The key is ensuring your power source and torch assembly are specifically designed for robotic control to maintain the necessary arc stability and gas coverage.