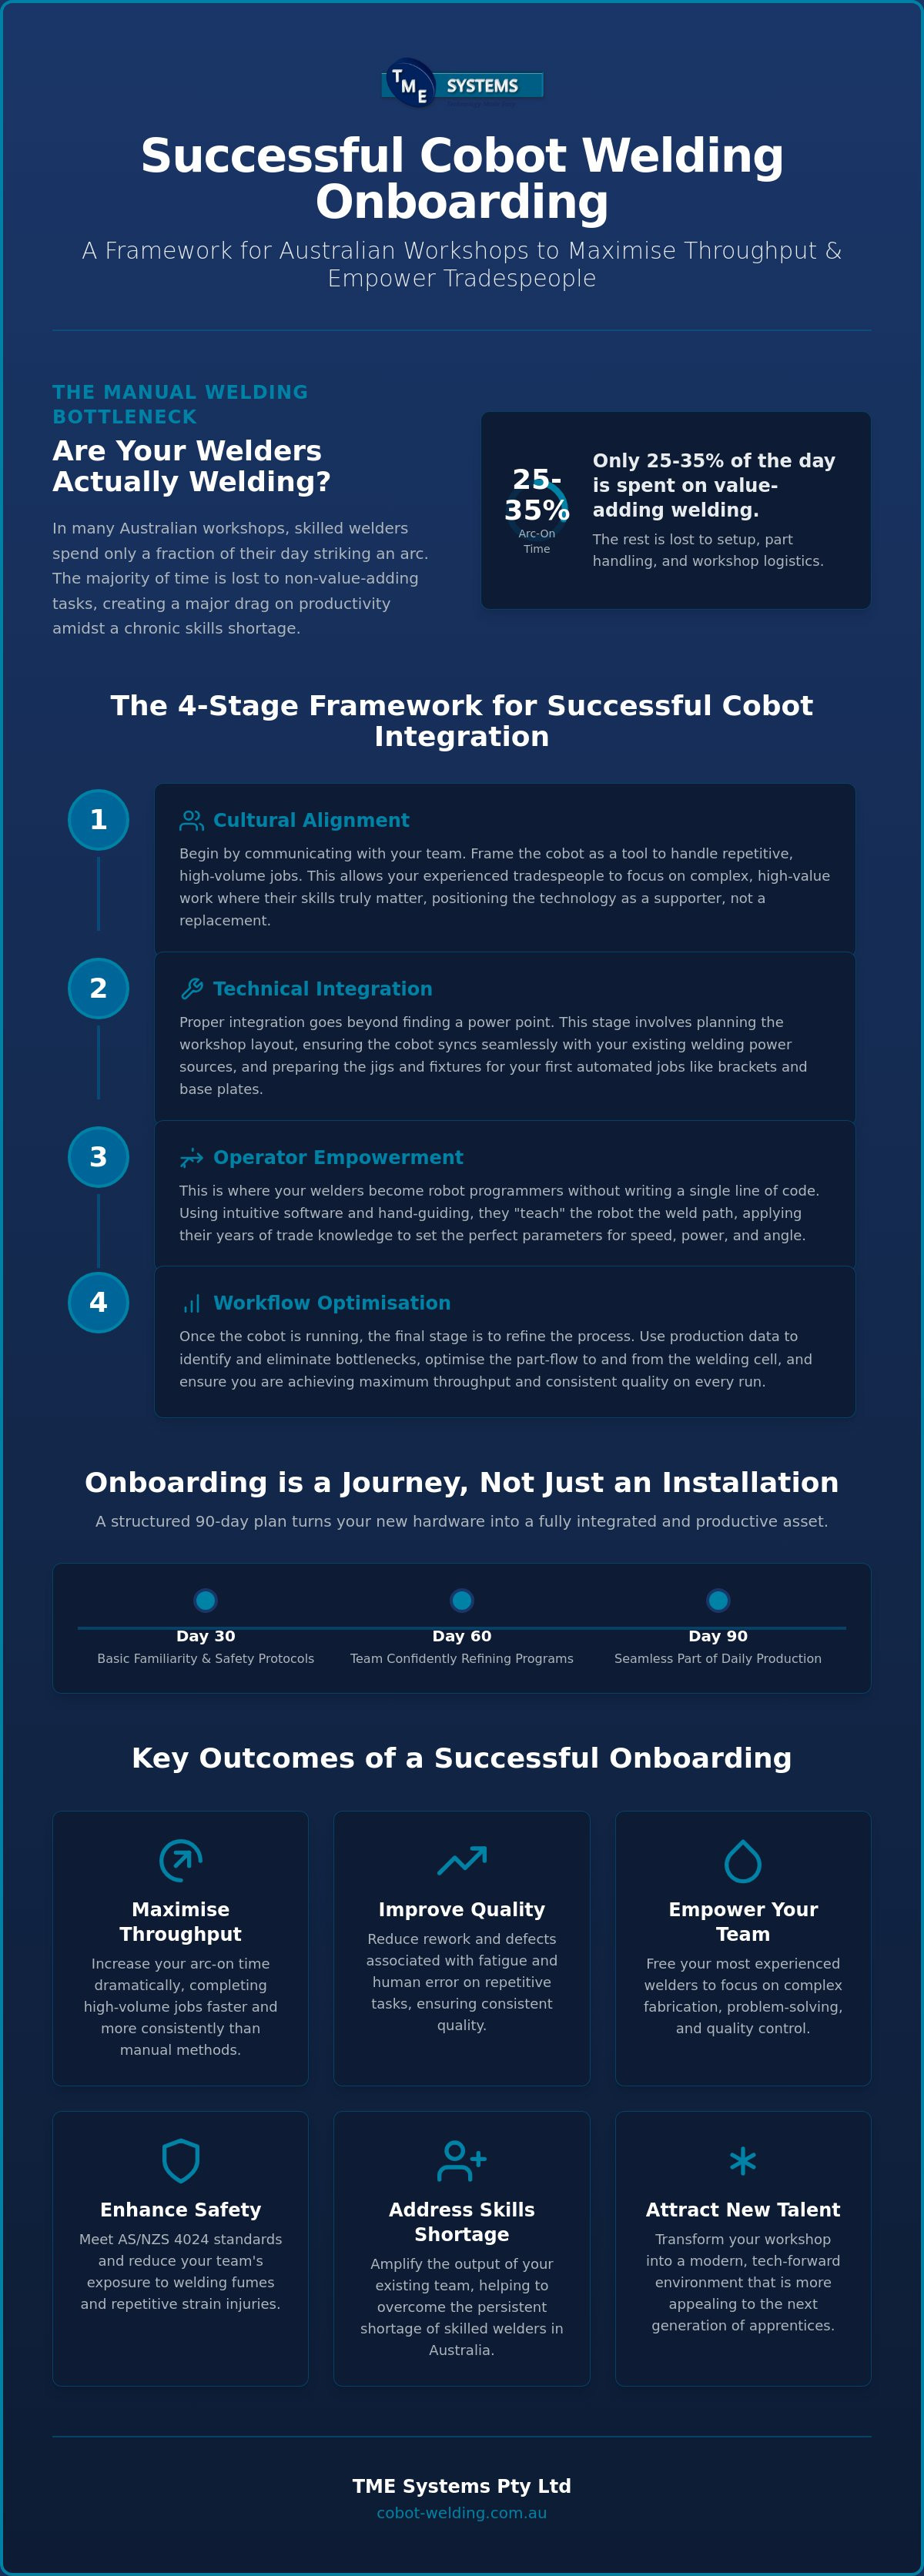
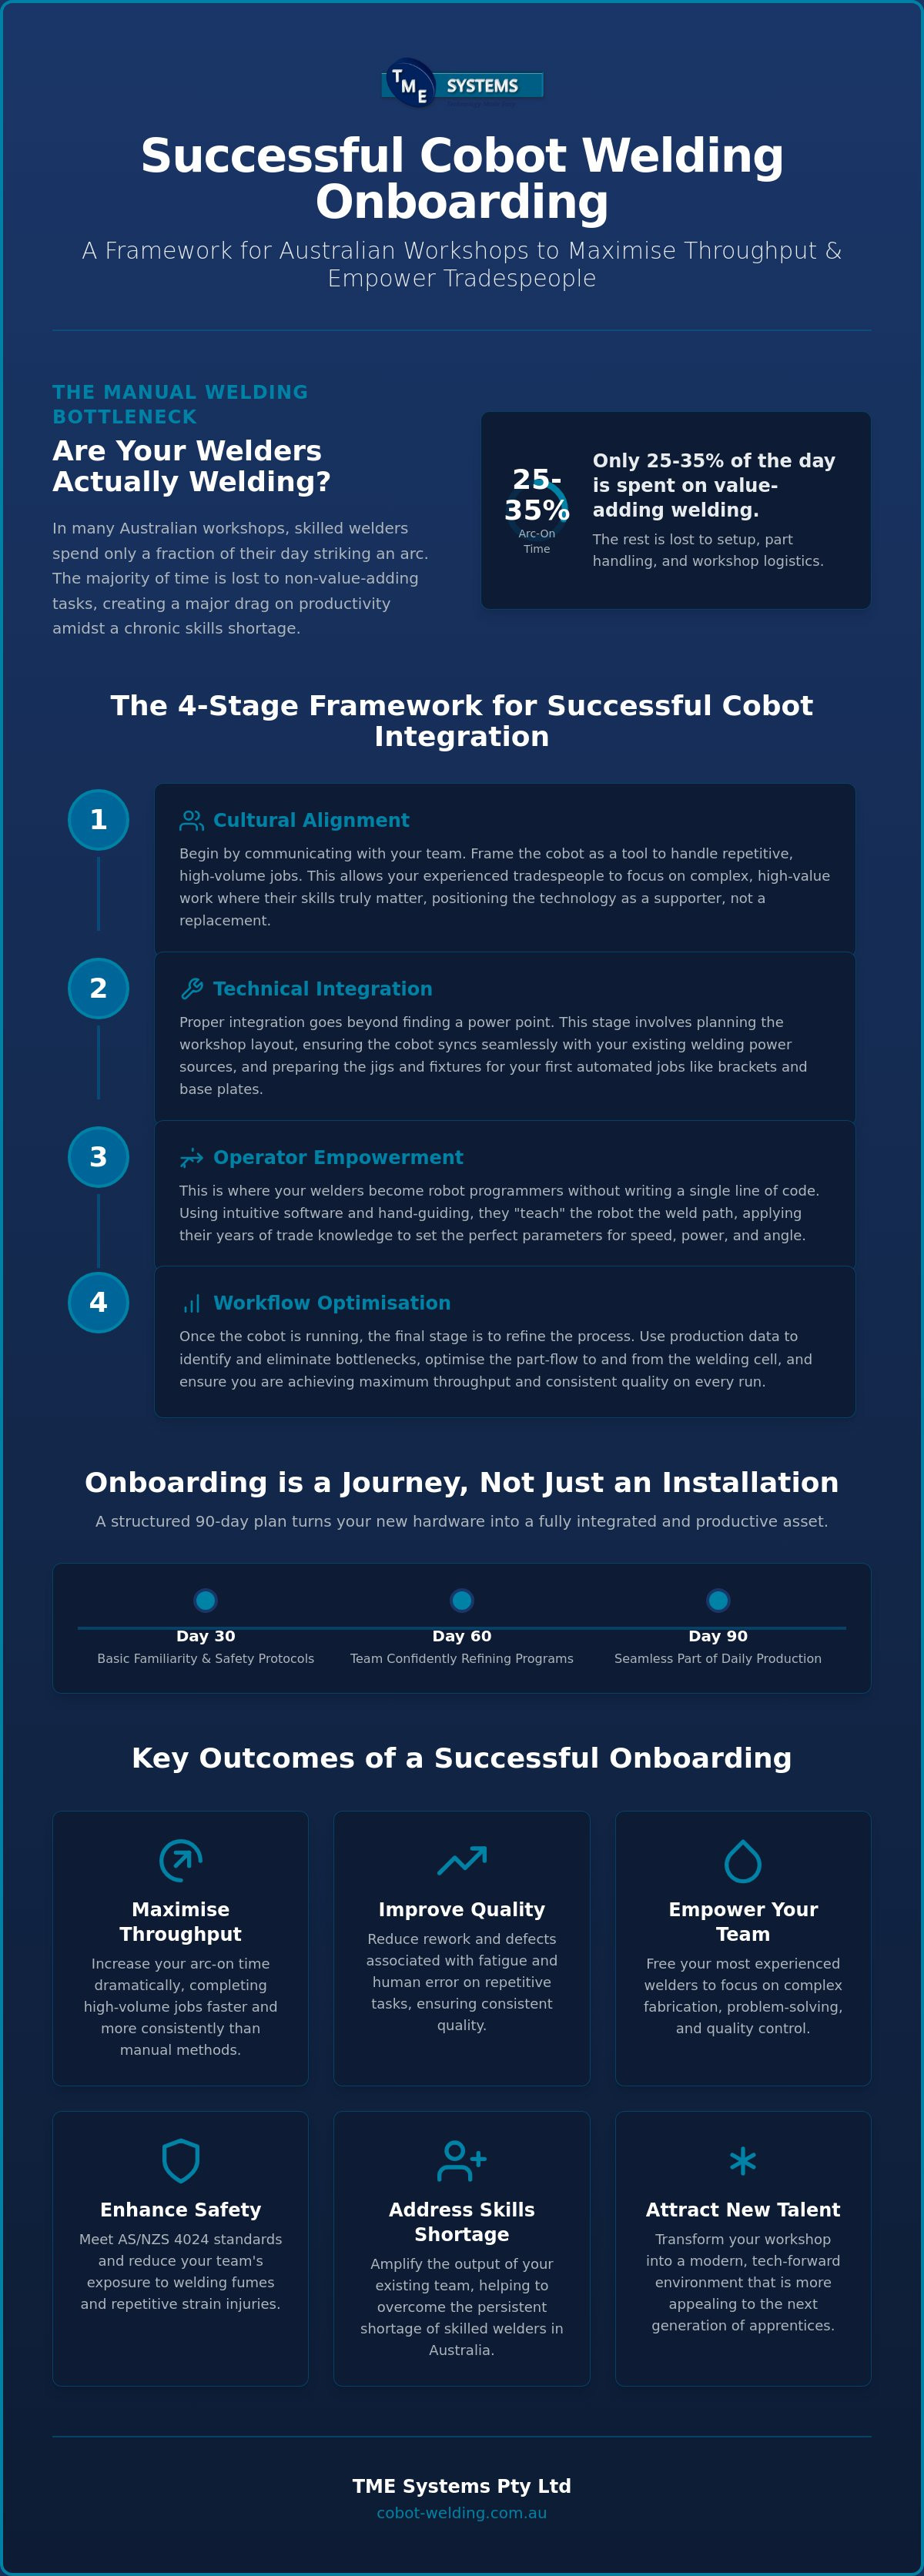
What if your most experienced welder didn't have to spend most of their shift on basic, repetitive runs just to keep the workshop moving? In many Australian shops, manual welders only spend about 25% to 35% of their day actually striking an arc, with the rest of the time lost to setup and handling. It's a frustrating reality when you're already facing a chronic shortage of skilled tradespeople and rising rework rates. While you might be ready for a change, the fear that a complex robotic welding onboarding process will alienate your team or lead to expensive downtime is a valid concern for any pragmatic business owner.
The good news is that modern automation is designed for the workshop floor, not a laboratory. By focusing on collaborative robots and intuitive, no-code teaching software, you can integrate systems that your team will actually want to use. This guide explains how to transition your workshop into a high-output environment where technology supports your tradespeople rather than replacing them. We'll look at how to get your team up to speed quickly, ensure you're meeting the latest AS 4024 safety standards, and turn that new cobot into the most reliable tool on your floor.
Key Takeaways
- Understand why successful robotic welding onboarding starts with cultural alignment, ensuring your tradespeople view the cobot as a valuable tool rather than a threat.
- Learn how no-code software removes the traditional programming barrier, allowing your experienced welders to "teach" the robot through simple hand-guiding.
- Get to grips with the essential AS/NZS 4024 safety standards required to keep your workshop compliant and your operators protected in a collaborative environment.
- Discover how to maximise workshop throughput by focusing on arc-on time and reducing the rework associated with repetitive, high-volume jobs.
- Explore a practical four-stage framework for integrating a collaborative welding cell into your existing production line without disrupting your current workflow.
What is Robotic Welding Onboarding in a Modern Workshop?
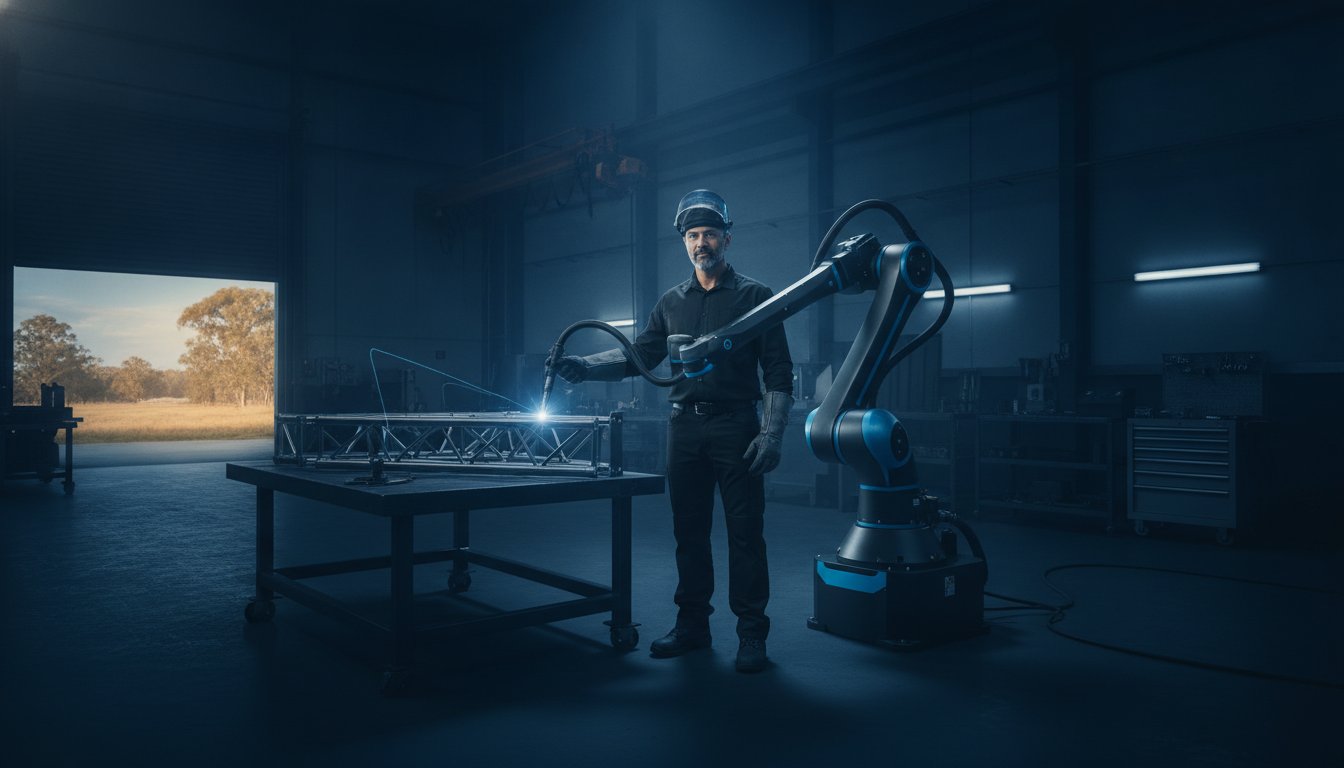
Successful robotic welding onboarding is far more than a simple delivery and a quick power-on test. In a modern Australian workshop, onboarding is a holistic process that integrates hardware, software, and staff culture into a single, functional system. It is about moving away from the old mindset where a robot was a complex piece of machinery hidden behind a safety cage. Today, we view the cobot as a "workshop mate" that works alongside your team to handle the heavy lifting and the repetitive runs that often lead to fatigue or inconsistent results.
For many local fabricators, 2026 has become the definitive tipping point for automation. This shift is driven by a combination of factors, including the strict enforcement of lower workplace exposure limits for welding fumes and the rising costs of rework. By moving repetitive tasks to a collaborative robot, you don't just improve your throughput; you also significantly reduce the physical strain on your tradespeople. This allows your team to focus on the technical aspects of the job where their human expertise is actually required. To understand What is Robotic Welding in this new era, you have to look at it as a partnership between man and machine.
The Difference Between Installation and Onboarding
Installation is a technical event; onboarding is an operational journey. Many workshops fail because they treat the arrival of a cobot like the arrival of a new pedestal drill. They bolt it down, plug it in, and expect immediate results. Without a structured plan to integrate the human element, that expensive equipment often ends up gathering dust. A successful robotic welding onboarding strategy sets clear milestones for the first 90 days. The first 30 days should focus on basic familiarity and safety. By day 60, your team should be refining their own programs. By day 90, the cobot should be a seamless part of your daily production schedule.
Solving the Australian Skills Shortage
The persistent shortage of skilled welders across Australia isn't going away, but automation offers a way to work around it. When you onboard a cobot, you aren't replacing your senior welders. Instead, you're freeing them up to focus on complex, high-value tasks that require years of experience to master. This approach also helps with staff retention. Providing on-site cobot welder training shows your team that you're invested in their professional growth. It turns a traditional workshop into a tech-forward environment, which is exactly what's needed to attract the next generation of apprentices into the trade.
The 4-Stage Framework for Successful Cobot Integration
A successful robotic welding onboarding strategy moves beyond the physical installation of a machine. It requires a structured approach that prioritises your people as much as your production targets. By following a clear four-stage framework, you can ensure that your investment starts paying for itself from the first arc. This process isn't about replacing skill; it's about applying it more effectively across your workshop floor. Every stage is designed to build confidence and ensure the technology fits your specific needs.
- Stage 1: Cultural Alignment. Talking to your team early is essential. Explain that the cobot is a tool for the repetitive, "boring" jobs, allowing them to focus on the high-skill work they actually enjoy.
- Stage 2: Technical Integration. This involves more than just finding a power point. It's about ensuring the cobot syncs perfectly with your existing power sources and workshop layout for a seamless start.
- Stage 3: Operator Empowerment. Here, your welders learn to use no-code software. They move from manual welding to teaching the robot, using their trade knowledge to set the perfect parameters.
- Stage 4: Workflow Optimisation. Once the robot is running, you refine the process. Use production data to find and fix bottlenecks, ensuring maximum throughput and consistent quality.
Stage 1 & 2: Preparing the Workshop Floor
Before the robot even arrives, identify the "low-hanging fruit" in your production schedule. Look for the simple, high-volume jobs that currently tie up your best welders for hours on end. Brackets, base plates, and simple frames are perfect starting points for your new system. Organising your workspace is equally critical. You need a clear, safe flow of materials to and from the welding cell to prevent the robot from sitting idle while an operator hunts for parts. If you're unsure about the best setup for your specific floor plan, consulting with welding system integration specialists can prevent costly layout mistakes early on. Seeing the technology in person can also help demystify the process. You might consider booking a mobile demo to see how a cell fits into a real workshop environment.
Stage 3 & 4: Empowering Your Tradespeople
The real magic happens when a manual welder realises they can "teach" a robot to perform a task in minutes. This transition from welder to robot operator is a significant boost to Australian manufacturing capabilities, especially as we face increasing global competition and a tightening labour market. Use the data provided by the cobot to identify where production slows down. Is the bottleneck at the welding arc, or is it in the jigging and prep work? Understanding these metrics allows you to refine your workflow for maximum efficiency. Continuous improvement is the final piece of the puzzle. Scheduling regular tune-up training sessions ensures your team stays confident as they move on to more complex parts. This steady, methodical approach to robotic welding onboarding turns a new piece of tech into a reliable, long-term partner for your business.
No-Code Software: The Bridge for Traditional Welders
Historically, the biggest hurdle for Australian fabricators hasn't been the cost of the robot, but the complexity of the code. Traditional industrial robots require specialised programming knowledge that most workshop teams simply don't have. This is where modern robotic welding onboarding changes the game. By using no-code robot welding software, we've removed the need for a computer science degree to get a clean bead. Instead of typing lines of syntax, your team uses "Teach by Touch" technology. They literally move the robot arm to the start and end points, defining the path just as they would with a manual torch.
This shift mimics the logic of a manual welder. If the penetration isn't right, a welder doesn't want to dig through a sub-menu; they want to adjust the volts or wire speed immediately. No-code interfaces allow these changes on the fly via a simple tablet. This approach has slashed setup times for small batches. What used to take hours of painstaking programming now takes minutes. It makes automation viable even for one-off jobs or short production runs that were previously too expensive to automate.
Intuitive Path Teaching Explained
The interface uses icons and visual cues rather than text-heavy commands. This visual approach is built for speed. When you're on the tools, you need to see exactly what's happening at a glance. You can save "Weld Recipes" for recurring jobs, which means that whether it's Monday morning or Friday afternoon, the weld quality remains 100% consistent. Once a job is dialled in, any operator can recall that recipe and start production in seconds without needing to recalibrate the entire system.
Removing the Fear of Technology
We often see "old-school" fabricators who are initially sceptical of anything with a touchscreen. However, once they realise the interface speaks the language of a welder, that fear evaporates. We have seen experienced tradespeople master the basics of a cobot in a single afternoon because the software doesn't ask them to be coders. In essence, no-code software acts as a digital extension of the welder’s hand. It respects their trade knowledge while taking the physical strain out of the job. This level of accessibility is a core pillar of successful robotic welding onboarding, ensuring the technology is embraced by the people who will use it every day.
Safety and Compliance: Meeting Australian Standards
Safety in an automated workshop isn't just a checkbox; it's the foundation of a successful robotic welding onboarding strategy. In Australia, we operate under strict machinery safety regulations, specifically the AS/NZS 4024 series and ISO 10218-2. While traditional industrial robots require massive steel cages, cobots use advanced force-sensing technology to stop immediately upon contact. However, a cobot is only one part of the equation. You must still account for the inherent risks of the welding process itself, such as arc flash and hazardous fumes. By 2026, the regulatory focus on air quality has intensified. The workplace exposure standard for welding fumes was legally lowered to 1mg/m3 in 2024, and even stricter limits are being enforced from December 2026. This makes integrated fume extraction a critical compliance issue for any fabricator.
A thorough, task-based risk assessment is a mandatory step before you move to full production. This assessment needs to look at every potential pinch point and hazard, including how a bystander might interact with the cell. Force-sensing technology is brilliant, but it doesn't protect against the heat of the torch or the intensity of the arc. You need to ensure that your setup includes appropriate flash protection and that your operators are trained to respect the "safe zones" of the machine. Taking a methodical approach to these requirements ensures that your new technology is a benefit to the shop, not a liability.
Collaborative vs. Industrial Safety Requirements
The primary Australian safety standard for collaborative applications is AS 4024.3303:2017. One of the main advantages of a cobot is that it can often operate without expensive safety cages, provided your risk assessment confirms the environment is safe. This is achieved through "Speed and Separation" monitoring, where the robot slows down or stops as a person approaches. It's a pragmatic solution that keeps your workshop floor open and accessible. You must also ensure the welding torch itself is guarded or monitored, as the collaborative nature of the arm doesn't automatically make the welding arc safe for nearby workers.
The Legal and Insurance Aspect for Aussie Owners
Documenting your robotic welding onboarding process is essential for WorkSafe compliance and insurance purposes. You need to maintain clear training records that prove your operators are competent and understand the safety protocols of the new system. These records are your first line of defence if an inspector visits your site. Modern collaborative robot welding cells are designed with these local standards in mind, making it easier for you to meet your legal obligations. If you want to see how these safety features work in a real-world setting, you can book a mobile demo today to evaluate a cell on your own workshop floor.
Maximising ROI: From the First Arc to Full Production
Realising a return on your investment starts with changing how you measure success on the workshop floor. While many fabricators look at total hours worked, the most critical metric for robotic welding onboarding is "Arc-on Time." As we noted earlier, manual welders often spend less than 35% of their shift actually striking an arc. A cobot, however, can maintain a consistent arc for nearly the entire duration of a production run. By focusing on this metric, you can improve welding productivity with cobots, specifically by eliminating the human fatigue that leads to high rework rates on repetitive components.
We recommend a "Pilot Project" approach for workshops new to automation. Start by identifying a single, high-volume part that is currently a bottleneck in your production. This allows your team to build confidence without the pressure of an entire factory overhaul. Once your operators are proficient, scaling up becomes a natural next step. This might mean adding a second shift where the cobot runs while the rest of the team is at home, or eventually integrating a second cell to handle a different product line as your order book expands.
Calculating Your Workshop’s New Capacity
When you compare manual throughput to an automated cell, the gains are often immediate. Beyond just speed, you should account for the "hidden" savings in consumables. Because a robot follows a precise, programmed path every time, you'll see a significant reduction in gas and wire wastage compared to manual welding. In a typical Australian shop, a well-utilised collaborative robot often pays for itself within 12 to 24 months through increased throughput and reduced overheads.
Partnering for Long-Term Success
Success isn't just about the day the machine arrives; it's about the support you receive in the years that follow. Technology evolves, and having access to ongoing technical support and software updates ensures your cell remains productive. This is why a mobile welding robot demonstration is such an important first step. It provides a risk-free proof of concept on your own floor, with your own parts, before you commit to the full integration. At TME Systems, we view robotic welding onboarding as the start of a long-term partnership. We stay involved with your team long after the initial setup, helping you refine your processes and troubleshoot new applications as your business grows.
Take the Next Step Toward Smarter Fabrication
Transitioning to automation doesn't have to be a leap into the unknown. A successful robotic welding onboarding process is about giving your tradespeople better tools to handle the grunt work, allowing them to focus on the craftsmanship that defines your business. We've seen that by using no-code software designed for tradespeople and following a clear safety framework, Australian workshops can achieve a rapid return on investment while meeting the latest 2026 compliance standards.
TME Systems is here to act as your practical mentor throughout this journey. With our turnkey cells and dedicated Australian-owned and operated support, we ensure you aren't just buying a machine but gaining a long-term production partner. Our no-code software removes the technical barriers, making automation a natural extension of your team's existing skills. The best way to understand how this fits your specific floor plan is to see it for yourself in a real-world setting.
Book a Mobile Demo to see cobot onboarding in action at your workshop and discover how accessible modern automation has become. Your team is already skilled; it's time to give them the digital tools they need to lead your workshop into the future.
Frequently Asked Questions
Do my welders need to know how to code to use a cobot?
No, your team won't need to learn a single line of code. We use intuitive no-code teaching software that allows experienced welders to hand-guide the robot arm to define the welding path. This approach respects their trade knowledge and trade skills, making the technical transition far less intimidating than traditional industrial programming.
How long does the typical onboarding process take for a small workshop?
The physical setup of a cell usually takes just a few days, but the full robotic welding onboarding journey typically spans 30 to 90 days. While your team can strike the first arc almost immediately, reaching peak proficiency and refining your workshop workflow for maximum throughput is a gradual process that we support every step of the way.
Is robotic welding safe for other workers in the same area?
Collaborative robots are designed to work alongside people, but they must still comply with AS/NZS 4024 safety standards. While the arm itself has force-sensing technology to stop on contact, you still need to manage the hazards of the arc. This includes using appropriate flash protection and integrated fume extraction to meet the strict air quality regulations enforced in 2026.
Can a cobot handle small batches, or is it only for high-volume runs?
Cobots are actually perfect for small batches and even one-off jobs. Because the no-code interface allows you to set up a new part in minutes rather than hours, automation becomes viable for short production runs that would be too expensive for traditional industrial robots. It gives your workshop the flexibility to switch between different jobs quickly as orders come in.
What kind of maintenance does a collaborative welding cell require?
A collaborative welding cell requires regular, basic maintenance similar to your other workshop machinery. You'll need to perform routine cleaning, check the cable management for wear, and replace welding consumables like tips and liners as you usually would. We recommend a more thorough technical inspection once a year to ensure the sensors and software are performing at their best.
Will a welding robot work with my existing MIG or TIG power source?
Yes, our systems are designed for seamless welding system integration with most professional MIG and TIG power sources. You don't necessarily need to buy an entirely new welder to start automating your floor. We can often sync the cobot with your existing equipment to help you get the most out of the tools you already own.
What happens if the robot makes a mistake or a weld is off-path?
The operator maintains full control and can adjust the path on the fly using the tablet interface or by hand-guiding the arm to the correct position. The system doesn't lock you out of the process. This level of control ensures that your tradespeople remain the experts in charge, using the robot as a precise extension of their own hands.
Does TME Systems provide on-site training for my specific team?
Yes, TME Systems provides comprehensive on-site operator training and robotic welding onboarding tailored specifically to your workshop's needs. We don't just drop off the hardware and leave you to figure it out. Our team works directly with your welders on your own floor, ensuring they are confident, safe, and capable of managing the system independently.